
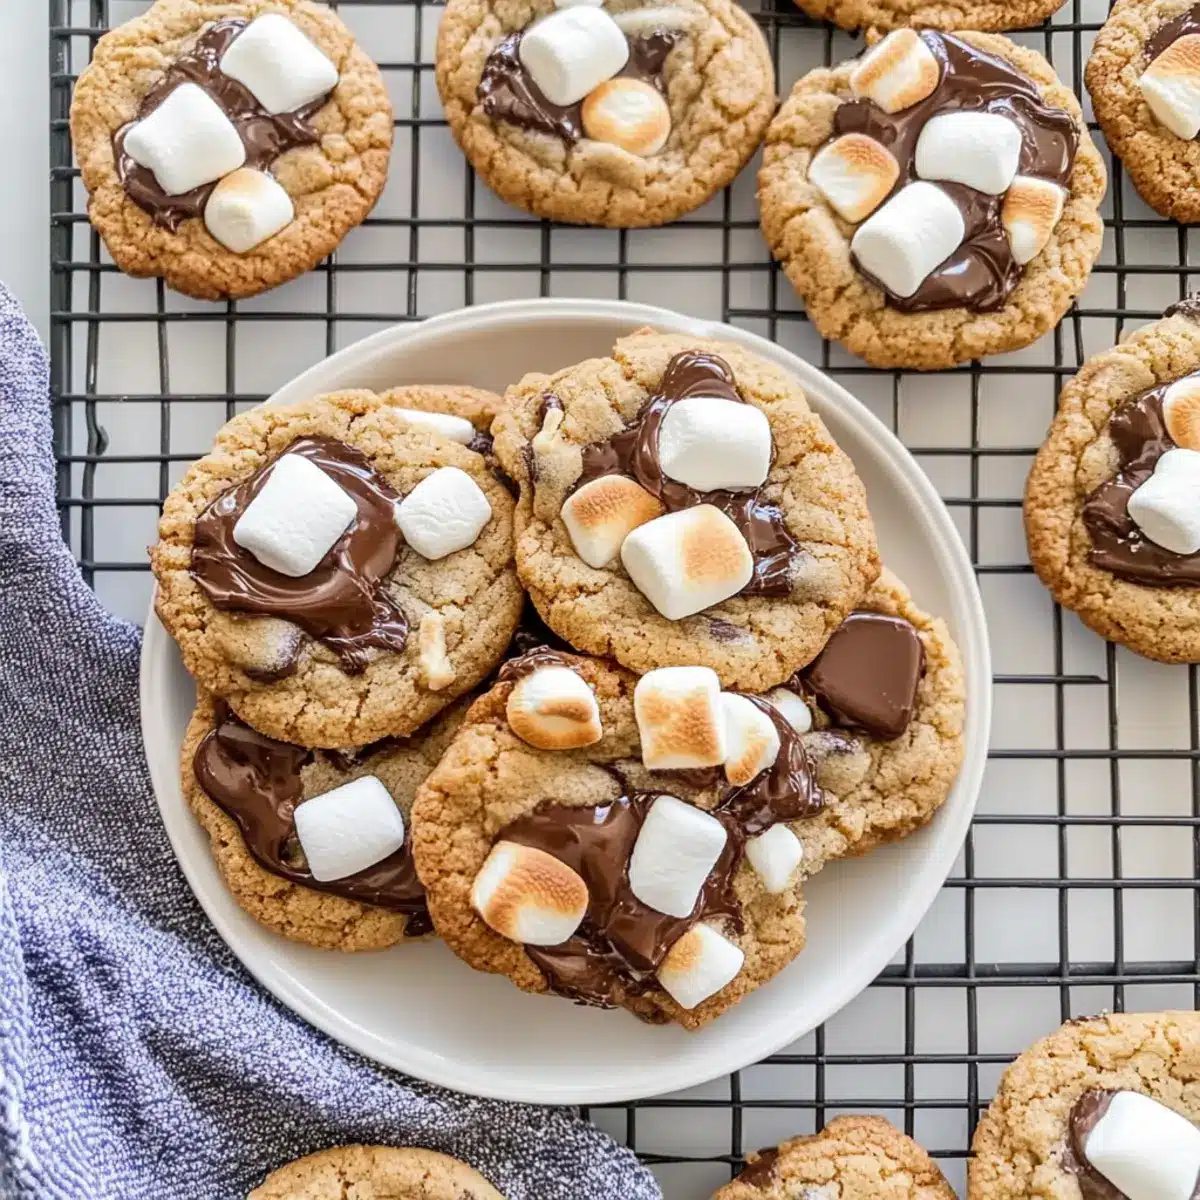
As I walked through my local park recently, the scent of toasted marshmallows wafted through the air, instantly transporting me to carefree summer nights around the campfire. This nostalgia inspired me to create the ultimate S’mores Cookies that bring that warm, gooey goodness right into your kitchen any time of year. These Chewy S’mores Cookies are incredibly easy to whip up, making them perfect for satisfied smiles at any gathering. Just imagine sinking your teeth into a soft, chewy cookie, bursting with melty chocolate, crisp graham cracker bits, and sweet, gooey marshmallows. Not only are they a crowd-pleaser, but they’re also an effortless way to elevate your dessert game. Curious to see how you can recreate this favorite campfire treat at home? Let’s get baking!
Why Are S’mores Cookies So Irresistible?
Nostalgic Delight: These S’mores Cookies evoke the warm memories of campfire gatherings, rich with the flavors of summer.
Easy to Make: With just a few simple ingredients, you can whip up a batch in no time, perfect for any home cook or busy chef.
Texture Perfection: Enjoy the delightful contrast of soft, chewy centers paired with slightly crisp edges and gooey marshmallows.
Versatile Treat: Customize with your favorite chocolates, or even add nuts for an extra crunch—endless possibilities await!
Crowd Favorite: These cookies are sure to impress at any gathering, leaving your guests craving more. For other delightful cookie ideas, check out Raspberry Swirl Cookies and Peppermint Swirl Cookies for a festive touch!
S’mores Cookies Ingredients
• The perfect blend for nostalgic delight!
For the Cookie Base
- Salted Butter – Provides richness and moisture; use unsalted for a less salty flavor.
- Light Brown Sugar – Adds moisture and caramel notes; can substitute with dark brown sugar for deeper flavor.
- Granulated Sugar – Sweetens the cookies and aids in browning; no direct substitute needed.
- Large Eggs – Provide structure and moisture; flax eggs can be used for a vegan option.
- Vanilla Extract – Enhances the flavor profile; almond extract can be used for a twist.
- All-Purpose Flour – Creates the cookie base; a gluten-free blend can be used for a gluten-free version.
- Cornstarch – Contributes to a tender cookie texture; can be omitted if necessary.
- Baking Soda – Leavening agent for a light texture; do not substitute with baking powder without adjustments.
- Salt – Balances sweetness; reduce if using salted butter.
For the S’mores Goodness
- Mini Marshmallows – Add gooey texture; larger marshmallows can be substituted but adjust the quantity.
- Graham Crackers – Provides crunch and flavor; use gluten-free graham crackers if needed.
- Milk Chocolate Chips – Contributes sweetness and creaminess; can replace with dark chocolate chips for a richer taste.
- Semisweet Chocolate Chips – Adds an additional layer of chocolate flavor; omit for less sweetness.
With these key ingredients, your S’mores Cookies are just a mix away from transforming your kitchen into a nostalgic dessert haven!
Step‑by‑Step Instructions for S’mores Cookies
Step 1: Preheat the Oven
Begin by preheating your oven to 375°F (190°C). While the oven warms up, line two baking sheets with parchment paper to prevent the S’mores Cookies from sticking. This step is essential for achieving crispy edges with soft centers, ensuring your cookies come out perfectly baked and easily removable.
Step 2: Make the Cookie Dough
In a large mixing bowl, cream together 1 cup of softened salted butter, 1 cup of light brown sugar, and ½ cup of granulated sugar using a hand mixer for about 2-3 minutes until the mixture is light and fluffy. This aeration will help give your S’mores Cookies the perfect texture, so don’t rush this step!
Step 3: Add Eggs and Vanilla
Next, incorporate 2 large eggs and 1 teaspoon of vanilla extract into the creamed mixture. Mix well until everything is fully combined, ensuring the eggs are well blended. The dough should have a smooth consistency and a delightful aroma as the vanilla starts to shine through.
Step 4: Combine Dry Ingredients
Gradually add 2 cups of all-purpose flour, 1 teaspoon of cornstarch, 1 teaspoon of baking soda, and ½ teaspoon of salt to the wet ingredients. Mix on low speed just until combined; you want to avoid over-mixing which can lead to tough cookies. The dough will be slightly thick and a bit sticky—perfect for shaping!
Step 5: Fold in S’mores Ingredients
Gently fold in 1.5 cups of crushed graham cracker pieces, 1.5 cups of mini marshmallows, 1 cup of milk chocolate chips, and 1 cup of semisweet chocolate chips using a spatula. This step allows you to evenly distribute those delicious bits throughout the dough, making every bite of your S’mores Cookies a true indulgence.
Step 6: Scoop the Dough
Using a cookie scoop or tablespoon, drop dough balls that are about 2-3 tablespoons each onto the prepared baking sheets. Leave at least 2 inches of space between the dough balls to allow for spreading while baking. This spacing will help ensure each cookie bakes evenly and doesn’t merge with its neighbors.
Step 7: Bake the Cookies
Place the baking sheets in your preheated oven and bake the cookies for 10 minutes, or until the edges are set but the centers remain soft and slightly underbaked. This is crucial for achieving the signature chewy interior of the S’mores Cookies, so keep an eye on them as they bake!
Step 8: Add Toppings and Finish Baking
After 10 minutes, remove the cookies from the oven and immediately press additional mini marshmallows, graham cracker pieces, and Hershey bar pieces onto the top of each warm cookie. Return them to the oven for another 1-2 minutes to allow the toppings to melt slightly, creating a gooey delight atop your S’mores Cookies.
Step 9: Toast the Marshmallows (Optional)
For an extra special touch, switch your oven to broil and toast the marshmallows for about 30 seconds. Watch closely, as they can quickly go from perfectly toasted to burnt! This step adds a nice caramelized flavor and enhances the nostalgic campfire quality of your cookies.
Step 10: Cool and Serve
Let the cookies cool on the baking sheet for 2-3 minutes, allowing them to firm up slightly. Then, carefully transfer them to a wire rack to cool completely. Enjoy these S’mores Cookies warm for the best gooey experience or store them in an airtight container to savor later!
Expert Tips for S’mores Cookies
-
Room Temperature Butter: Ensure your butter is at room temperature for the best texture. Cold butter will lead to uneven mixing and a denser cookie.
-
Don’t Overmix Dough: Mix your cookie dough just until combined after adding dry ingredients. Overmixing can create tough cookies instead of the desired chewy texture.
-
Use Parchment Paper: Always line your baking sheets with parchment paper to prevent sticking. This is essential, especially with marshmallows involved.
-
Watch the Broiling: If you choose to broil your cookies for toasted marshmallows, keep a vigilant eye on them. They can go from perfectly toasted to burnt in seconds.
-
Cooling Time: Allow the cookies to cool slightly on the baking sheet before transferring to a wire rack. This helps them set up perfectly while maintaining that chewy interior.
-
Experiment With Mix-Ins: Feel free to get creative! Substitute Hershey bars with different chocolates or add nuts for extra crunch in your S’mores Cookies.
What to Serve with Chewy S’mores Cookies?
Indulge in these delightful treats that evoke warm memories with every bite, and consider pairing them for a fully satisfying experience.
-
Cold Milk: The classic pairing! A glass of ice-cold milk complements the rich flavors and helps wash down those gooey marshmallow bits.
-
Vanilla Ice Cream: Serve warm cookies over a scoop of vanilla ice cream to create a delightful s’mores sundae. The contrasting temperatures are heavenly!
-
Fruity Salad: A fresh fruit salad adds a touch of brightness. Try combining berries with a drizzle of honey for a refreshing side.
-
Hot Chocolate: For a cozy evening, pair these cookies with a steaming cup of hot chocolate topped with whipped cream. It’s like a warm hug in a mug!
-
Caramel Sauce Drizzle: Elevate your cookies by drizzling warm caramel sauce on top, adding another layer of sweetness and a touch of indulgence.
-
S’mores-Inspired Milkshake: Blend up a milkshake with chocolate ice cream, graham cracker crumbs, and a scoop of marshmallow fluff for a fun, dessert twist!
-
Chili: For a surprising and savory contrast, serve alongside a hearty bowl of chili. The spice creates a delightful counterbalance to the sweetness of the cookies.
-
Tea or Coffee: Enhance the flavors with a nice cup of brewed tea or coffee. The warmth and slight bitterness will beautifully complement the sweetness of the S’mores Cookies.
Make Ahead Options
These irresistibly chewy S’mores Cookies are ideal for meal prep, allowing you to enjoy that nostalgic flavor with minimal effort during busy weeknights! You can prepare the cookie dough up to 24 hours in advance—just mix the ingredients as directed and store the dough in an airtight container in the refrigerator to maintain freshness. When you’re ready to bake, simply scoop the chilled dough onto a baking sheet and add your toppings before following the baking instructions. For an even quicker option, you can fully bake the cookies up to 3 days ahead and store them in an airtight container at room temperature. Just reheat in the microwave for 10-15 seconds before serving to restore their gooey goodness!
How to Store and Freeze S’mores Cookies
-
Room Temperature: Store S’mores Cookies in an airtight container at room temperature for up to 4-5 days. This keeps them soft and chewy, ready for snacking anytime.
-
Fridge: If you prefer colder cookies, you can refrigerate them in an airtight container for up to a week. Just let them sit at room temperature for a few minutes before enjoying.
-
Freezer: To freeze, place the cookies in a single layer on a baking sheet until firm, then transfer to a freezer-safe container or bag for up to 3 months. Thaw at room temperature or reheat briefly in the microwave.
-
Reheating: For a fresh-baked taste, reheat S’mores Cookies in the microwave for 10-15 seconds or pop them in a warm oven for a few minutes. Enjoy the gooeyness once more!
S’mores Cookies Variations & Substitutions
Customize your S’mores Cookies experience with these delightful twists that offer something for everyone!
-
Nut-Free: Use sunflower butter instead of regular butter to create a nut-free version while keeping the richness intact.
For those avoiding nuts, this swap provides a lovely creamy texture that complements the cookie’s sweetness. -
Gluten-Free: Substitute all-purpose flour with a 1:1 gluten-free flour blend. This allows everyone to join in on the S’mores fun without the gluten!
Many gluten-free blends contain a mix of flours and binders, ensuring your cookies remain soft and chewy. -
Vegan: Replace the eggs with flax eggs (1 tbsp flaxseed meal + 2.5 tbsp water per egg) and use vegan butter. You’ll still get the delicious chewy texture without the animal products.
These adjustments make the cookies accessible to a wider audience, proving that everyone can enjoy this treat! -
Chocolate Variety: Swap half of the milk chocolate chips for dark chocolate chips for a richer taste.
This little change creates a deeper chocolate flavor and balances the sweetness of the marshmallows perfectly. -
Spicy Kick: Add a pinch of cayenne pepper or chili powder to the cookie batter for a hint of heat.
The warmth of the spices surprises the palate and adds a fun twist to the classic S’mores flavor profile. -
Minty Fresh: Incorporate peppermint extract instead of vanilla for a refreshing mint flavor!
This version adds a delightful seasonal twist, especially around the holidays. Serve them with a hot chocolate for a cozy treat! -
Extra Crunch: Mix in chopped nuts like walnuts or pecans for some added texture.
The crunchy addition will give your cookies a delightful bite, contrasting with the gooey marshmallows inside. -
Peanut Butter Treat: Stir in 1/2 cup peanut butter along with the wet ingredients for a delicious peanut butter S’mores variation.
The rich nutty flavor pairs beautifully with the marshmallows and chocolate, creating an irresistible indulgence.
These variations not only enhance your S’mores Cookies but also keep your baking exciting! And if you’re looking for more ideas, don’t forget to check out Raspberry Linzer Cookies for a fruity twist!
S’mores Cookies Recipe FAQs
What is the best way to choose ingredients for S’mores Cookies?
Absolutely! For the best S’mores Cookies, select fresh and high-quality ingredients. Choose salted butter that’s soft to the touch for the perfect cookie texture. When picking graham crackers, go for ones that are crisp and not broken. Mini marshmallows should be soft and fluffy, ensuring they melt beautifully in the cookie. For chocolate, use a mix of milk chocolate chips and semisweet for a balanced sweetness—both add delightful melty goodness!
How should I store my S’mores Cookies?
To maintain their chewiness, store S’mores Cookies in an airtight container at room temperature for up to 4-5 days. Ensure they are completely cooled before storing to avoid excess moisture. If you’re in a warmer climate, you might opt to refrigerate them, which will keep them fresh for about a week. Just remember to let them sit at room temperature for a bit before indulging, as this restores their soft texture.
Can I freeze S’mores Cookies, and how?
Of course! To freeze S’mores Cookies, start by laying them in a single layer on a baking sheet and placing them in the freezer until firm. Once frozen, transfer the cookies into a freezer-safe container or a zip-top bag, where they can be stored for up to 3 months. To thaw, simply leave them at room temperature for about 15-20 minutes or reheat them directly in the microwave for 10-15 seconds for that gooey warmth again!
What if my S’mores Cookies don’t turn out chewy?
If your S’mores Cookies aren’t chewy, there are a few things you can do. First, ensure you didn’t overmix the dough; overmixing can lead to tough cookies. Second, check your oven temperature—baking them for too long or at too high a temperature can dry them out. Ideally, the edges should be set while the centers are soft. If overbaked, you might try reducing the baking time by a minute or so to find the sweet spot for that perfect chewy texture.
Are S’mores Cookies safe for pets?
No, it’s essential to keep S’mores Cookies away from pets. Ingredients like chocolate and certain sweeteners can be harmful to dogs and cats. If you want to treat your furry friends, consider making homemade pet-friendly treats instead. Focus on ingredients that are safe for their diet, like pumpkin or banana, to ensure they stay happy and healthy!
Can I substitute any ingredients in S’mores Cookies for dietary restrictions?
Very much so! If you’re looking for vegan options, substitute the eggs with flax eggs (1 tbsp flaxseed meal mixed with 2.5 tbsp of water per egg) and use plant-based butter or oil instead. For gluten-free cookies, opt for a gluten-free flour blend in place of all-purpose flour, along with gluten-free graham crackers. These swaps can still result in delicious, chewy S’mores Cookies for everyone to enjoy!

Irresistibly Chewy S'mores Cookies for Sweet Nostalgia
Ingredients
Equipment
Method
- Preheat your oven to 375°F (190°C) and line two baking sheets with parchment paper.
- In a large mixing bowl, cream together the salted butter, light brown sugar, and granulated sugar until light and fluffy.
- Add the large eggs and vanilla extract to the creamed mixture and mix until fully combined.
- Gradually add the all-purpose flour, cornstarch, baking soda, and salt; mix on low speed until just combined.
- Fold in the graham cracker pieces, mini marshmallows, milk chocolate chips, and semisweet chocolate chips.
- Drop dough balls onto the prepared baking sheets, leaving space between them.
- Bake the cookies for 10 minutes, or until the edges are set but the centers are soft.
- Press additional mini marshmallows, graham cracker pieces, and Hershey bar pieces onto each warm cookie.
- Return cookies to the oven for an additional 1-2 minutes to melt the toppings.
- Optionally toast the marshmallows under the broiler for about 30 seconds, being careful not to burn them.
- Let the cookies cool on the baking sheet for 2-3 minutes before transferring to a wire rack to cool completely.
Leave a Reply