
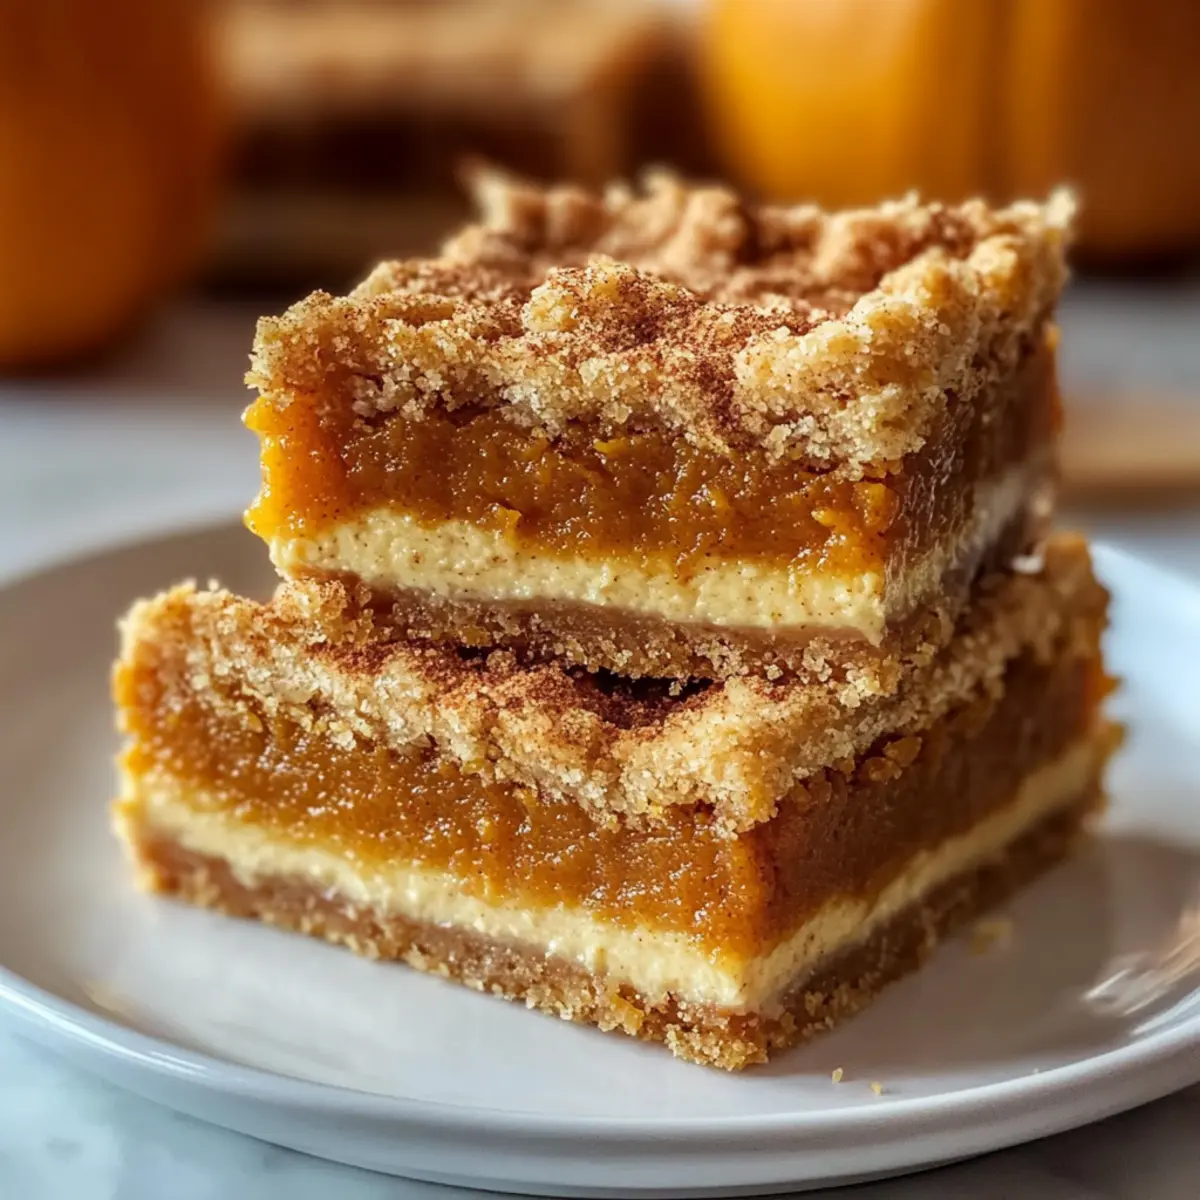
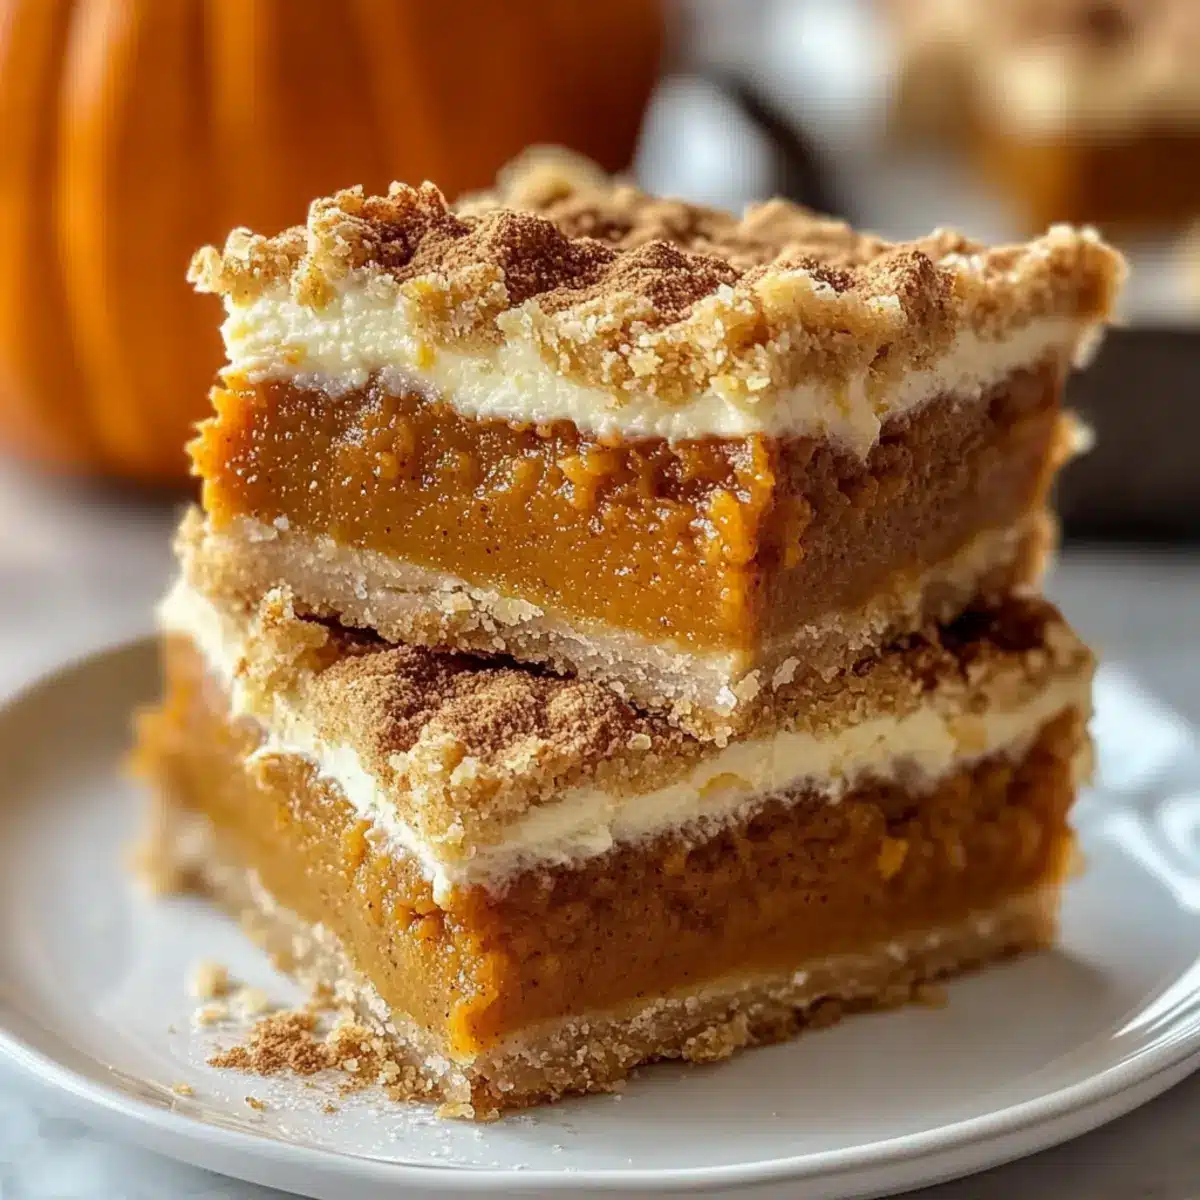
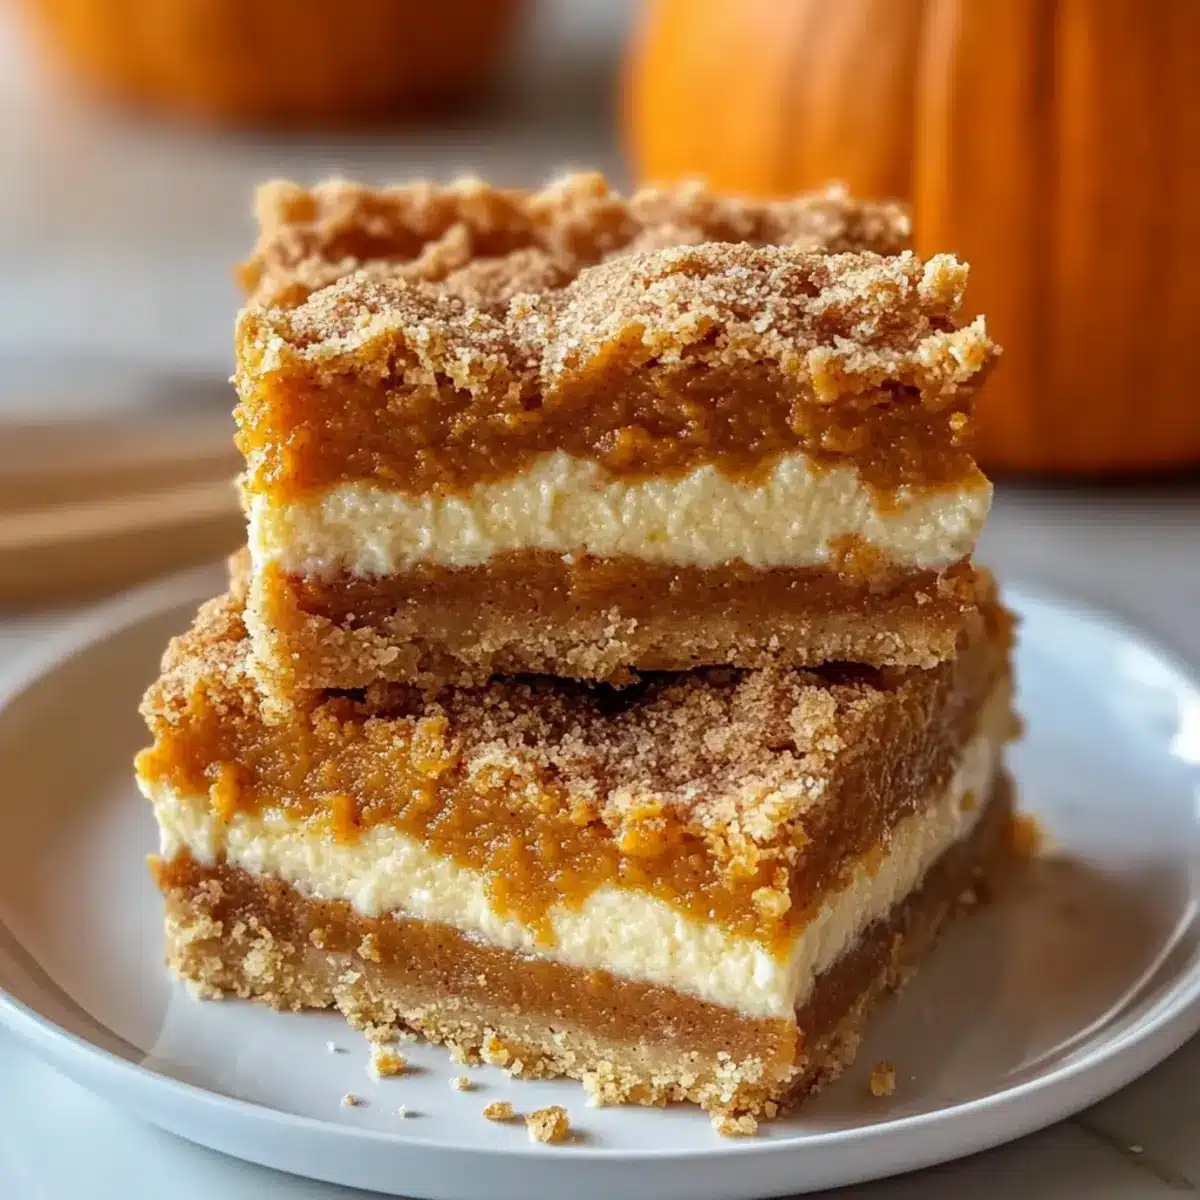
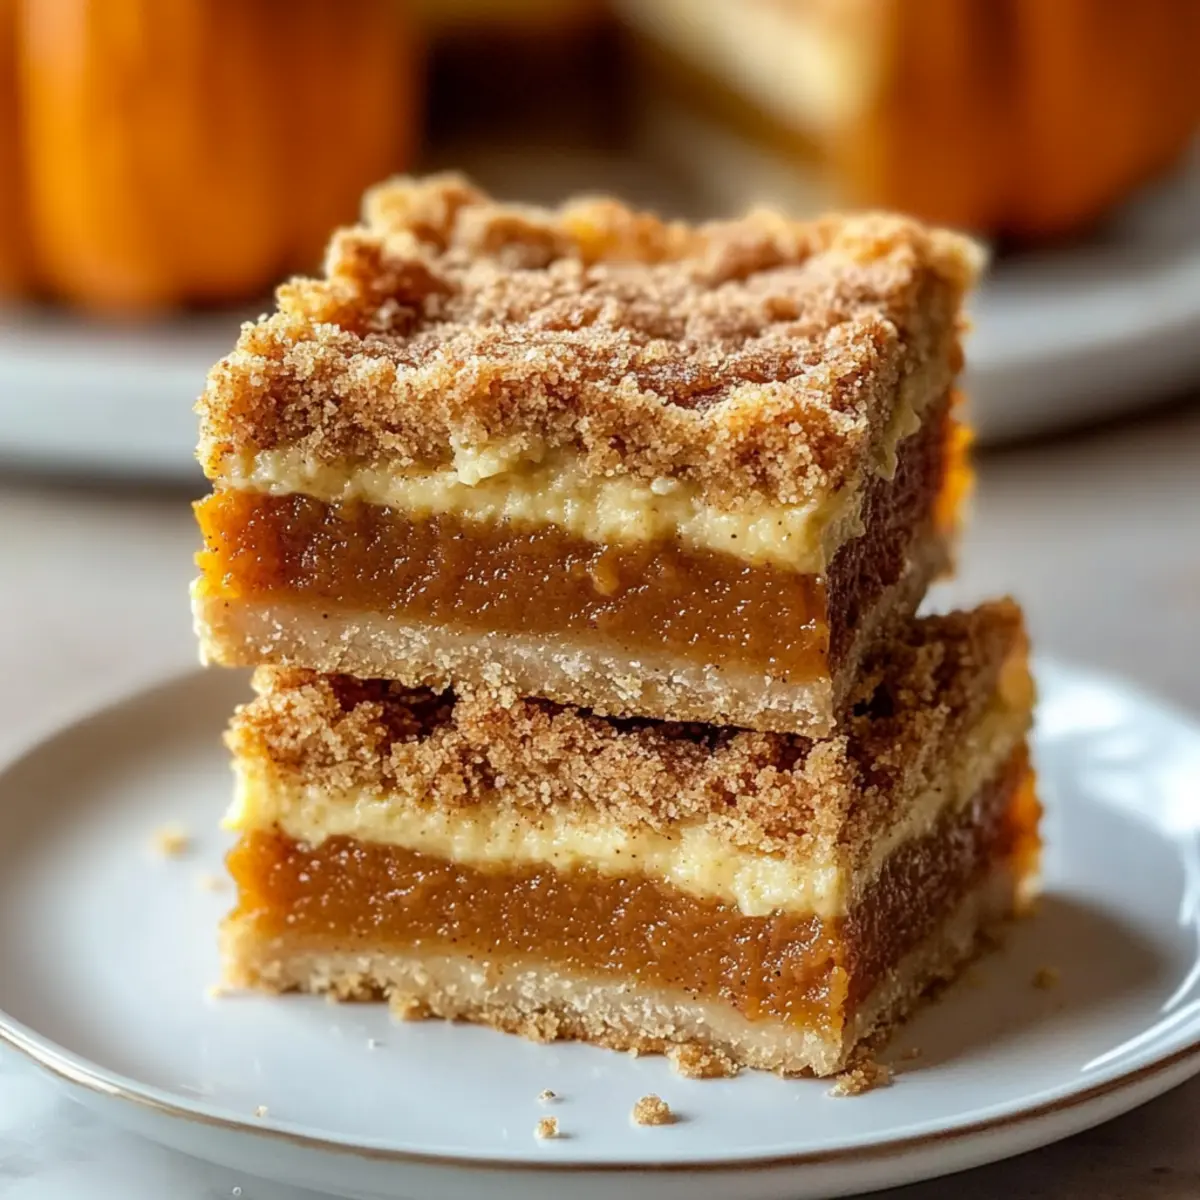
As I peeled back the layers of fall, a warm, spicy aroma filled my kitchen, instantly whisking me away to memories of cozy gatherings and laughter. That’s the magic behind these Gluten-Free Pumpkin Pie Bars—a sweet treat that captures the essence of autumn in every bite. With a creamy, spiced pumpkin filling paired with a buttery, crumbly crust, they’re not just gluten-free; they’re a quick crowd-pleaser perfect for any gathering. Whether you’re sharing them with friends or indulging solo while wrapped in a blanket, these bars promise not just a delightful dessert but a slice of nostalgia too. Ready to elevate your fall dessert game? Let’s dive into making these irresistible pumpkin pie bars!
Why Are These Bars So Irresistible?
Simplicity, the ingredient list is straightforward, making it easy for anyone to whip up a batch without any fuss. Deliciously Versatile, you can personalize your bars with variations like chocolate chip or nutty crunch, appealing to all taste buds. Crowd-Pleasing Treat, these bars blend creamy pumpkin and buttery crust, satisfying both gluten-free and non-gluten-free friends alike. Make Ahead, prepare them in advance to save time during busy gatherings. These delectable Gluten-Free Pumpkin Pie Bars are more than just a dessert; they bring warmth and joy to any fall celebration!
Gluten-Free Pumpkin Pie Bars Ingredients
• Get ready to bake delightful bars!
For the Crust
- Gluten-Free Flour – Essential for creating a sturdy base; choose a blend suited for baking.
- Sugar – Adds sweetness; granulated or brown can both work, depending on your preference.
- Salt – Enhances overall flavor; you can omit this if you’re watching sodium intake.
- Cold Butter – Provides a flaky texture; vegan butter makes a perfect dairy-free substitute.
- Egg – Acts as a binding agent; try a flax egg for a vegan option.
For the Filling
- Pumpkin Puree – The star flavor; use pure pumpkin puree for the best results—avoid pie filling!
- Brown Sugar – Sweetens and adds depth; coconut sugar is a great low-glycemic swap.
- Evaporated Milk – Delivers creaminess; consider using coconut milk for a dairy-free variation.
- Vanilla Extract – A must for flavor; opt for pure vanilla extract for the best taste.
- Pumpkin Pie Spice – Adds warmth; mix your own with cinnamon, nutmeg, and ginger if preferred.
- Salt – A little extra in the filling balances sweetness beautifully.
These Gluten-Free Pumpkin Pie Bars are not only scrumptious but also easy to make, allowing you to delight in a comforting fall treat!
Step‑by‑Step Instructions for Gluten-Free Pumpkin Pie Bars
Step 1: Preheat and Prep
Begin by preheating your oven to 350°F (175°C). While the oven warms up, grab an 8×8 inch baking pan and line it with parchment paper, ensuring the sides extend slightly for easy removal later. Lightly grease the parchment paper with cooking spray or butter to prevent sticking, setting the stage for your delicious Gluten-Free Pumpkin Pie Bars.
Step 2: Make Crust
In a large mixing bowl, combine your gluten-free flour, sugar, and salt, whisking together until well mixed. Then, cut in the cold butter using a pastry cutter or your fingertips until the mixture resembles coarse crumbs. Next, add the egg, mixing until a cohesive dough forms. Press the dough evenly into the bottom of your prepared pan, creating a sturdy base for the pumpkin filling.
Step 3: Prepare Filling
In a separate bowl, add the pumpkin puree, brown sugar, eggs, evaporated milk, vanilla extract, pumpkin pie spice, and salt. Whisk these ingredients together until the mixture is smooth and creamy, ensuring that all components are evenly combined. This spiced filling will transform your crust into delectable Gluten-Free Pumpkin Pie Bars, so take your time to blend thoroughly.
Step 4: Bake
Carefully pour the pumpkin filling over the prepared crust, smoothing it out to ensure an even layer. Place the pan in the preheated oven and bake for 40-45 minutes, watching closely. The bars are ready when the center is just set but still has a slight jiggle—it will firm up as it cools. Golden edges will begin to form, indicating that your bars are nearly perfect.
Step 5: Cool and Serve
Once baked, remove the pan from the oven and let it cool completely on a wire rack, allowing the flavors to meld. This cooling step is crucial, as it helps the filling set beautifully. After cooling, lift the bars from the pan using the parchment edges, and cut them into squares. Your irresistible Gluten-Free Pumpkin Pie Bars are now ready to be shared or savored!
Expert Tips for Gluten-Free Pumpkin Pie Bars
-
Cold Butter: Use cold butter when making the crust for a flaky texture. If it’s too warm, your crust may become dense instead of light and crumbly.
-
Avoid Overbaking: Keep a close eye on the bars during baking. They should have a slight jiggle in the center when done; overbaking can lead to a dry filling.
-
Keep Crust Together: If your bars fall apart when cut, add a bit more butter or an egg to the crust mixture next time for better binding.
-
Customizable Flavor: Feel free to experiment with your own spice blend if you don’t have pumpkin pie spice on hand; a mix of cinnamon, nutmeg, and ginger works beautifully.
-
Chill Before Serving: For the best flavor, allow the bars to chill in the fridge for at least several hours or overnight; this enhances the texture and taste of your gluten-free pumpkin pie bars!
Gluten-Free Pumpkin Pie Bars Variations
Feel free to let your creativity shine with these delightful twists on the classic bars!
-
Chocolate Chip Twist: Fold in semisweet chocolate chips to the pumpkin filling for a deliciously sweet contrast. The rich chocolate flavors pair perfectly with the spiced pumpkin.
-
Nutty Crunch Top: Sprinkle chopped nuts or oats over the top of your filling before baking for added crunch and flavor. Walnuts or pecans work beautifully here, adding texture that complements the creamy filling.
-
Dairy-Free Delight: Swap evaporated milk for coconut milk for a tropical twist on the classic recipe. The coconut adds a subtle sweetness to the filling you won’t want to miss!
-
Maple Sweetener: Use pure maple syrup in place of brown sugar for a unique flavor profile. It brings a lovely depth and pairs beautifully with the pumpkin and spices.
-
Spicy Kick: Enhance the flavor with a pinch of cayenne pepper or some finely chopped jalapeños for a surprising pop of heat that contrasts nicely with the sweetness. Just a little goes a long way!
-
Pumpkin Cheesecake Bars: Mix in cream cheese into the filling for a tangy, rich texture reminiscent of cheesecake. Swirl it on top before baking for beautiful marbling!
-
Gluten-Free Oat Crust: For a twist on the traditional crust, use gluten-free oats blended into a fine flour as the base, adding a chewy texture to your bars.
-
Caramel Drizzle: Drizzle some homemade or store-bought caramel sauce over the cooled bars right before serving for an indulgent treat that enhances the autumn flavors.
These variations make your Gluten-Free Pumpkin Pie Bars not just a dessert but a canvas for your culinary imagination. Looking for more pumpkin inspiration? Try these delightful Pumpkin Pie Tacos or whip up a lovely Pumpkin Cheese Ball for your next gathering! Enjoy!
How to Store and Freeze Gluten-Free Pumpkin Pie Bars
Fridge: Store your Gluten-Free Pumpkin Pie Bars in an airtight container in the fridge for up to 5 days. This helps maintain their freshness while allowing the flavors to develop.
Freezer: For longer storage, freeze the bars wrapped tightly in plastic wrap and then place them in a freezer-safe bag. They can last for up to 3 months and make for a quick, delightful dessert anytime!
Reheating: To enjoy them warm, pop the bars in the microwave for 20-30 seconds. Alternatively, reheating in the oven at 350°F (175°C) for about 10 minutes creates a lovely, warm texture while preserving their delicious flavor.
Tip: The bars taste even better after resting in the fridge for a day, so don’t shy away from making them ahead of time!
What to Serve with Irresistible Gluten-Free Pumpkin Pie Bars
These delightful pumpkin pie bars are ready to shine at your autumn gatherings, but what can you have alongside them to create a truly enchanting meal?
-
Whipped Cream: A dollop of freshly whipped cream adds a light, airy touch to each bar, enhancing its creamy texture without overshadowing the flavors.
-
Nutty Granola: Adding a sprinkle of nutty granola offers a crunchy contrast, bringing a delightful texture while complementing the warm spices in the pumpkin bars.
-
Vanilla Ice Cream: Serve a scoop of vanilla ice cream on the side for a classic twist; the cold creaminess wonderfully balances the warm, spiced flavors.
-
Cinnamon Apple Compote: This warm topping provides a sweet and tangy contrast; think of it as autumn on a plate, infusing every bite with homey goodness.
-
Maple Glazed Pecans: For an extra nutty crunch, these pecans are a great addition. Their sweet glaze enhances the pumpkin’s warmth, creating a harmonious blend of flavors.
-
Hot Apple Cider: Sip on a warm mug of spiced apple cider by your side. This cozy drink echoes the fall vibes, perfectly complementing the dessert’s flavors.
-
Chocolate Sauce: Drizzle some decadent chocolate sauce over your bars for a fun twist. The richness of chocolate pairs beautifully, elevating each bite to pure indulgence.
-
Pecan Pie Bars: For a dessert duo, serve some pecan pie bars alongside. Their nutty sweetness provides a perfect counterpoint to the pumpkin’s creamy richness.
-
Coffee or Chai Latte: Pair the bars with a warm beverage like coffee or chai latte. The warm spices in chai will enhance the flavors in your pumpkin pie bars, making each moment a comforting experience.
With these thoughtful pairings, your gluten-free pumpkin pie bars will take center stage in a wonderful seasonal feast!
Make Ahead Options
These Gluten-Free Pumpkin Pie Bars are a fantastic option for meal prep, allowing you to enjoy the flavors of fall without the last-minute rush! You can prepare the crust and filling separately up to 24 hours in advance. Simply mix the crust and press it into the pan, then store it covered in the refrigerator while whisking together the filling to keep it fresh. When you’re ready to bake, pour the filling over the chilled crust, and proceed to bake as directed. This not only saves you time but also enhances the flavors, making the bars just as delicious! They can also be baked a day or two ahead, which improves the taste as they rest in the fridge, so don’t hesitate to prepare your Gluten-Free Pumpkin Pie Bars in advance for a stress-free gathering!
Gluten-Free Pumpkin Pie Bars Recipe FAQs
What type of gluten-free flour should I use?
Absolutely! It’s essential to use a gluten-free flour blend specifically designed for baking to ensure the crust holds its shape and has a good texture. Look for blends that contain a mix of rice flour, tapioca flour, and potato starch. If you’re in a pinch, you can even create your own by mixing equal parts of almond flour and coconut flour, but results may vary!
How should I store my Gluten-Free Pumpkin Pie Bars?
To keep your bars fresh, store them in an airtight container in the fridge for up to 5 days. This not only maintains their wonderful flavor but also allows the ingredients to meld beautifully, enhancing taste!
Can I freeze these bars?
Yes, you can freeze your Gluten-Free Pumpkin Pie Bars! First, let them cool completely. Then wrap the bars tightly in plastic wrap and place them in an airtight freezer bag. They’ll be good for up to 3 months. When you’re ready to enjoy, just thaw them in the fridge overnight or warm them in the microwave for about 20-30 seconds!
What should I do if my crust crumbles when cut?
If your bars fall apart, don’t worry! This can happen sometimes. You might need to add a tad more binding, such as an additional tablespoon of melted butter or an extra egg to your crust mixture next time. Alternatively, pressing the crust more firmly into the pan can also help create a sturdier base.
Are these bars safe for people with nut allergies?
Great question! These Gluten-Free Pumpkin Pie Bars are generally nut-free, but it’s crucial to ensure that all your ingredients, like the gluten-free flour, are processed in a nut-free facility if allergies are a concern. Always read labels carefully to ensure safety for anyone with allergies in your gathering.
Gluten-Free Pumpkin Pie Bars That Everyone Will Love
Ingredients
Equipment
Method
- Preheat oven to 350°F (175°C) and prepare an 8x8 inch baking pan with parchment paper.
- In a large mixing bowl, mix gluten-free flour, sugar, and salt. Cut in cold butter until resembling coarse crumbs, then add egg to form dough.
- In another bowl, combine pumpkin puree, brown sugar, evaporated milk, vanilla, pumpkin spice, and salt. Whisk until smooth.
- Pour filling over the crust, smooth out, and bake for 40-45 minutes until just set with a slight jiggle.
- Allow to cool completely on a wire rack, then lift bars out using parchment and cut into squares.
Leave a Reply