
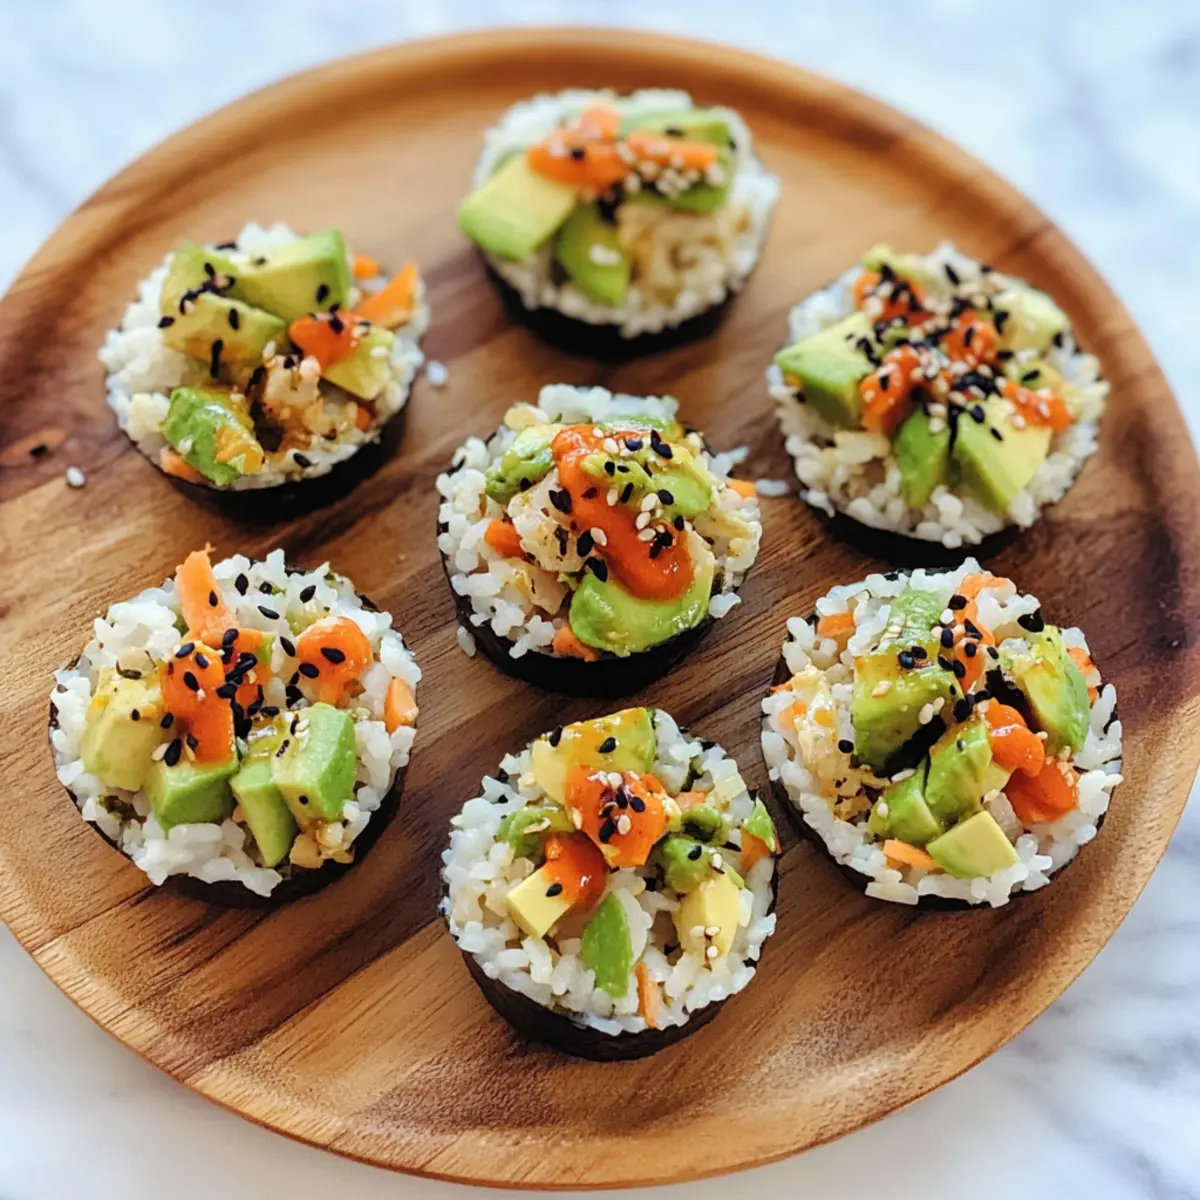
As I was experimenting in my kitchen recently, I stumbled upon a delightful revelation: no-bake sushi cups! These charming little bites combine the fresh crunch of your favorite vegetables, creamy avocado, and a spicy mayo drizzle, all nestled in perfectly molded rice cups. This recipe for customizable sushi cups not only makes for a visually stunning appetizer but is also incredibly easy to whip up, taking away the hassle of rolling traditional sushi. They’re vegetarian-friendly too, making them a crowd-pleaser for any occasion. Whether it’s a cozy night in or a lively get-together, these sushi cups are sure to elevate your dining experience. Curious about how to create these scrumptious bites? Let’s dive in!
Why Are Sushi Cups So Irresistible?
Versatile and Customizable: You can mix and match ingredients to suit your taste, using any veggies you love. No-Bake Convenience: Say goodbye to complicated rolling techniques and hello to a stress-free way to enjoy sushi. Crowd-pleaser: Perfect for gatherings, these sushi cups impress visually and appeal to multiple dietary preferences. Fresh Flavors: Each bite bursts with vibrant freshness, creamy avocado, and a spicy kick from the mayo drizzle. Quick Prep Time: Whip these up in no time—ideal for those last-minute party plans. Ready to give it a go? Don’t forget to check out more appetizer ideas that can enhance your culinary repertoire!
Sushi Cups Ingredients
For the Rice Cups
• Sushi Rice – The chewy base that holds everything together; remember to rinse it well before cooking.
• Water – Essential for cooking the rice; accurate measurement ensures perfect texture.
For the Filling
• Finely Chopped Veggies (1/2 cup) – Add a refreshing crunch using any raw vegetables you enjoy, like carrots or cucumbers.
• Steamed Mukimame (1/4 cup) – This fun ingredient provides protein; you can use shelled edamame if you can’t find mukimame.
• Diced Avocado (1/4 cup) – Gives a creamy touch; make sure it’s ripe for the best flavor.
• Sauce of Choice (1 tablespoon) – Opt for soy sauce, tamari, or coconut aminos to brighten the mix.
For the Spicy Mayo Drizzle
• Mayonnaise (1/4 cup) – It creates the rich base for your drizzle; feel free to choose a vegan alternative if desired.
• Sriracha Sauce (1 teaspoon) – Adjust according to your heat preference; it adds that spicy kick.
• Coconut Aminos or Soy Sauce (1 teaspoon) – Enhances the flavor of your mayo mix.
• Honey (1 teaspoon) – Balances the spice from the sriracha, making the mayo mellow and sweet.
• Sesame Oil (1/2 teaspoon) – Infuses a lovely nutty aroma into your drizzle.
For Garnishing
• Black Sesame Seeds – Sprinkle for added texture and a striking visual contrast on your sushi cups.
With these delicious ingredients, you’ll be ready to create your very own sushi cups that are easy, customizable, and incredibly delicious! Enjoy getting creative with your fillings!
Step‑by‑Step Instructions for Sushi Cups
Step 1: Prepare the Sushi Rice
In a medium pot, combine the rinsed sushi rice with the appropriate amount of water, ensuring it’s evenly distributed. Bring the mixture to a boil over medium heat, then reduce the heat to low, cover with a lid, and let it simmer for 18-20 minutes until the rice is tender and the water has fully absorbed. The rice should be plump and slightly sticky, indicative of perfect sushi rice.
Step 2: Cool the Rice
Once the sushi rice is cooked, remove the pot from heat and let it sit, covered, for about 10 minutes. This resting time allows the rice to firm up while retaining its moisture. After the resting period, uncover the pot and fluff the rice gently with a fork, ensuring it cools slightly before shaping it into cups.
Step 3: Form the Rice Cups
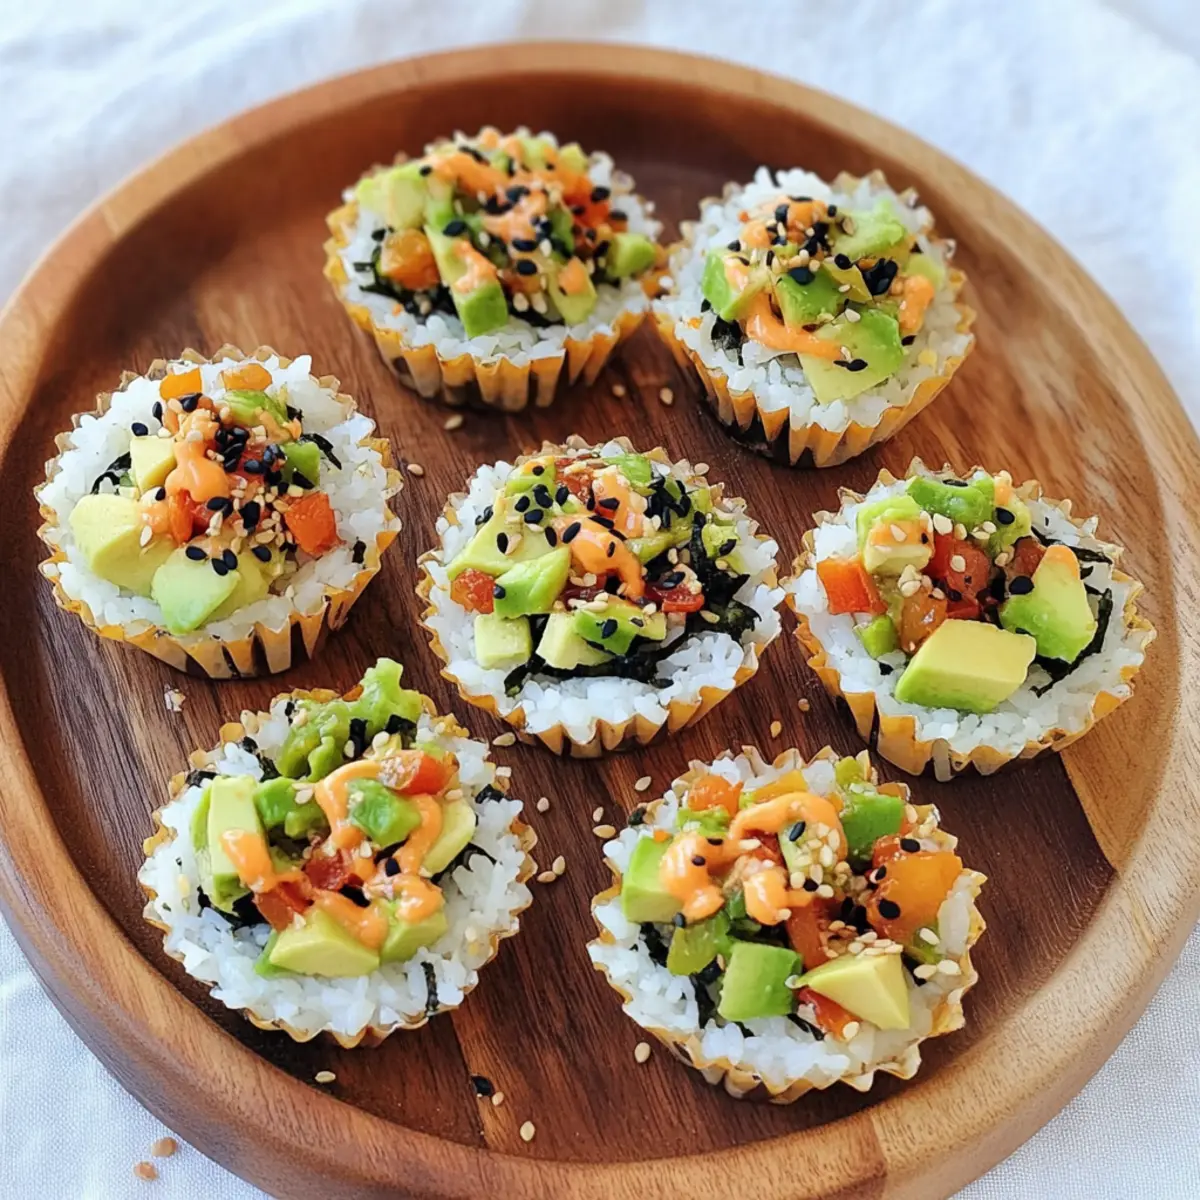
Grab a silicone muffin tin and press about 2 heaping tablespoons of the cooled sushi rice into each cup. Use your fingers or the back of a spoon to firmly pack the rice into an even layer, creating a sturdy base. Once all cups are filled, place the muffin tin in the refrigerator for at least 20 minutes to set and hold their shape.
Step 4: Prepare the Filling
In a mixing bowl, combine your finely chopped veggies, steamed mukimame, and diced avocado. Drizzle your chosen sauce over the mixture and gently fold everything together until well-coated. The colors should be vibrant, and the mix should be crunchy and fresh, ready to be piled into the rice cups.
Step 5: Make the Spicy Mayo Drizzle
In a separate bowl, whisk together the mayonnaise, sriracha sauce, coconut aminos or soy sauce, honey, and sesame oil. Beat until the mixture is smooth and creamy, adjusting the sriracha for heat according to your preference. The result should be a rich, lustrous drizzle that complements the flavors of your sushi cups.
Step 6: Assemble the Sushi Cups
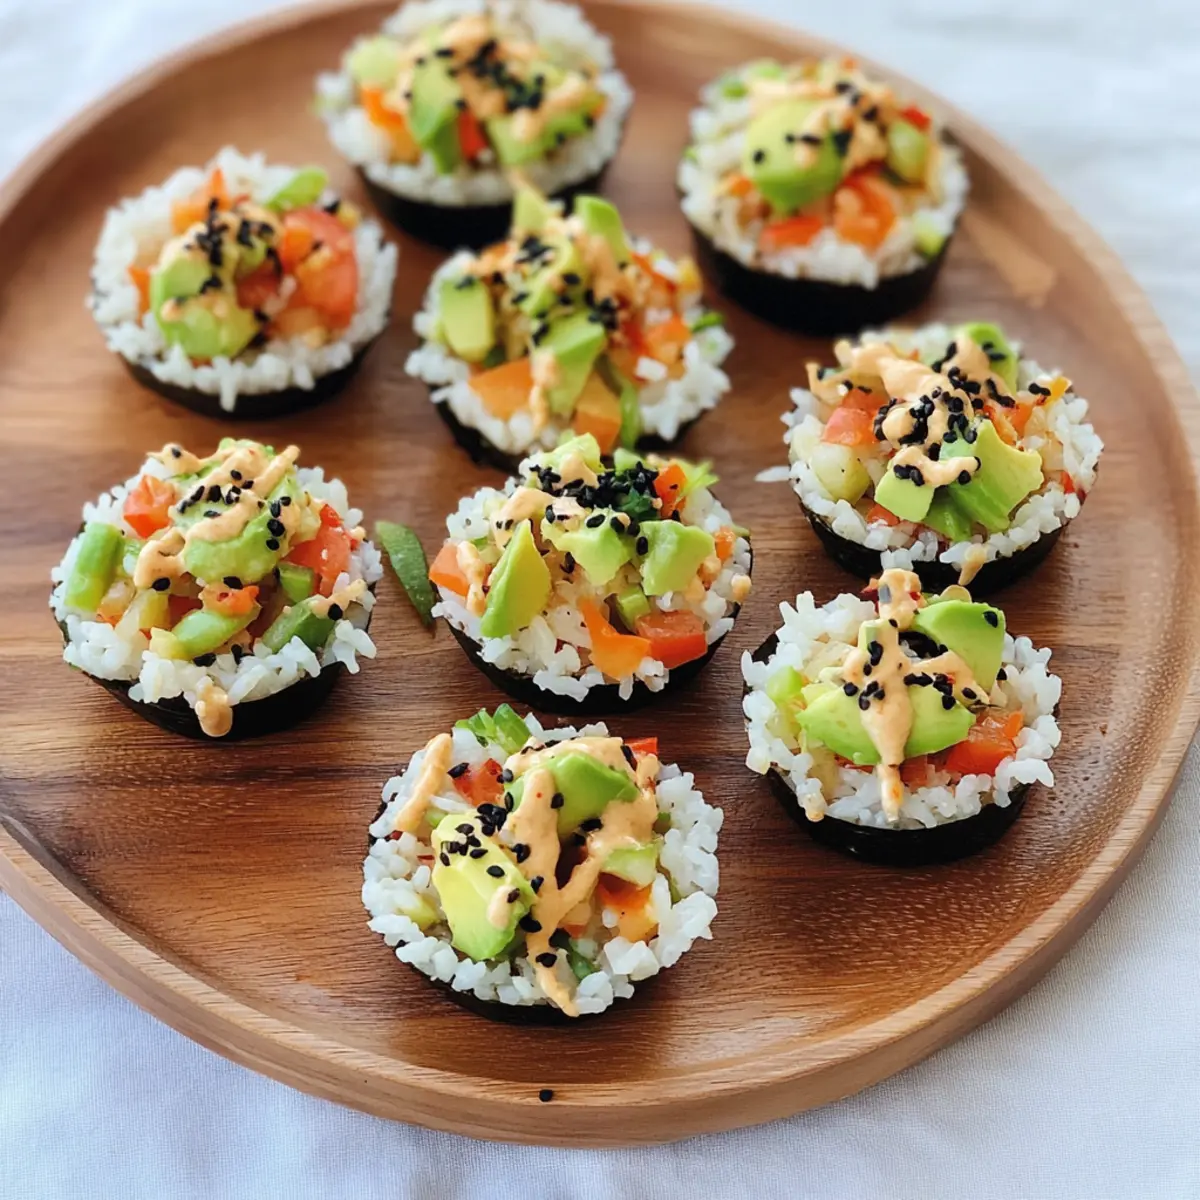
Once the rice cups have set in the refrigerator, carefully remove them from the silicone muffin tin. Fill each cup with a generous tablespoon of the veggie mixture, ensuring the filling is heaping and colorful. Finish off by drizzling the spicy mayo on top, allowing it to cascade over the edges for that appealing look.
Step 7: Garnish and Serve
Sprinkle the tops of your sushi cups with black sesame seeds for an added crunch and visual flair. Arrange the completed sushi cups on a serving platter and serve immediately or chill them briefly before serving at your gathering. Enjoy the fresh and delicious flavors of these sushi cups!

Make Ahead Options
These sushi cups are perfect for meal prep, allowing busy cooks to enjoy delicious flavors without the last-minute rush. You can prepare the sushi rice and shape it into cups up to 24 hours in advance, storing them in the refrigerator to maintain their texture. Additionally, chop the veggies and mix the spicy mayo drizzle ahead of time, keeping everything in airtight containers. Just before serving, fill each rice cup with the veggie mixture, drizzle with the mayo, and garnish with black sesame seeds for a fresh finish. By prepping ahead, you can savor the mouthwatering taste of sushi cups with minimal effort when you’re ready to enjoy!
Expert Tips for Sushi Cups
-
Rinse Rice Well: Always rinse your sushi rice thoroughly before cooking to remove excess starch, ensuring a better texture in your sushi cups.
-
Use Silicone Muffin Tins: For easy removal, opt for silicone muffin tins. They help to maintain the shape of the rice cups without sticking.
-
Fresh Ingredients Matter: Use fresh and vibrant vegetables for the filling. Stale or wilted veggies can dull the flavor of your sushi cups.
-
Customize Smartly: Feel free to experiment with different fillings and sauces, but remember to balance flavors—add sweetness or acidity to enhance your sushi cups!
-
Storage Tips: Keep any leftover sushi cups in an airtight container in the fridge for up to two days, but aim to enjoy them fresh for the best taste.
How to Store and Freeze Sushi Cups
Fridge: Store leftover sushi cups in an airtight container for up to 2 days. Enjoy them fresh to maintain texture and flavors, and avoid letting rice become stale.
Freezer: While sushi cups are best fresh, you can freeze the rice cups (without filling) for up to 1 month. Just thaw in the fridge before adding fresh ingredients.
Reheating: To warm up any leftover sushi cups, place them in the microwave for about 20-30 seconds on low power. Enjoy while warm, but remember they are best cold!
Preparation Ahead: You can prepare the rice cups a day in advance. Assemble them right before serving for the ultimate freshness and crunch.
What to Serve with Customizable No-Bake Sushi Cups
The vibrant flavors and textures of these sushi cups invite a delicious ensemble that perfectly complements each bite.
-
Crispy Seaweed Snacks: These crunchy bites echo the ocean’s flavors, adding a delightful texture alongside your sushi cups. They are a fun and easy addition that elevates the sushi experience.
-
Soy Sauce Dipping: A classic choice that enhances the umami notes in your sushi cups. The salty splash harmonizes perfectly with the creamy and spicy mayo drizzle on top.
-
Chilled Cucumber Salad: This refreshing salad brings a cool, crisp crunch and light acidity that balances the richness of avocado and mayo. Toss it with a light vinaigrette for extra zing.
-
Pickled Ginger: Offering a burst of tangy flavor, pickled ginger serves as a palate cleanser that brightens each bite. Its zingy taste provides a delightful contrast to the sushi cups.
-
Edamame: A bowl of lightly salted, steamed edamame adds protein and a buttery texture, complementing the vegetarian nature of your sushi cups beautifully. It’s a simple side that’s always a hit.
-
Miso Soup: Warm and soothing, miso soup brings comfort to your meal. Its savory broth pairs wonderfully with the bold flavors of the sushi cups and adds a heartwarming element to your dining experience.
-
Sparkling Water with Lime: A refreshing, light drink that cleanses the palate, sparkling water adorned with a slice of lime adds a touch of elegance and brightness to your gathering.
-
Fruit Skewers: Bright, juicy fruit skewers provide a sweet and juicy contrast, echoing the freshness in your sushi cups. Opt for strawberries, pineapple, or melon for a colorful medley!
These accompanying dishes and drinks create a symphony of flavors and textures that will make your sushi cups shine on any occasion!
Sushi Cups Variations & Substitutions
Don’t be afraid to let your creativity shine as you personalize these delightful sushi cups to suit your taste!
-
Protein-Packed: Substitute mukimame with shrimp, crab meat, or grilled tofu for a protein boost. Each option brings its unique flavor and texture that everyone will love. Imagine the tender sweetness of shrimp lifting the overall dish!
-
Spicy Twist: If you’re craving more heat, increase the sriracha or add fresh jalapeños to the veggie mixture. This simple adjustment can elevate your sushi cups, making them more exciting with each bite!
-
Creamy Delight: Swap mayonnaise for Greek yogurt for a tangy flair. This swap not only enhances creaminess but also adds a nutritional kick. You’ll love the extra zing it brings to the creamy drizzle!
-
Veggie Variety: Mix and match your veggies based on what’s in season. Think radishes for a peppery crunch or avocado for creaminess. This flexibility keeps your sushi cups fresh and exciting throughout the year!
-
Flavorful Sauces: Experiment with alternative sauces like teriyaki or spicy sesame dressing for a new flavor profile. Each sauce spins a different cultural touch, enhancing the overall experience with added umami.
-
Crunch Factor: Add some toasted nori strips or crispy tempura flakes for a delightful crunch. These additions enhance the textural contrast and make your sushi cups even more enjoyable.
-
Paleo-Friendly: For a grain-free option, replace sushi rice with cauliflower rice. This alteration beautifully maintains the sushi cup concept while catering to health-conscious diners looking for low-carb alternatives.
With these variations, your sushi cups can suit every palate and occasion. So get mixing, and don’t hesitate to try different ingredients and toppings! For more delicious inspiration, check out our appetizer ideas that will impress your guests!
Sushi Cups Recipe FAQs
What type of rice should I use for sushi cups?
I recommend using sushi rice, which has a high starch content that gives the cups their chewy texture. Make sure to rinse it well before cooking to remove excess starch; this will help achieve that perfect consistency and prevent the rice from becoming too sticky.
How do I store leftover sushi cups?
To keep your sushi cups fresh, store them in an airtight container in the refrigerator for up to 2 days. Enjoy them within this timeframe to avoid the rice becoming stale. If you have any filling left, store that separately to keep everything crisp.
Can I freeze sushi cups?
Absolutely! While it’s best to enjoy sushi cups fresh, you can freeze the rice cups without fillings for up to 1 month. To do this, allow the rice cups to cool completely, then place them in a freezer-safe container. When you’re ready to use them, thaw in the fridge, then fill with fresh ingredients right before serving.
What can I do if my rice cups are falling apart?
If your sushi cups are crumbling, it might be due to not packing the rice tightly enough when forming them. Make sure to press the rice firmly into the silicone muffin tin. If they’re still not holding, you can try adding a bit of water to the rice and mixing it well before pressing it into the cups to help with binding.
Are sushi cups suitable for people with dietary restrictions?
Yes, sushi cups are very customizable! You can make them vegetarian or vegan easily by substituting ingredients like mayonnaise with a plant-based alternative. Moreover, always check if your filling ingredients, especially sauces, contain allergens like gluten or soy, and adjust accordingly to fit your dietary needs.
How can I enhance the flavor of my sushi cups?
Experimenting with your fillings can add layers of flavor! Try incorporating marinated tofu or crunchy pickled radishes for a zestier profile. Adding a dash of citrus—like lime or lemon juice—can brighten up the overall taste too.
Sushi Cups That Are Easy, Customizable, and Delicious
Ingredients
Equipment
Method
- In a medium pot, combine the rinsed sushi rice with water. Bring to a boil, reduce heat to low, cover, and simmer for 18-20 minutes until tender.
- Remove from heat and let sit covered for 10 minutes. Fluff rice gently with a fork.
- Press about 2 heaping tablespoons of the cooled sushi rice into each cup of a silicone muffin tin. Refrigerate for at least 20 minutes to set.
- In a mixing bowl, combine finely chopped veggies, steamed mukimame, diced avocado, and drizzle with chosen sauce. Fold together until well-coated.
- In a separate bowl, whisk together mayonnaise, sriracha, coconut aminos or soy sauce, honey, and sesame oil until smooth.
- Once the rice cups are set, fill each cup with the veggie mixture and drizzle with spicy mayo.
- Sprinkle with black sesame seeds and serve immediately or chill briefly before serving.
Leave a Reply