
When the kitchen fills with the rich aroma of caramelized onions and earthy potatoes, it’s almost impossible not to feel a wave of comfort washing over you. Today, I’m thrilled to share my version of Homemade Gluten-Free Potato Pierogi, a twist on a cherished Eastern European classic. These delectable dumplings, packed with creamy filling and a satisfying crunch, offer a delicious escape from the usual fast food routine. One of the best things about this recipe is how rewarding it is; perfect for a cozy afternoon cooking session with family or friends. Plus, they’re a gluten-free delight that everyone can enjoy, making it an ideal comfort food choice for diverse diets. Are you ready to dive into this culinary adventure and elevate your homemade meals? Let’s get cooking!
Why Try This Gluten-Free Pierogi Recipe?
Simplicity Meets Flavor: This recipe is designed for home cooks of all levels, ensuring that you can whip up these indulgent gluten-free pierogi effortlessly. Delightfully Comforting: Each bite transports you to Eastern Europe with its rich filling of potatoes, cheese, and caramelized onions, giving you that warm, nostalgic feel. Versatile Fillings: Feel free to experiment! Whether you prefer traditional fillings or want to try seasonal vegetables, the options are endless. Crowd-Pleaser: Perfect for gatherings, these crispy dumplings are sure to impress even the pickiest eaters. Make-Ahead Convenience: You can freeze uncooked pierogi for a quick meal later, helping you save time. Plus, if you’re keen on gluten-free snacks, check out my recipe for Gluten Free Reindeer for another delicious option!
Gluten-Free Pierogi Ingredients
Experience the joy of homemade gluten-free pierogi with this simple ingredient list!
For the Dough
- Gluten-Free Flour Blend – Use Cup4Cup for the best results; substitutions may affect texture.
- Salt – Essential for enhancing flavors in both the dough and filling.
- Water – Use room temperature water; adjust as needed for dough consistency.
- Eggs – Incorporate one egg at a time for better integration.
For the Filling
- Russet Potatoes – Provide creaminess; ensure they are well-mashed for a smooth texture.
- Yellow or White Onion – Caramelize for sweetness in the filling, enhancing its flavor.
- Unsalted Butter – Ideal for caramelizing onions and frying pierogi; can substitute with dairy-free alternatives.
- Cheddar Cheese – Preferably freshly grated; can substitute with dairy-free cheese for a gluten-free pierogi.
- Salt & Pepper – Adjust to taste while preparing the filling for a balanced flavor.
For Serving
- Sour Cream or Applesauce – Provides a creamy contrast or a touch of sweetness, perfect for serving alongside your pierogi.
Step‑by‑Step Instructions for Gluten-Free Pierogi
Step 1: Prepare the Dough
In a large mixing bowl, combine the gluten-free flour blend and salt. Gradually add room temperature water and eggs, mixing until a cohesive dough forms. Knead the dough lightly for about 5 minutes, shaping it into a ball. Wrap the dough in plastic wrap and refrigerate for at least 30 minutes to rest, allowing the flavors to meld and the dough to become easier to handle.
Step 2: Cook Potatoes
Bring a large pot of salted water to a boil, then add the chopped russet potatoes. Cook the potatoes for 15-20 minutes, or until they are fork-tender and easily break apart. Once done, drain them thoroughly, allow them to steam dry for a minute, and then return them to the pot. Mash the potatoes until they achieve a smooth consistency, ensuring no lumps remain for a creamy filling.
Step 3: Caramelize Onions
In a skillet over low heat, melt 2 tablespoons of unsalted butter. Add the diced yellow or white onions, stirring to coat them in the butter. Cook the onions gently for about 20-25 minutes, stirring occasionally until they are golden brown and soft. The caramelization enhances their natural sweetness, creating a fragrant base for your savory filling for the gluten-free pierogi.
Step 4: Make Filling
Once the onions are caramelized, combine the mashed potatoes, sautéed onions, and freshly grated cheddar cheese in a large bowl. Mix thoroughly, seasoning with salt and pepper to taste. The filling should be creamy and flavorful, ensuring that each bite of your gluten-free pierogi is packed with deliciousness. Set this mixture aside to cool slightly while you prepare to assemble the dough.
Step 5: Assemble Pierogi
On a lightly floured surface with additional gluten-free flour, roll out the chilled dough to about 1/8 inch thick. Cut circles using a round cookie cutter or a glass, aiming for 3-4 inches in diameter. Place a teaspoon of filling in the center of each circle, then fold the dough over to create a half-moon shape. Seal the edges firmly with water and gently press with a fork to ensure a tight seal.
Step 6: Cook Pierogi
Bring a large pot of salted water to a gentle boil, then add the assembled gluten-free pierogi in batches, ensuring not to overcrowd. Cook for 5-6 minutes or until the pierogi float to the surface, indicating they are cooked through. Once floating, use a slotted spoon to transfer them carefully to a plate, allowing them to drain well as you finish cooking the remaining batches.
Step 7: Fry Pierogi
Heat a skillet over medium heat and add about 2 tablespoons of unsalted butter. Once melted and bubbly, add the boiled gluten-free pierogi to the skillet, cooking them for 3-4 minutes on each side or until they turn golden brown and crispy. Keep an eye on them to avoid burning while waiting for that perfect crunchy exterior that contrasts beautifully with the soft filling.
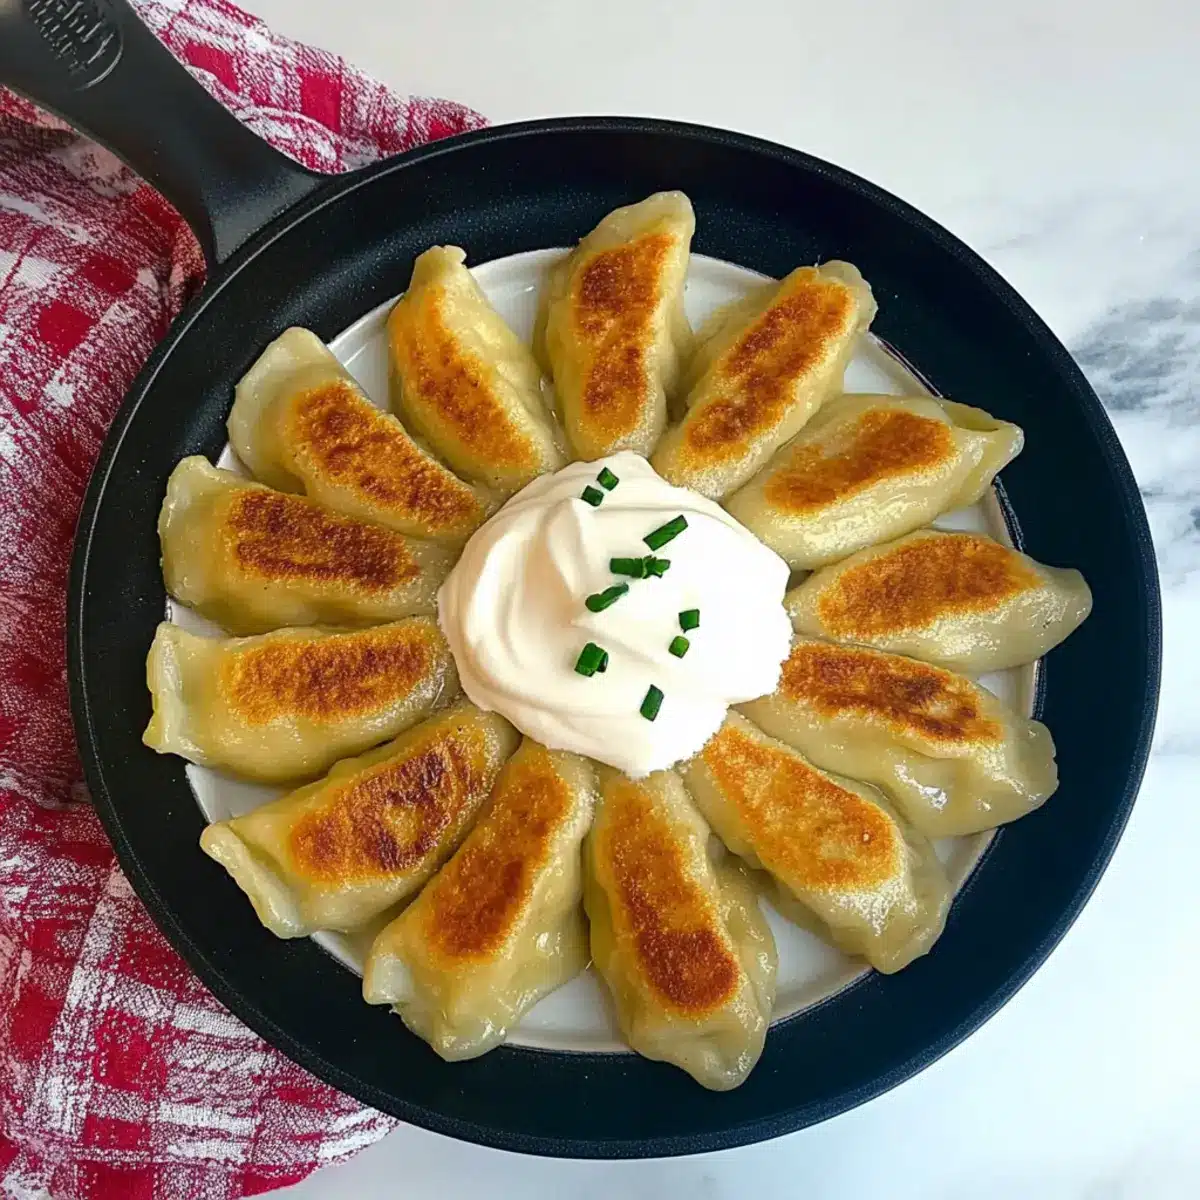
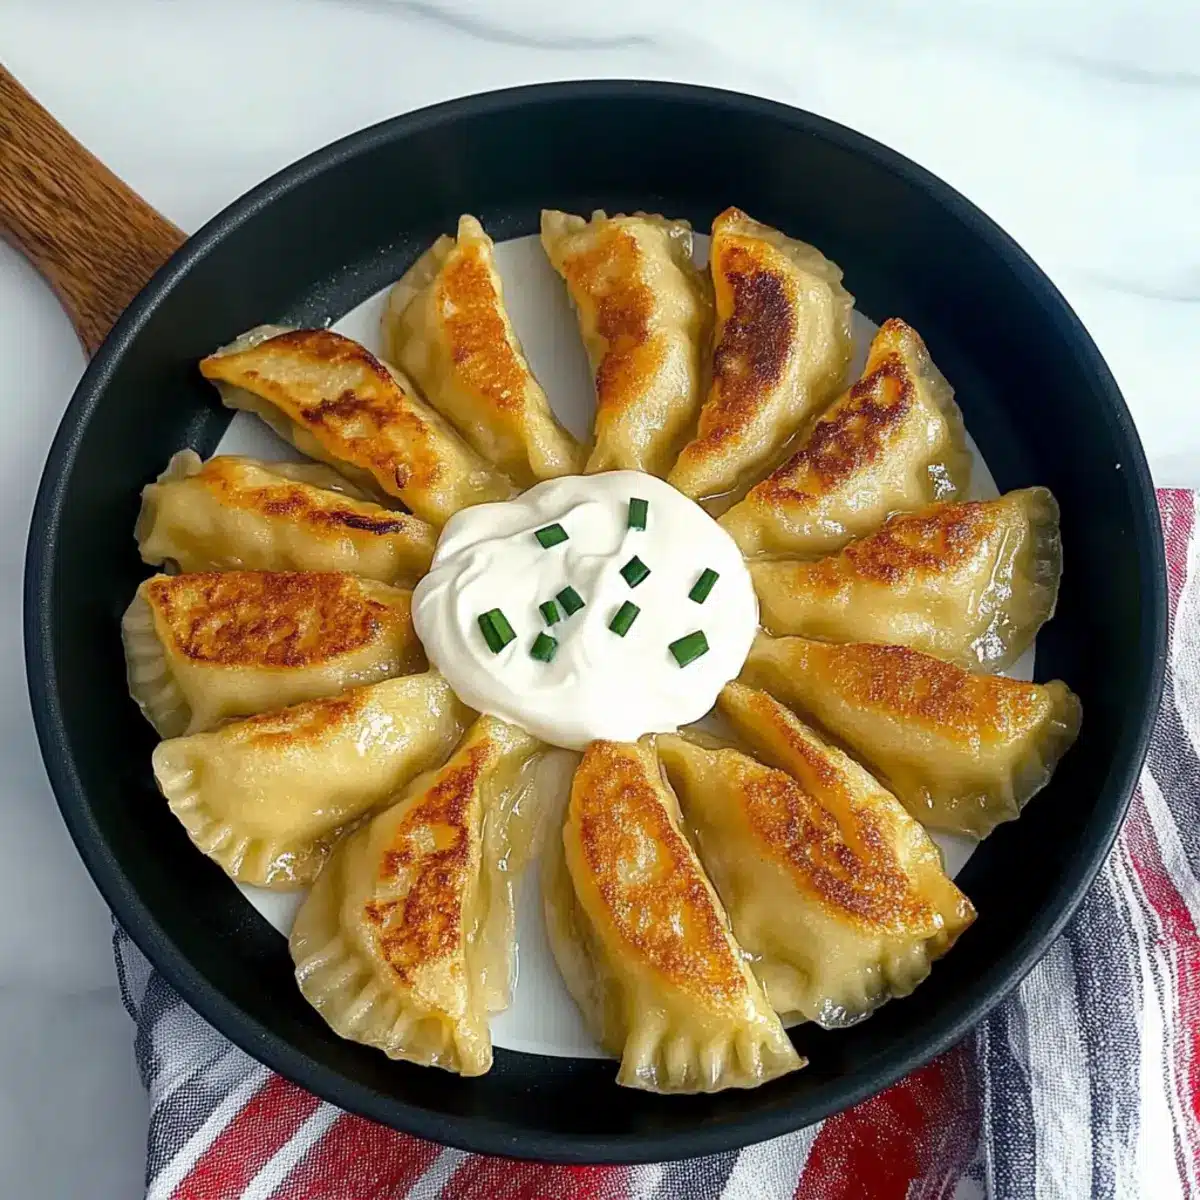
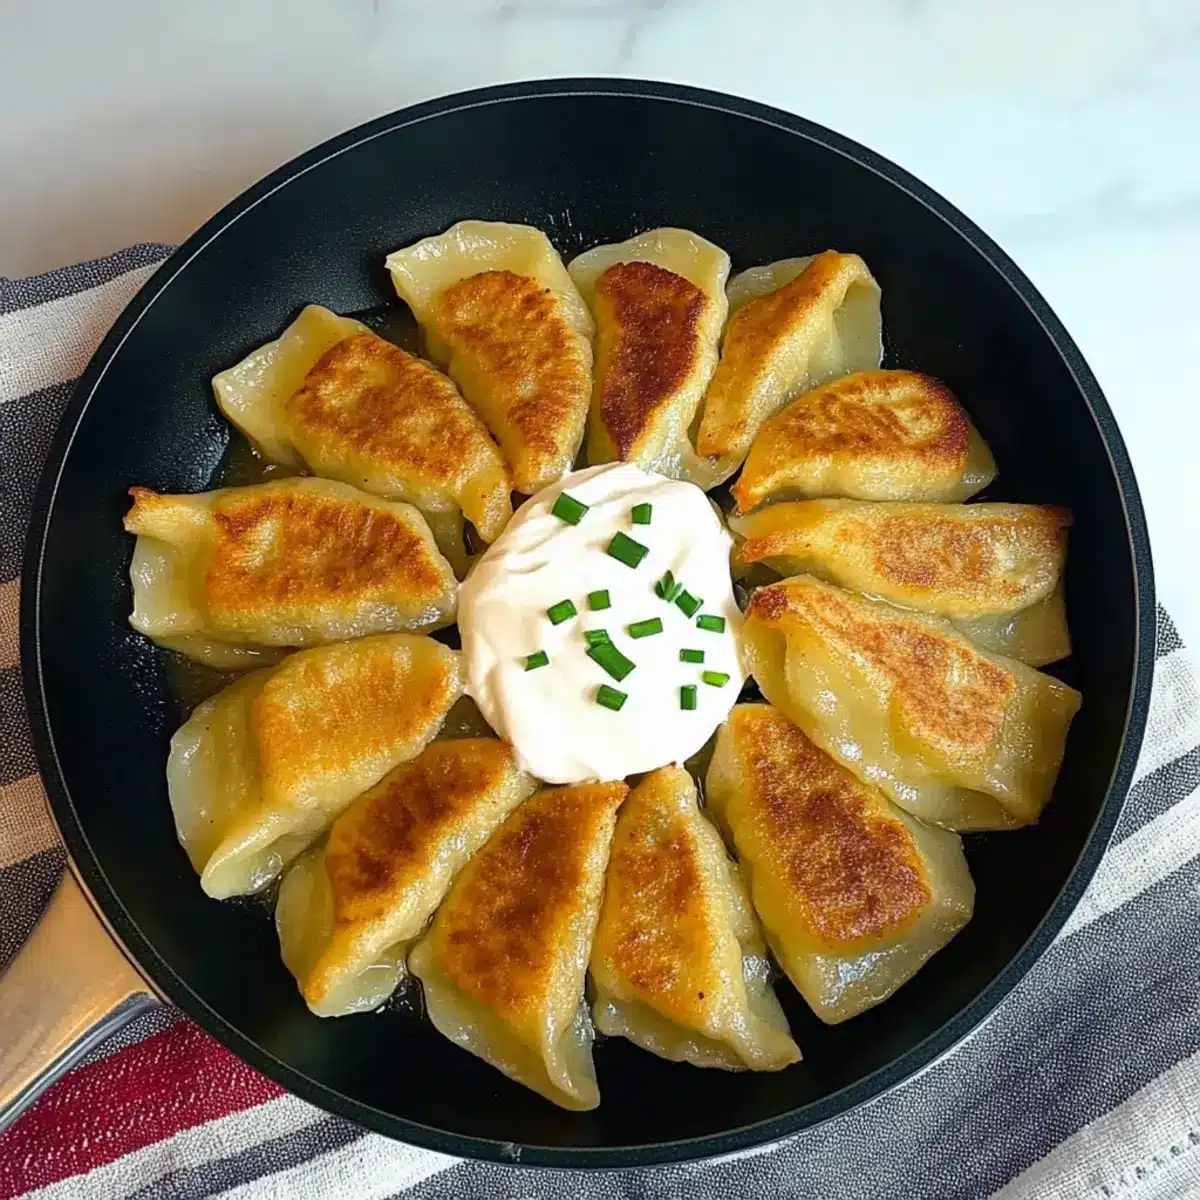
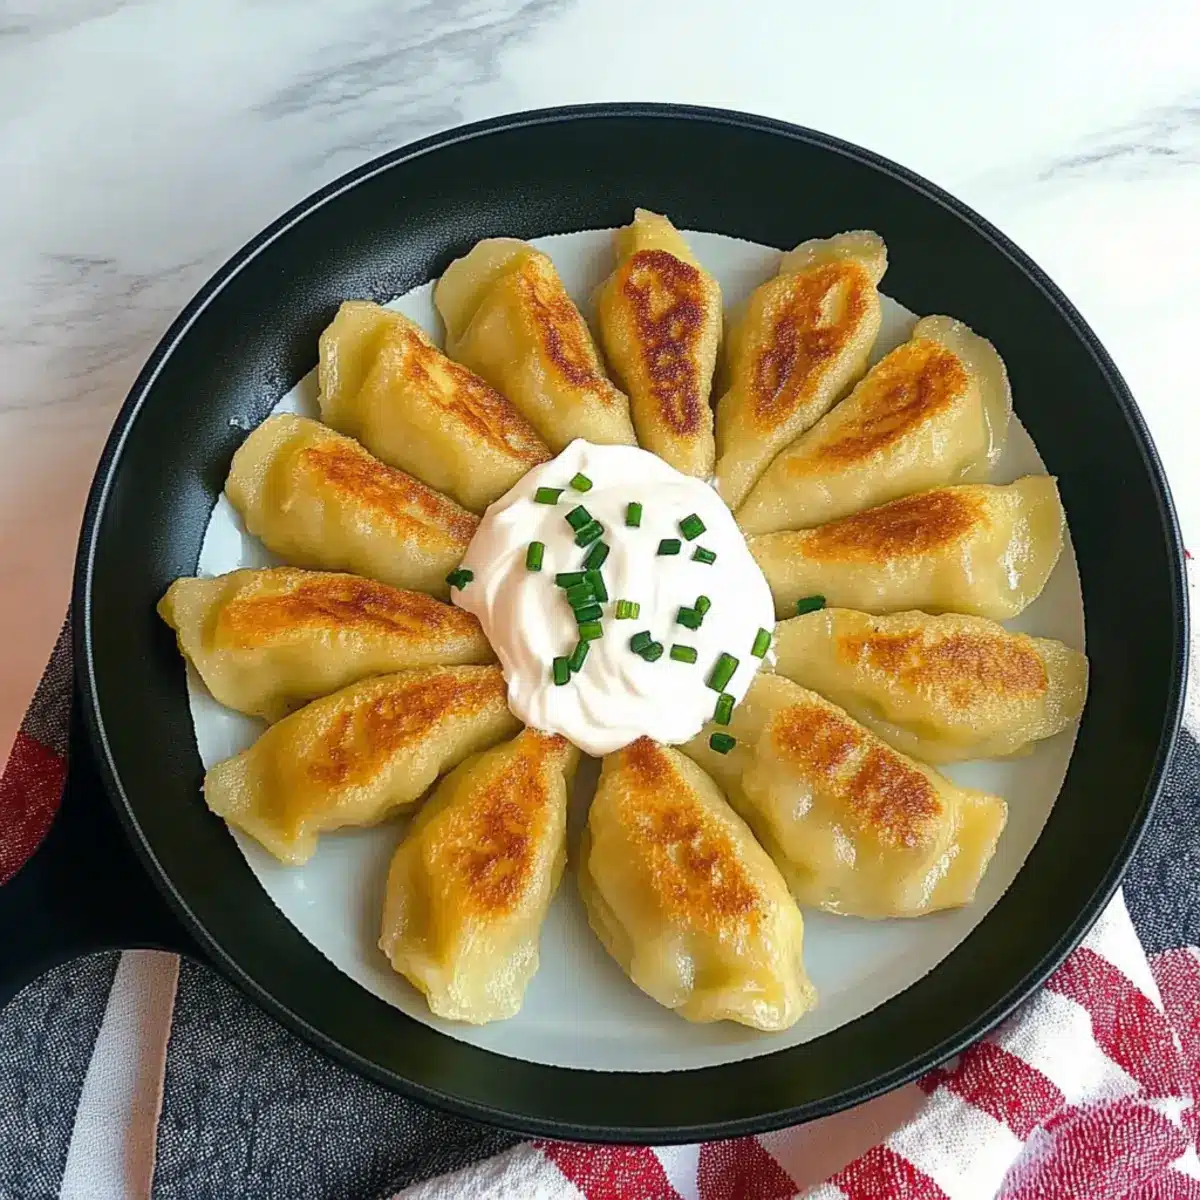
Step 8: Serve
Plate the crispy gluten-free pierogi hot, garnishing with a dollop of sour cream or applesauce for a delightful contrast. Optional toppings like chopped chives or crispy bacon bits can elevate their flavor even further. Savor each bite of your homemade pierogi, sharing them with family and friends for a heartwarming meal that brings comfort to any table!
Gluten-Free Pierogi Variations
Discover new ways to enhance your gluten-free pierogi and tailor them to your tastes—each bite a delight!
-
Mushroom Filling: Substitute half of the potato filling with sautéed mushrooms for an earthy twist. The rich flavor pairs beautifully with the cheese.
-
Herbed Cheese: Use feta or goat cheese instead of cheddar in the filling for a tangy flavor explosion. Fresh herbs like dill or chives can take the taste over the top!
-
Sauerkraut Add-In: Mix in a small amount of drained sauerkraut with the potato filling for a zesty touch. It adds a delightful crunch and a hint of acidity.
-
Sweet Potato Twist: Substitute russet potatoes with mashed sweet potatoes for a subtly sweeter filling. This twist brings vibrant color and a unique flavor.
-
Dairy-Free Delight: Swap out cheddar for dairy-free cheese and use vegan butter for frying. It creates a deliciously inclusive dish for those with dietary restrictions.
-
Spicy Kick: Add a pinch of cayenne pepper or red pepper flakes to the filling for a delightful heat. It’s a bold move that adds an exciting zing.
-
Veggie Medley: Mix seasonal vegetables like spinach or zucchini into the potato filling for added nutrition and color. Each bite is packed with freshness and crunch.
-
Bacon Bits: Incorporate crispy bacon bits into the filling for a smokey flavor that elevates the traditional taste. This brings a savory element that’s hard to resist.
Try these variations to make your gluten-free pierogi even more exciting! And if you’re looking for another tasty recipe, consider exploring my delightful Gluten Free Reindeer treat for a fun twist!
What to Serve with Homemade Gluten-Free Potato Pierogi?
When you savor the tender, crispy bites of these dumplings, it’s easy to envision a wholesome meal spread out before you.
- Crispy Bacon Bits: Adds a salty crunch that tantalizes the taste buds and contrasts beautifully with the creamy pierogi filling.
- Sautéed Greens: Spinach or kale sautéed with garlic provides a fresh, vibrant touch, balancing the richness of the pierogi.
- Homemade Applesauce: This sweet accompaniment offers a delightful contrast, enhancing the flavors while cooling the palate.
- Creamy Coleslaw: The crunchiness of coleslaw refreshes each bite, making every mouthful of pierogi even more enjoyable.
- Herb-Infused Sour Cream: Add chopped chives or dill for a burst of freshness that pairs wonderfully with the savory filling.
- Roasted Vegetables: Seasonal veggies like carrots and bell peppers serve up a colorful, nutritious side that complements the dumplings.
- Hearty Chicken Soup: A warm bowl of chicken soup creates a comforting meal, perfect for a cozy gathering around the table.
- Light Beer or Cider: A refreshing beverage choice that cleanses the palate without overpowering the gentle flavors of the pierogi.
- Chocolate Dessert: End your meal on a sweet note with a rich chocolate cake or mousse that contrasts with the savory starters.
Expert Tips for Gluten-Free Pierogi
- Sealing Technique: Make sure to moisten the edges of the dough with water before sealing. This helps prevent leaks during boiling.
- Dough Consistency: If your dough feels too crumbly or cracks while rolling, try adding a little more water and knead until it’s pliable and smooth.
- Filling Amount: Don’t overstuff your pierogi! A teaspoon of filling is ideal—this prevents bursting and keeps your gluten-free pierogi intact during cooking.
- Boiling Tips: When boiling, wait until the pierogi float to the surface, then give them an extra minute before transferring to avoid gummy dumplings.
- Frying Gold: Keep an eye on the frying process to achieve that perfect golden-brown crust—check frequently to avoid burning!
How to Store and Freeze Gluten-Free Pierogi
- Room Temperature: Gluten-free pierogi can be kept at room temperature for up to 2 hours before cooking. If they are cooked, let them cool completely before storing.
- Fridge: Cooked gluten-free pierogi can be stored in the refrigerator for up to 3-4 days in an airtight container. Reheat on the stovetop with a little butter for a crispy texture.
- Freezer: For uncooked pierogi, place them on a tray in a single layer to freeze for a few hours before transferring to a resealable bag. They can be stored in the freezer for up to 3 months.
- Reheating: To reheat frozen gluten-free pierogi, cook directly from frozen in boiling water until they float, then pan-fry for a crispy finish.
Make Ahead Options
These Gluten-Free Pierogi are perfect for meal prep, allowing you to enjoy comforting home-cooked meals with ease! You can prepare the dough and filling up to 24 hours in advance; simply wrap the dough tightly in plastic and refrigerate. The filling can also be made ahead and stored in an airtight container for up to 3 days in the fridge. When you’re ready to cook, roll out the chilled dough, assemble the pierogi, and boil them as directed. For the best texture, avoid freezing cooked pierogi; instead, freeze uncooked ones for up to 3 months, spread apart on a tray and transferred to a bag once frozen. When you’re eager for a quick meal, just boil straight from the freezer and fry as instructed!
Gluten-Free Pierogi Recipe FAQs
How do I select the right gluten-free flour blend?
Absolutely! For the best results in making gluten-free pierogi, I highly recommend using Cup4Cup flour blend. This blend mimics the properties of regular flour closely, providing the right texture. If you opt for substitutions, just keep in mind that the texture and consistency might differ, so proceed with care.
How should I store leftover gluten-free pierogi?
After cooking, let your gluten-free pierogi cool down completely. Store them in an airtight container in the fridge for up to 3-4 days. To reheat, I suggest using a skillet with a little butter to restore their crispiness—this method works wonders!
Can I freeze uncooked gluten-free pierogi?
Without a doubt! Freezing uncooked pierogi is a fantastic way to prepare ahead. Lay them out on a tray in a single layer to freeze for 2-3 hours until solid. Once set, you can transfer them to a resealable bag, ensuring they’re well-packed. They can be stored in the freezer for up to 3 months. When you’re ready to cook, just drop them straight into boiling water without thawing!
What should I do if my pierogi dough cracks?
Very common! If your dough is cracking, it’s a sign that it might be too dry. Simply add a tablespoon of water gradually while kneading until it becomes pliable and smooth. This should help you achieve that perfect consistency for rolling. Also, remember to roll on a floured surface to prevent sticking!
Can gluten-free pierogi be enjoyed by those with nut allergies?
Absolutely! This recipe primarily uses gluten-free flour, potatoes, and dairy for filling, which generally doesn’t include nuts. However, be cautious about cross-contamination depending on your flour choice. Always check labels for allergens to ensure everything meets your dietary needs!
Crispy Gluten-Free Pierogi for Comfort Food Lovers
Ingredients
Equipment
Method
- In a large mixing bowl, combine the gluten-free flour blend and salt. Gradually add water and eggs, mixing until a cohesive dough forms. Knead lightly for about 5 minutes and refrigerate for at least 30 minutes.
- Bring a pot of salted water to a boil, add chopped russet potatoes, and cook for 15-20 minutes until fork-tender. Drain and mash until smooth.
- In a skillet over low heat, melt butter and cook diced onions for 20-25 minutes until golden brown.
- Combine mashed potatoes, sautéed onions, and cheddar cheese in a large bowl. Season with salt and pepper to taste.
- On a floured surface, roll out dough to about 1/8 inch thick. Cut circles, fill with a teaspoon of filling, and fold to create a half-moon shape.
- Boil assembled pierogi in salted water until they float (5-6 minutes), then transfer to a plate.
- Heat butter in a skillet and fry boiled pierogi for 3-4 minutes on each side until golden brown.
- Plate pierogi hot, garnish with sour cream or applesauce, and optional toppings like chives or bacon.
Leave a Reply