
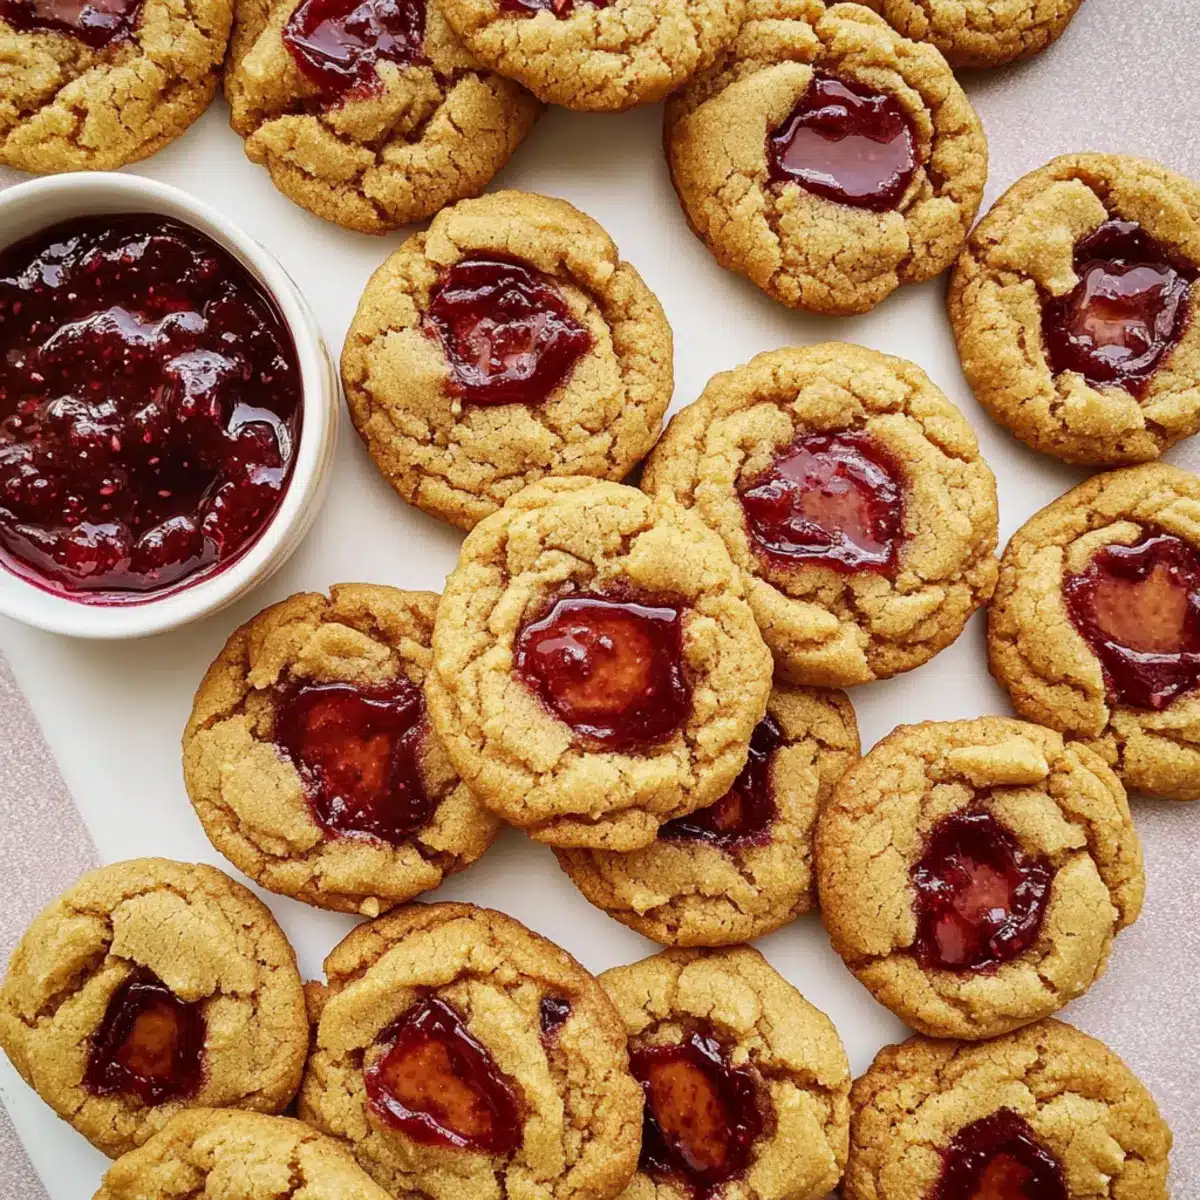
The aroma of warm peanut butter and sweet, gooey strawberry jam wafts through my kitchen, instantly transporting me back to carefree afternoons filled with mom’s kitchen creations. These Classic Peanut Butter & Jelly Cookies are not just a treat; they’re a comforting reminder of childhood favorites reinvented into something extraordinary. With a soft and chewy texture complemented by a slightly crisp exterior, this recipe captures the essence of beloved PB&J sandwiches without demanding hours in the kitchen. Best of all, it’s a quick and simple treat that requires no mixer—perfect for busy days or spontaneous snacking. Want to indulge in a nostalgic cookie that satisfies cravings and sparks joy? Let’s bake some together!
Why are these cookies so special?
Nostalgic Joy: These Peanut Butter & Jelly Cookies bring back cherished childhood memories, making them more than just a dessert—they’re a walk down memory lane!
No-Fuss Recipe: This simple cookie recipe requires no mixer, allowing you to whip up a batch in a flash, even on the busiest days.
Perfectly Chewy Texture: With a soft and chewy interior and a slightly crisp exterior, each bite is a delightful experience.
Versatile Variations: Feel free to switch up the flavors! Swap in almond butter or try different jams like raspberry for a unique twist.
Crowd-Pleaser: These cookies are always a hit at gatherings, making them an excellent choice for holiday cookie trays or after-school snacks.
Easy Storage: Enjoy freshly baked cookies or store leftovers in an airtight container, ensuring they stay delicious for days. Don’t forget to check out my recipes for Swirl Cookies Butter or Coffee Butter Cookies for even more delightful treats!
Peanut Butter & Jelly Cookie Ingredients
• To make these nostalgic Peanut Butter & Jelly Cookies, gather the following ingredients:
For the Cookie Dough
- Unsalted Butter – Provides richness and moisture; ensure it is melted for easy mixing.
- Creamy Natural Peanut Butter – Main flavor contributor; stir well to blend the oils for consistent flavor throughout.
- Light Brown Sugar – Adds sweetness and contributes to a chewy texture that keeps cookies moist.
- Granulated Sugar – Balances out the sweetness and helps create a crispy exterior.
- Bleached All-Purpose Flour – Maintains a soft, moist dough; avoid unbleached flour to prevent dryness.
- Baking Soda – Essential for leavening; helps cookies rise to the perfect height.
- Baking Powder – Enhances the cookie’s texture by adding lightness.
- Fine Sea Salt – Balances the sweetness and elevates the overall flavor profile.
- Large Eggs – Adds moisture and binds ingredients together; use at room temperature for best results.
- Milk – Aids in achieving the right dough consistency, creating the perfect chewy texture.
- Vanilla Extract – Enhances the flavor profile, making each bite even more delightful.
For the Filling
- Strawberry Jam or Jelly – Provides those gooey flavor pockets; chill for best results to prevent leaking during baking.
Step‑by‑Step Instructions for Peanut Butter & Jelly Cookies
Step 1: Preheat the Oven
Begin by preheating your oven to 350°F (175°C). While the oven heats up, take a moment to line your baking sheets with parchment paper to prevent sticking and ensure easy cleanup. This will help your Peanut Butter & Jelly Cookies bake evenly and achieve a perfect golden color.
Step 2: Melt the Butter
In a microwave-safe bowl, melt the unsalted butter until it’s completely liquid, which should take about 30 seconds. Stir in the creamy natural peanut butter, ensuring both are well-combined and smooth. The warmth of the melted butter will help create a deliciously rich base for your cookies!
Step 3: Combine Sugars
Add in the light brown sugar and granulated sugar, whisking vigorously until the mixture is smooth and glossy. This will take about 1-2 minutes. Let the mixture cool slightly until it’s warm to the touch; this ensures the eggs won’t scramble when added next, helping your Peanut Butter & Jelly Cookies turn out perfectly.
Step 4: Incorporate Eggs and Milk
Once cooled, whisk in the large eggs, milk, and vanilla extract until fully combined. The eggs will provide moisture and bind all the ingredients together, making for a rich dough. This step is crucial for creating the desired chewy texture in your cookies, so make sure everything is mixed well.
Step 5: Mix Dry Ingredients
In a separate bowl, whisk together the bleached all-purpose flour, baking soda, baking powder, and fine sea salt until evenly blended. Gradually add this flour mixture to your wet ingredients, folding it in gently. The dough should be soft and slightly sticky, perfect for shaping your Peanut Butter & Jelly Cookies.
Step 6: Shape the Cookies
Using a 3-tablespoon cookie scoop, scoop out portions of cookie dough and roll them into balls between your hands. Place each ball on the prepared baking sheets, leaving about 3 inches of space between them. This allows room for spreading as they bake, ensuring you have beautiful, round cookies.
Step 7: Create the Wells
Using your thumb, gently press down in the center of each dough ball to create a well. This step is essential as it will hold the strawberry jam nicely. Don’t worry if the edges crack a bit; that’s normal! Make sure each well has enough space for a generous dollop of jam.
Step 8: Fill with Jam
Carefully fill each well with chilled strawberry jam, ensuring some jam peeks out to create that classic look. Take care not to overfill, which could cause the jam to leak out during baking. This will give your Peanut Butter & Jelly Cookies that delightful gooeyness everyone loves.
Step 9: Bake the Cookies
Place the baking sheets in the preheated oven and bake for about 14 minutes, or until the edges of your cookies are golden brown. Keep an eye on them; the center should remain soft. These visual cues are crucial to achieving the perfect texture for your cookies.
Step 10: Cool the Cookies
Once baked, remove the cookies from the oven and let them cool on the baking sheets for about 5 minutes. This cooling period allows them to set before transferring to a wire rack. These soft and chewy Peanut Butter & Jelly Cookies will be a warm treat, perfect for enjoying right away!
What to Serve with Classic Peanut Butter & Jelly Cookies
The aroma of fresh-baked cookies fills your home, creating a warm, inviting atmosphere perfect for gathering loved ones.
- Milk: A classic pairing that balances the sweetness and richness of the cookies, making it a nostalgic dip for each bite.
- Fresh Fruit Salad: A vibrant mix of berries and melons adds refreshing brightness, offsetting the cookies’ indulgence beautifully.
- Ice Cream: Creamy vanilla or strawberry ice cream creates a delightful contrast, turning your cookies into an unforgettable dessert sandwich.
- Coffee: A warm cup of coffee provides a rich, roasted flavor, balancing the sweetness of the cookies for a cozy afternoon treat.
- Chocolate Sauce: Drizzle warm chocolate sauce over the top for an extra layer of decadence; it’s a chocolate lover’s dream.
- Nutella Spread: For a twist, spread a little Nutella on top of a cookie, enhancing it with a chocolate-hazelnut flavor that’s utterly divine.
- S’mores Dip: Serve these cookies alongside a warm s’mores dip for dipping, adding a fun element to any gathering.
- Homemade Lemonade: The zesty and refreshing taste of lemonade balances the richness, creating a perfect sweet and tart combo.
Expert Tips for Peanut Butter & Jelly Cookies
Natural Peanut Butter: Make sure to use creamy natural peanut butter for the best flavor; stir it well to combine the oils and prevent greasy cookies.
Don’t Overmix: When incorporating dry ingredients into the wet mixture, mix just until combined; overmixing can lead to tough cookies.
Jam Temperature: Chill your strawberry jam before filling the cookies; this helps it hold its shape and prevents leaks during baking.
Spacing Matters: Leave at least 3 inches between cookie dough balls on the baking sheet; this allows for proper spreading and ensures evenly baked Peanut Butter & Jelly Cookies.
Check for Doneness: Look for golden edges while keeping the center soft; overbaking can lead to a dry texture, while underbaking may make them too gooey.
Peanut Butter & Jelly Cookies Variations
Feel free to let your creativity shine and customize these cookies to your taste with these delightful variations!
-
Almond Butter: Swap out the peanut butter for almond butter for a nutty twist and a slightly different flavor profile. It adds a delightful richness that’s surprisingly delightful!
-
Different Jams: Experiment with various jams like raspberry, grape, or even apricot for a burst of unique flavors in every bite. Each jam brings its own fruity zing that makes these cookies a true delight!
-
Spicy Kick: Add a pinch of cayenne pepper or chili powder to the dough for a sweet and spicy flavor combo. It’s an unexpected twist that will tantalize your taste buds!
-
Oatmeal Boost: Mix in half a cup of rolled oats for a chewy texture and an extra dose of fiber. These cookies can become a more wholesome snack without sacrificing any flavor!
-
Chocolate Delight: Fold in a handful of chocolate chips or chunks to create a luxurious chocolate-peanut butter experience. Is there anything better than the combination of chocolate and peanut butter? I think not!
-
Nut-Free: Use sunflower seed butter instead of peanut butter to make these cookies nut-free, perfect for school lunches or gatherings. Everyone can enjoy these nostalgic treats without worry.
-
Flour Twist: Substitute coconut flour for half of the all-purpose flour for a unique flavor and a subtle sweetness. Coconut flour can add an interesting layer to your cookies that many will love!
-
Savory Hint: For an unexpected savory flavor, sprinkle a touch of sea salt on top before baking. It elevates the sweetness of the jam beautifully while adding a gourmet touch.
Don’t forget to check out my other cookie recipes like Buttery Raspberry Crumble and Raspberry Linzer Cookies for more inspiration on creating comforting treats that everyone will love!
Make Ahead Options
These Classic Peanut Butter & Jelly Cookies are wonderful for meal prep! You can prepare the cookie dough up to 24 hours in advance and refrigerate it in an airtight container to maintain its freshness. Additionally, you can roll the dough into balls and create the wells, covering them tightly before chilling, to save time on busy baking days. When you’re ready to enjoy these nostalgic treats, simply fill the wells with chilled jam and bake as instructed. This way, you’ll have delicious cookies with minimal last-minute effort—perfectly soft, chewy, and just as delightful as if they were freshly made!
How to Store and Freeze Peanut Butter & Jelly Cookies
Room Temperature: Store cookies in an airtight container at room temperature for up to 2 days to maintain their soft and chewy texture.
Fridge: If you prefer a cooler treat, you can refrigerate the cookies; they’ll stay fresh for up to 5 days, but may lose some of their initial softness.
Freezer: For longer storage, freeze the cookies in a single layer on a baking sheet. Once frozen, transfer them to a freezer-safe bag or container for up to one month.
Reheating: To enjoy warm cookies, reheat in the oven at 350°F for 5–7 minutes, or until warmed through—perfect for that fresh-baked experience!
Peanut Butter & Jelly Cookies Recipe FAQs
What kind of peanut butter is best for the cookies?
Absolutely! I recommend using creamy natural peanut butter for the richest flavor. Be sure to stir it well to combine the oils before measuring; this ensures that every cookie is evenly flavored. Avoid using crunchy peanut butter unless you prefer that texture in your cookies.
How should I store leftover cookies?
These delightful Peanut Butter & Jelly Cookies can be stored in an airtight container at room temperature for up to 2 days. If you want to keep them longer, refrigerate them for up to 5 days, but keep in mind that refrigeration may affect their softness.
Can I freeze Peanut Butter & Jelly Cookies?
Very much! To freeze your cookies, place them in a single layer on a baking sheet and freeze until solid—about 1-2 hours. Once frozen, transfer them to a freezer-safe bag or container. They will last for up to one month. When you’re ready to enjoy, simply thaw them overnight in the fridge or reheat directly from frozen in the oven at 350°F for 5–7 minutes.
What if my cookie dough is too dry?
If you find your cookie dough is too dry, it could be due to the flour measurement or the humidity in your kitchen. You can add a splash more milk—start with just 1 tablespoon at a time until the dough is soft but still manageable. Remember, it’s crucial not to overmix once you add the dry ingredients, so mix just until blended!
Can pets eat these cookies?
No, it’s best to keep these cookies away from pets. Peanut butter itself can be safe for dogs in small quantities, but keep an eye on the sugars and other ingredients, like chocolate or certain jams, as they can be harmful. Always consult with your veterinarian before introducing any human foods to your pets.
What if I want a different flavor jam?
The more the merrier! Feel free to experiment with your favorite jams! Raspberry or grape can be fantastic substitutes for the traditional strawberry jam. Just ensure that the jams are chilled before filling the cookies to prevent leakage while baking.
Peanut Butter & Jelly Cookies That Take You Back to Childhood
Ingredients
Equipment
Method
- Preheat your oven to 350°F (175°C) and line baking sheets with parchment paper.
- Melt the unsalted butter and stir in the creamy peanut butter until smooth.
- Add light brown sugar and granulated sugar, whisk until smooth and glossy.
- Whisk in eggs, milk, and vanilla extract until combined.
- Mix flour, baking soda, baking powder, and salt in a separate bowl. Gradually add to wet ingredients.
- Use a cookie scoop to shape dough into balls and place on baking sheets with space in between.
- Press down in the center of each dough ball to create a well.
- Fill each well with chilled strawberry jam.
- Bake for about 14 minutes or until edges are golden brown.
- Let cool on baking sheets for about 5 minutes before transferring to a wire rack.
Leave a Reply