
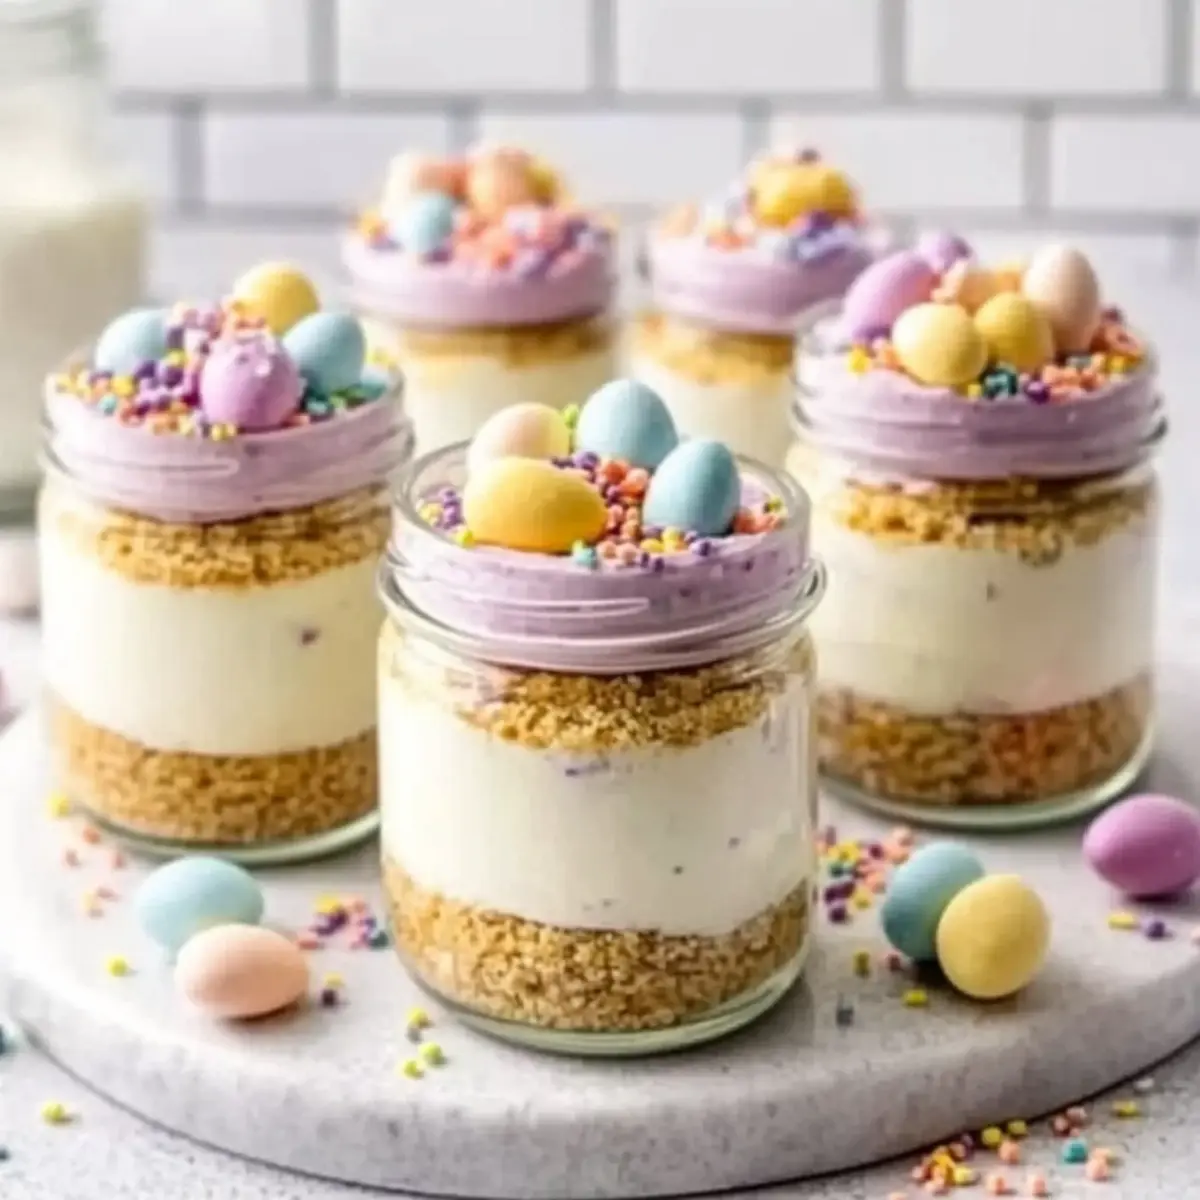
As I stood in my kitchen, colorful decorations strewn about from our recent Easter preparations, a thought struck me—why not create a dessert that captures the joy and spirit of springtime? Enter these delightful Mini Easter Cheesecake Jars! They are not only no-bake and incredibly easy to whip up, but they’re also the perfect make-ahead treat for gatherings, leaving you free to enjoy the festivities. Each jar is a little piece of creamy happiness, layered over a crunchy cookie base and topped with festive sprinkles and chocolate eggs. Kid-friendly and customizable to fit your family’s tastes, these adorable desserts add a playful flair to any brunch or potluck. Curious about how to make these colorful jars a highlight of your celebration? Let’s dive in!
Why are Mini Cheesecake Jars So Amazing?
No-Bake Convenience: These Mini Easter Cheesecake Jars require zero baking, making them a hassle-free option for busy kitchens.
Customizable Joy: Feel free to swap flavors or toppings, whether you prefer chocolate delights from our Chocolate Orange Cheesecake or fruity layers inspired by a Lemon Cheesecake Cake.
Colorful Presentation: The pastel shades add a vibrant touch to your table, making these jars a feast for the eyes as well as the palate.
Kid-Friendly Fun: Perfect for little hands, these treats are not just delicious but also a fun project to get kids involved in holiday festivities.
Make-Ahead Magic: Prepare them a day in advance. Spend less time in the kitchen and more time enjoying special moments with family and friends.
Mini Easter Cheesecake Jars Ingredients
For the Crust
- Graham cracker crumbs – 1 1/2 cups for that perfect crunchy base. Substitute with digestive biscuits for a different flavor.
- Unsalted butter – 5 tablespoons, melted to bind the crumbs together; coconut oil works well for a dairy-free option.
- Sugar – 2 tablespoons to add just the right amount of sweetness to the crust.
- Pinch of salt – Enhances the flavors in your crust, elevating it to the next level.
For the Cheesecake Filling
- Cream cheese – 12 oz, softened; this is the star ingredient for that creamy texture we all love. Make sure it’s not melted!
- Powdered sugar – 1/2 cup for the perfect sweetness; consider reducing to 1/3 cup if you want a more lemony taste.
- Vanilla extract – 1 teaspoon to add depth to the flavor profile.
- Lemon juice – 1 tablespoon brightens the filling and complements the cheesecake beautifully.
- Heavy whipping cream – 1 cup, cold; whip this well for that fluffy, airy consistency. Remember, under-whipping may lead to runniness!
For Color and Flavor (Optional)
- Gel food coloring – A few drops in pastel shades can make your jars festive without affecting the taste.
- Lemon zest or almond extract – To taste, these can elevate the flavor and add a hint of citrus or nuttiness.
For Toppings
- Mini chocolate eggs or jelly beans – These fun, Easter-themed toppings are sure to please kids and adults alike!
- Pastel sprinkles – Add a pop of color and festive charm to your jars.
- Shredded coconut – Optional, but when dyed green, it perfectly resembles “grass” for decoration.
These Mini Easter Cheesecake Jars are not just a treat; they’re a celebration in every bite!
Step‑by‑Step Instructions for Mini Easter Cheesecake Jars
Step 1: Prepare the Crust
In a mixing bowl, combine 1 1/2 cups of graham cracker crumbs, 2 tablespoons of sugar, a pinch of salt, and 5 tablespoons of melted unsalted butter. Stir until the mixture resembles wet sand. Firmly press the crumb mixture into the bottom of your small jars, creating an even layer. This crunchy base will provide a delicious foundation for your Mini Easter Cheesecake Jars.
Step 2: Whip the Cream
In a separate chilled mixing bowl, pour in 1 cup of cold heavy whipping cream. Using an electric mixer, whip the cream on medium-high speed until medium-stiff peaks form. This should take about 3–5 minutes. Once whipped, carefully transfer the whipped cream to the refrigerator to keep it cool while you prepare the cheesecake filling.
Step 3: Make the Filling
In the same mixing bowl, beat 12 oz of softened cream cheese, 1/2 cup of powdered sugar, 1 teaspoon of vanilla extract, and 1 tablespoon of lemon juice together until smooth and fluffy, which should take about 1–2 minutes. Ensure there are no lumps, resulting in a creamy cheesecake filling that will delight your taste buds in the Mini Easter Cheesecake Jars.
Step 4: Combine
Gently fold the whipped cream into the cream cheese mixture in two additions. Use a spatula to combine the two mixtures until no streaks remain. This should maintain the lightness of the whipped cream, ensuring your filling is airy and creamy. Now you’ve created a luscious cheesecake filling ready for your jars!
Step 5: Add Color (Optional)
If you’d like to add some festive flair to your Mini Easter Cheesecake Jars, divide the cheesecake filling into separate bowls. In each bowl, add a few drops of gel food coloring in pastel shades. Stir gently until you achieve your desired colors. This colorful filling will make your jars look delightful and vibrant for spring celebrations.
Step 6: Fill Jars
Using a piping bag or a spoon, carefully fill each jar with the cheesecake filling, layering it over the crust. Leave some space at the top for decorations. Aim for an even distribution of filling in each jar, making sure to showcase the beautiful colors of your Mini Easter Cheesecake Jars.
Step 7: Chill
Cover each jar with a lid or plastic wrap and refrigerate for at least 2 hours to allow the cheesecake filling to set properly. This chilling time also enhances the flavors, making your Mini Easter Cheesecake Jars even more irresistible when served fresh.
Step 8: Decorate
Just before serving, unleash your creativity by topping the jars with shredded coconut dyed green to resemble grass, pastel sprinkles, and mini chocolate eggs. These fun decorations will add a festive touch to your Mini Easter Cheesecake Jars, making them a beautiful centerpiece at your brunch or gathering.
Mini Easter Cheesecake Jars Variations
Feel the joy of customizing these delightful jars to fit your cravings or dietary needs! Let your creativity shine with these fun ideas.
- Dairy-Free: Substitute cream cheese with a dairy-free alternative like cashew cream for a smooth and rich filling.
- Chocolate Lovers: Use chocolate cookie crumbs for the crust and fold melted chocolate into the cheesecake filling for an indulgent twist. What a treat!
- Fruit Burst: Layer in a fruit compote, such as strawberry or blueberry, between the crust and cheesecake for a delicious fruity addition. A burst of flavor awaits!
- Nutty Flavor: Mix in 2-3 tablespoons of pistachio paste into the filling for a unique nutty flavor. This adds an exciting depth that complements the cheesecake beautifully.
- Coconut Delight: Fold in some toasted coconut flakes into the filling for added texture and a tropical touch. It’s like a mini vacation in a jar!
- Cool Mint: Swap vanilla extract with mint extract for a refreshing twist perfect for spring. Top with crushed mint candies for a delightful crunch.
- Low Sugar Option: Use a sugar substitute in place of powdered sugar for a healthier take on the filling, suited for those watching their sugar intake. Delicious and guilt-free!
- Gourmet Touch: Drizzle a caramel or chocolate sauce over the top before serving for an elegant presentation that is sure to impress. A touch of luxury!
These variations allow you to tailor your Mini Easter Cheesecake Jars to your liking, whether you’re in the mood for something fruity or decadent! Pair with our perfect Mini Grilled Cheese for a delightful complete meal or top with sprinkles like those in our Pistachio Mushroom Cheesecake for extra festive flair. Happy creating!
Expert Tips for Mini Easter Cheesecake Jars
-
Cream Cheese Care: Use cream cheese that is softened but not melted; this ensures a creamy texture and avoids runniness in your filling.
-
Whipping Wisely: Whip your heavy cream to medium-stiff peaks—under-whipping can lead to a watery filling that won’t hold its shape in the jar.
-
Freeze for Later: For longer enjoyment, these jars can be frozen for up to a month without toppings. Just thaw them in the fridge overnight for the best results.
-
Layering Effectively: When adding food coloring, be gentle to maintain the fluffiness of the filling while achieving that vibrant look for your Mini Easter Cheesecake Jars.
-
Final Touches: Add candy toppings just before serving to keep them fresh and prevent color bleeding—this ensures your jars look as delightful as they taste.
Make Ahead Options
These Mini Easter Cheesecake Jars are perfect for meal prep and can save you time during busy spring celebrations! You can prepare the crust and cheesecake filling up to 24 hours in advance, storing them separately in the refrigerator to maintain freshness. Simply keep the crust in an airtight container and refrigerate the filling in a mixing bowl covered with plastic wrap. When you’re ready to serve, fill the jars with the cheesecake mixture and decorate with toppings just before presenting—this keeps everything looking fresh and delightful. By prepping ahead, you’ll create a stunning dessert with minimal last-minute effort, allowing you to enjoy your gatherings even more!
How to Store and Freeze Mini Easter Cheesecake Jars
Fridge: Store covered Mini Easter Cheesecake Jars in the refrigerator for up to 3 days. Keep them sealed to maintain freshness and avoid any absorption of fridge odors.
Freezer: For longer storage, freeze the jars without their toppings for up to 1 month. Be sure to label the jars for easy identification.
Thawing: To enjoy your frozen treats, simply transfer the jars to the refrigerator and let them thaw overnight. This ensures they retain their creamy texture.
Serving: Add any decorations or toppings right before serving to keep them crisp and visually appealing. Enjoy your delicious cheesecake jars!
What to Serve with Mini Easter Cheesecake Jars
Imagine a bright spring gathering filled with laughter and joy, where these colorful desserts steal the show and complement a delightful meal.
-
Fresh Berry Salad: A mix of strawberries, raspberries, and blueberries adds a burst of freshness, balancing the creaminess of the cheesecake jars.
-
Lemon Curd Tart: This zesty tart is a perfect contrast to the sweet cheesecake, providing a bright citrus flavor that awakens the palate.
-
Minty Lamb Chops: Grilled lamb marinated with fresh herbs offers a savory touch that pairs beautifully with the dessert’s sweetness, making every bite memorable.
-
Sparkling Lemonade: A refreshing drink that echoes the citrus notes of the cheesecake, adding a fizzy brightness to your celebratory spread.
-
Carrot Cake: An Easter classic, this moist and spiced cake creates a harmonious link between flavors while adding a nostalgic touch to the table décor.
-
Chocolate Easter Eggs: These classic treats can serve as additional toppings for the jars or sweet nibblers alongside the cheesecake, offering that extra festive flair.
With these pairings, your Mini Easter Cheesecake Jars become part of a joyful spring feast that brightens everyone’s day!
Mini Easter Cheesecake Jars Recipe FAQs
What type of graham crackers should I use for the crust?
You can use traditional graham cracker crumbs or digestive biscuits for a slightly different flavor. If you’re looking for a gluten-free option, there are gluten-free graham crackers available that work just as well!
How should I store the Mini Easter Cheesecake Jars?
Keep your Mini Easter Cheesecake Jars covered in the refrigerator for up to 3 days. Make sure to seal them tightly to maintain their freshness and protect them from any fridge odors.
Can I freeze the Mini Easter Cheesecake Jars?
Absolutely! You can freeze the jars without their toppings for up to 1 month. To freeze, simply cover them tightly with lids or plastic wrap. When you’re ready to enjoy them, thaw the jars overnight in the refrigerator for the best texture.
What should I do if my cream cheese is too soft?
To achieve the perfect consistency, ensure your cream cheese is softened to room temperature but not melted! If you’ve accidentally over-softened it, refrigerate it for a bit until it’s cool. This will help in achieving that creamy and stable filling you desire.
Are these cheesecake jars suitable for those with dietary restrictions?
You can definitely customize the recipe for various dietary needs! If someone has gluten sensitivities, use gluten-free cookies for the crust. For dairy-free options, substitute cream cheese and heavy cream with lactose-free or plant-based alternatives. Just double-check any toppings like candy or sprinkles to ensure they align with dietary preferences.
How can I keep the toppings from bleeding into the filling?
To maintain the integrity of your toppings, only add them right before serving. This will keep them crisp and visually striking, preventing any color bleeding into your delicious Mini Easter Cheesecake Jars.
Mini Easter Cheesecake Jars for a Festive Spring Delight
Ingredients
Equipment
Method
- In a mixing bowl, combine graham cracker crumbs, sugar, salt, and melted butter. Stir until the mixture resembles wet sand. Press into the bottom of jars to create the crust.
- In a separate bowl, whip heavy cream on medium-high speed until medium-stiff peaks form, about 3–5 minutes. Refrigerate to keep cool.
- Beat cream cheese, powdered sugar, vanilla extract, and lemon juice until smooth and fluffy.
- Gently fold whipped cream into the cream cheese mixture until no streaks remain.
- Optionally, divide filling and mix in gel food coloring to achieve desired colors.
- Fill jars with cheesecake filling over the crust, leaving space for decorations.
- Refrigerate for at least 2 hours to set.
- Decorate with coconut, sprinkles, and mini chocolate eggs before serving.
Leave a Reply