
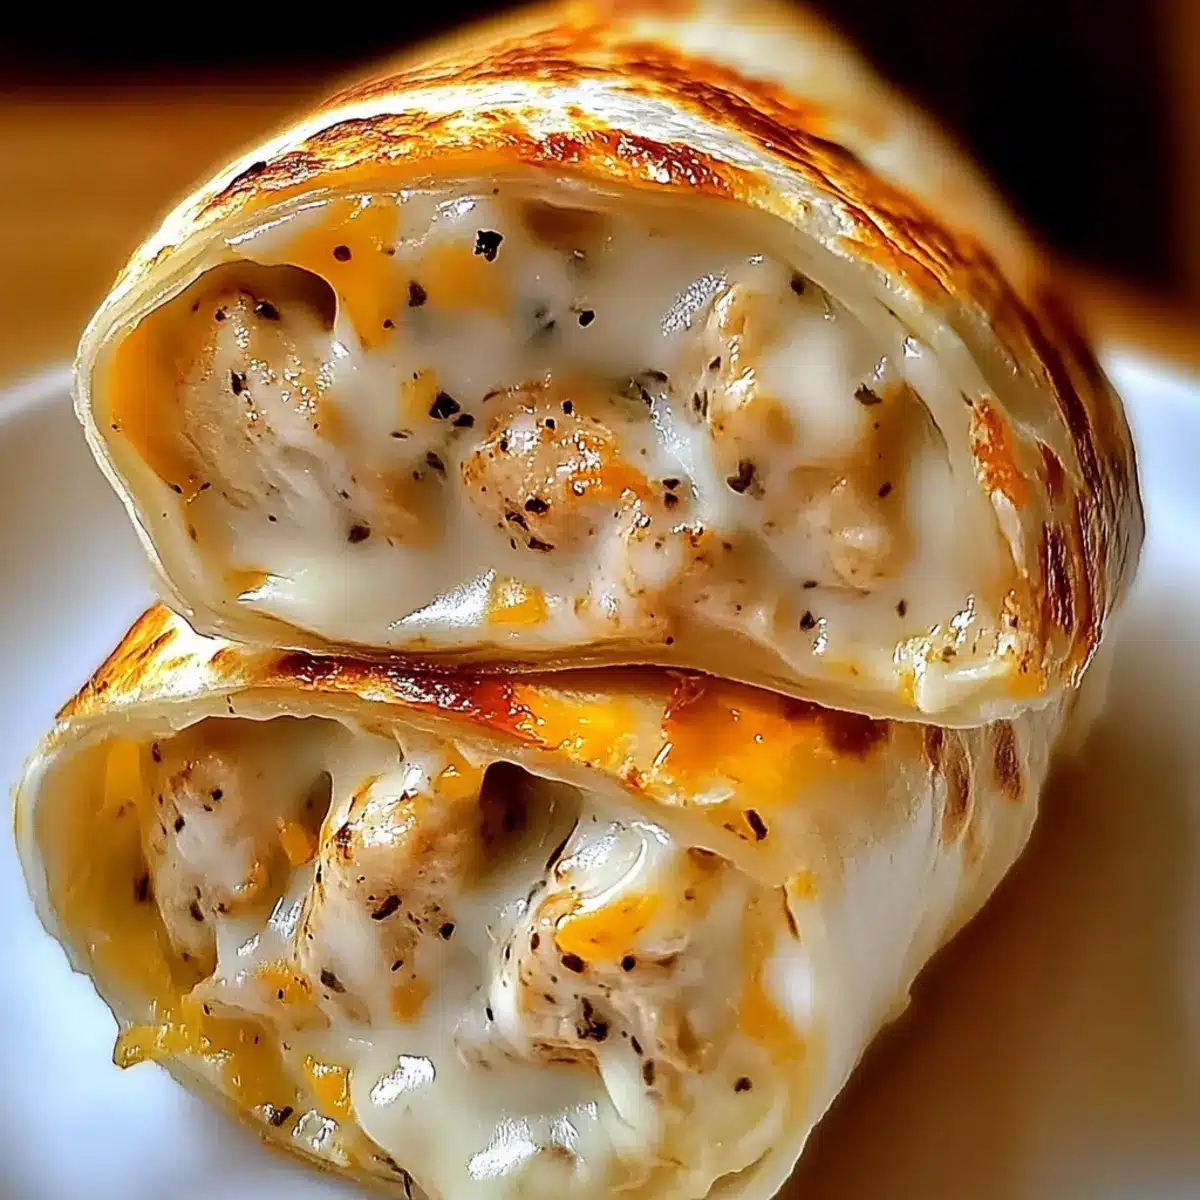
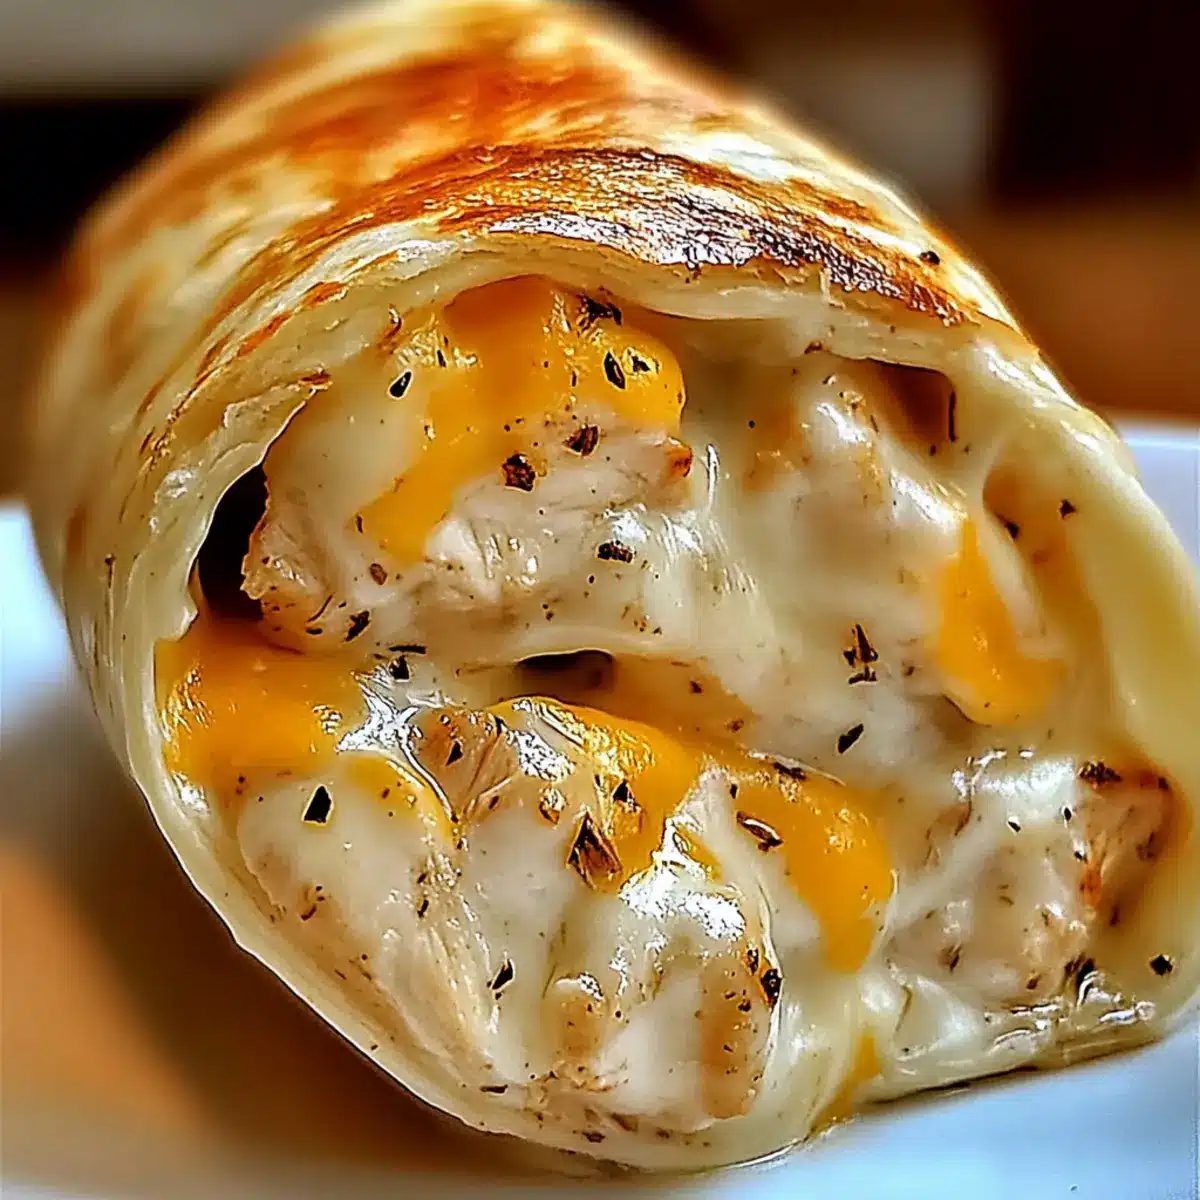
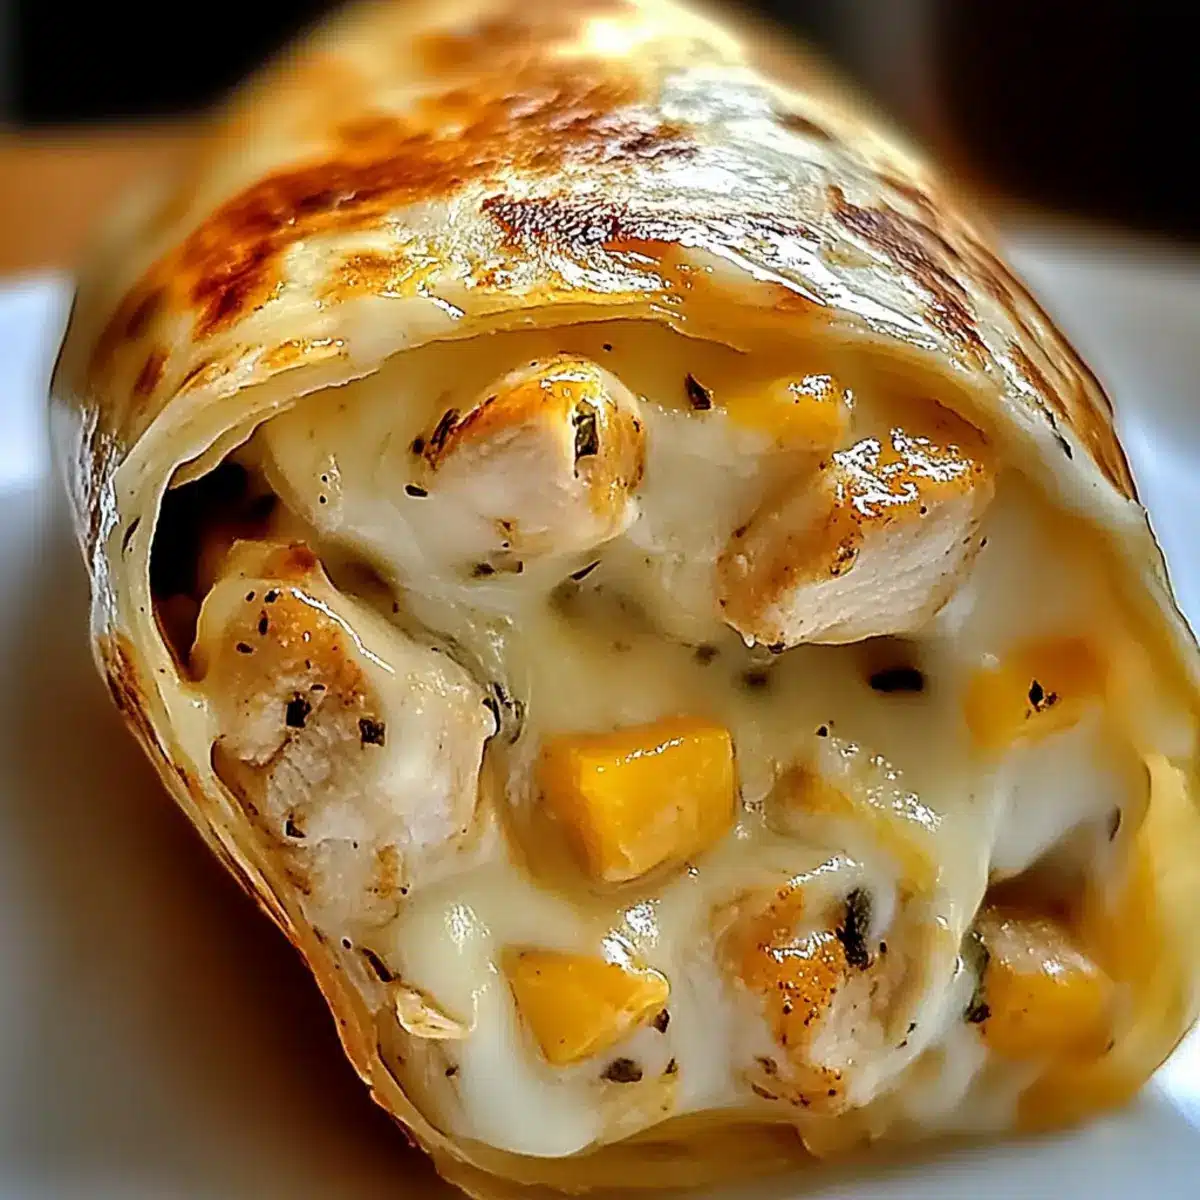
As I stood in my kitchen, the enticing aroma of sautéed garlic began to dance through the air, instantly lifting my spirits. That’s the magic of these Cheesy Garlic Chicken Wraps—a simple yet heavenly combination of tender chicken, rich garlic flavor, and melted cheese neatly tucked into soft tortillas. Perfect for those hectic evenings, this recipe can be whipped up in under thirty minutes, ensuring that you serve a homemade meal without the hassle. And the best part? It’s incredibly customizable, allowing you to switch up the fillings to suit your family’s preferences or dietary needs, including gluten-free tortillas. Who knew meal prep could be this satisfying and versatile? Ready to unwrap a delicious dinner?
Why Are Cheesy Garlic Chicken Wraps Perfect?
Quick and Simple: These wraps are a lifesaver for busy weeknights, allowing you to prepare a hearty meal in under thirty minutes.
Flavor Explosion: The savory blend of garlic, chicken, and melted cheese creates a taste that’s sure to delight every palate.
Endless Customization: Want to keep it vegetarian? Substitute chicken with roasted veggies, or try integrating different cheeses for exciting flavor combinations.
Family-Friendly: These wraps are a hit with both kids and adults, making dinner time fun and enjoyable.
Healthy Options: Use gluten-free tortillas or swap in Greek yogurt for sour cream to suit dietary preferences while keeping the flavors intact.
Whether paired with a side of fresh salsa or a crisp salad, these wraps promise to transform your dinner experience. Don’t forget to check out more easy meal ideas like Chicken Enchiladas Cozy or Garlic Pasta Comfort for your next culinary adventure!
Cheesy Garlic Chicken Wraps Ingredients
For the Chicken Filling
• Cooked Chicken – Provides protein and bulk; use leftover rotisserie chicken for flavor and convenience.
• Garlic (minced) – Adds aromatic flavor; garlic powder can be used if fresh is unavailable.
• Italian Seasoning – Adds herbal flavor to the filling; substitute with any preferred herbs.
For the Cheesy Mixture
• Cream Cheese – Contributes creaminess and binds the filling; ensure it’s softened for easy mixing.
• Shredded Cheese (Mozzarella/Cheddar) – Adds creaminess and flavor; feel free to mix cheese types for a richer taste.
• Sour Cream – Enhances creaminess and provides tang; Greek yogurt is a tasty, lower-fat alternative.
• Garlic Powder – Rounds out garlic flavor; optional if using fresh garlic.
For Assembly
• Large Tortillas – Encases the filling; use whole-wheat, spinach, or gluten-free options for dietary needs.
• Butter (melted) – Used for sautéing garlic and adds richness; can replace with olive oil for a lighter option.
• Salt and Pepper – For seasoning; adjust to taste.
• Fresh Parsley – For garnish; optional, adds a pop of color and freshness.
With these ingredients, your homemade Cheesy Garlic Chicken Wraps are just moments away from being devoured!
Step‑by‑Step Instructions for Cheesy Garlic Chicken Wraps
Step 1: Sauté Garlic
Begin by melting butter in a skillet over medium heat. Once the butter is bubbling, add minced garlic, stirring frequently for about 1-2 minutes until it becomes fragrant and lightly golden. Be careful not to burn the garlic, as this can lead to a bitter taste that can affect your delicious Cheesy Garlic Chicken Wraps.
Step 2: Heat Chicken
Add cooked chicken to the skillet, seasoning it generously with garlic powder, Italian seasoning, salt, and pepper. Stir the mixture well and allow the chicken to heat through for approximately 5 minutes. The chicken should be warm and well-coated with the buttery garlic goodness, enhancing the overall flavor of your wraps.
Step 3: Mix Cheeses
In a separate bowl, combine softened cream cheese, sour cream, and half of the shredded cheese. Using a spatula or a mixer, blend until the mixture is smooth and creamy. This cheese mixture will bind your filling and contribute to the deliciousness of your Cheesy Garlic Chicken Wraps, adding a decadent touch.
Step 4: Combine Mixtures
Carefully add the heated chicken mixture to your cheese mixture in the bowl. Stir gently but thoroughly until everything is combined into a cohesive filling. This step is crucial as it ensures that each bite of your wraps is bursting with the savory goodness of cheesy garlic and tender chicken.
Step 5: Assemble Wraps
With large tortillas laid flat on a clean surface, divide the chicken-cheese mixture evenly among them, placing it in the center. Sprinkle the remaining shredded cheese on top, then fold the sides of the tortillas inward and roll them tightly from the bottom up. This will create a neat wrap ready for cooking!
Step 6: Cook Wraps
Heat the skillet again over medium heat. Carefully place the assembled wraps seam-side down in the skillet, cooking for 2-3 minutes on each side until they are golden brown and crispy. The cheese should be melted and gooey inside, making your Cheesy Garlic Chicken Wraps a hearty and satisfying meal.

Make Ahead Options
These Cheesy Garlic Chicken Wraps are perfect for meal prep enthusiasts! You can prepare the chicken and cheese filling up to 24 hours in advance. Simply sauté the garlic, heat the chicken, and mix with the cheeses. Store the filling in an airtight container in the refrigerator, which helps maintain its creamy goodness without drying out. When you’re ready to serve, just assemble the wraps by spreading the filling onto tortillas, roll them up, and cook in a skillet for 2-3 minutes on each side until golden and melty. This way, you can enjoy a delicious homemade meal with minimal effort on busy weeknights!
How to Store and Freeze Cheesy Garlic Chicken Wraps
Fridge: Store leftover wraps in an airtight container for up to 3 days. Reheat in a skillet over medium heat for best results, ensuring the cheese melts beautifully.
Freezer: Freeze wrapped Cheesy Garlic Chicken Wraps in a single layer on a baking sheet, then transfer to a resealable freezer bag for up to 2 months. Reheat from frozen by baking in the oven at 375°F (190°C) until heated through.
Reheating: For optimal texture, thaw in the fridge overnight before reheating in a skillet or oven. This prevents sogginess and keeps them crispy.
Make-Ahead Tip: You can prepare the filling in advance, store it in the fridge for up to 2 days, and assemble the wraps just before cooking for a quick meal.
What to Serve with Cheesy Garlic Chicken Wraps
Savoring these delightful wraps opens up a world of meal possibilities, making it easy to complement their rich flavors.
-
Mixed Greens Salad: A light salad dressed in vinaigrette adds a refreshing crunch, balancing the savory richness of the wraps.
-
Pico de Gallo: Fresh, zesty salsa brings a vibrant kick, enhancing the flavors of the cheese and garlic. Perfect for dipping!
-
Guacamole: Creamy avocado dip offers a rich contrast that pairs beautifully with the warm, cheesy wraps.
-
Sweet Potato Fries: Crispy fries add a touch of sweetness and a satisfying crunch, making for a delightful contrast.
-
Crispy Onion Rings: Their crunchiness provides a fun texture that complements the soft and cheesy wraps delightfully.
-
Sparkling Lemonade: A refreshing drink that cuts through the richness, making each bite even more enjoyable.
-
Chilled White Wine: Opt for a crisp Sauvignon Blanc; its acidity enhances the meal’s savory notes without overwhelming them.
Elevate your dining experience by pairing these Cheesy Garlic Chicken Wraps with any of these delicious sides or drinks!
Cheesy Garlic Chicken Wraps Variations
Feel free to get creative and customize these wraps to suit your taste. The possibilities are endless!
-
Shrimp Swap: Replace chicken with shrimp for a delightful seafood twist. The best part? You can get them sautéed perfectly in garlic too!
-
Veggie Delight: Use roasted vegetables like zucchini and bell peppers for a scrumptious vegetarian option. They bring a different texture and flavor that’ll surprise your taste buds.
-
Spicy Kick: Add slices of jalapeños or opt for pepper jack cheese for added heat. It’s a fantastic way to give your wraps a fiery twist.
-
Herb Infusion: Incorporate fresh herbs like basil or cilantro for an aromatic upgrade. They’ll brighten up every bite and enhance the overall flavor.
-
Different Cheeses: Experiment with a mix of cheeses, such as gouda for smokiness or feta for tang. Each cheese brings its unique character to the wraps!
-
Whole Grain Goodness: Try using whole-wheat or spinach tortillas instead of white for extra fiber and flavor. They add a lovely nuttiness that complements the filling beautifully.
-
Sour Cream Substitute: Swap sour cream for Greek yogurt for a healthier option without losing the creaminess. It’s a great swap to lighten up your meal!
-
Boosted Greens: Toss in some fresh baby spinach or arugula right before rolling up the wraps. It’s an easy way to sneak in more nutrients!
And if you’re looking for more delicious ideas, consider checking out Thai Baked Chicken or Harissa Chicken Spicy to diversify your dinner lineup!
Expert Tips for Cheesy Garlic Chicken Wraps
- Garlic Mastery: Avoid burning garlic as it gives a bitter taste; sauté until just fragrant for the perfect flavor balance in your wraps.
- Tortilla Choices: Feel free to swap tortillas with whole-wheat, spinach, or gluten-free options to cater to everyone’s tastes and dietary needs.
- Pre-Make Convenience: You can assemble the wraps ahead of time and refrigerate them for up to a day; just cook them right before serving for freshness.
- Cheese Variability: Mix different cheeses like pepper jack or gouda to add complexity to flavors; don’t hesitate to experiment!
- Press for Perfection: When cooking, gently press down on the wraps with a spatula to ensure even browning and a good seal while they cook.
- Extra Garnishes: Elevate your wraps with toppings like fresh parsley or a drizzle of your favorite sauce for added flavor and visual appeal.
Cheesy Garlic Chicken Wraps Recipe FAQs
What type of cooked chicken should I use?
Absolutely! Using leftover rotisserie chicken not only infuses your Cheesy Garlic Chicken Wraps with incredible flavor but also saves you time. You can also use grilled or baked chicken if you have that on hand; just make sure it’s shredded or diced for easy mixing.
How should I store leftover wraps?
To keep your Cheesy Garlic Chicken Wraps fresh, store them in an airtight container in the refrigerator for up to 3 days. When you’re ready to indulge again, reheat them in a skillet over medium heat for the best melty cheese experience. Just a few minutes on each side will work wonders!
Can I freeze the wraps?
Yes, you can indeed! To freeze your Cheesy Garlic Chicken Wraps, first, wrap them individually in plastic wrap. Place the wrapped wraps in a single layer on a baking sheet and freeze until solid. Once frozen, transfer them into a resealable freezer bag for up to 2 months. When you’re ready to enjoy, bake from frozen at 375°F (190°C) until heated through, usually about 20-25 minutes.
What should I do if my wraps are soggy after reheating?
To prevent sogginess, make sure to thaw your frozen wraps in the refrigerator overnight before reheating. When cooking, use a skillet over medium heat, and try pressing down gently with a spatula. This will help them crisp up nicely. If they’re still soggy, you can pop them in a hot oven for a few more minutes to get that desirable golden brown texture back.
Are these wraps suitable for gluten-free diets?
Very! To make your Cheesy Garlic Chicken Wraps gluten-free, simply use gluten-free tortillas. There are various options available at most grocery stores, ensuring everyone at your table can enjoy this delicious meal without concern. Just make sure all ingredients, especially sauces and seasonings, are also gluten-free.
How can I customize the fillings?
The more the merrier! Get creative with your fillings to suit your family’s tastes. You can swap chicken for sautéed shrimp, roasted vegetables, or even a mix of both for a vegetarian version. Adding sautéed bell peppers or spinach gives extra nutrition and flavor. Feel free to experiment with different cheese combinations, such as pepper jack for a spicy kick!
Cheesy Garlic Chicken Wraps for Quick and Easy Family Meals
Ingredients
Equipment
Method
- Begin by melting butter in a skillet over medium heat. Add minced garlic and sauté for 1-2 minutes until fragrant.
- Add cooked chicken to the skillet, season with garlic powder, Italian seasoning, salt, and pepper. Heat through for about 5 minutes.
- In a bowl, mix softened cream cheese, sour cream, and half of the shredded cheese until smooth.
- Add the heated chicken mixture to the cheese mixture. Stir until well combined.
- Lay tortillas flat, divide the mixture among them, sprinkle remaining cheese on top, fold sides inward, and roll tightly.
- In the skillet, place the wraps seam-side down and cook for 2-3 minutes on each side until golden brown and crispy.
Leave a Reply