
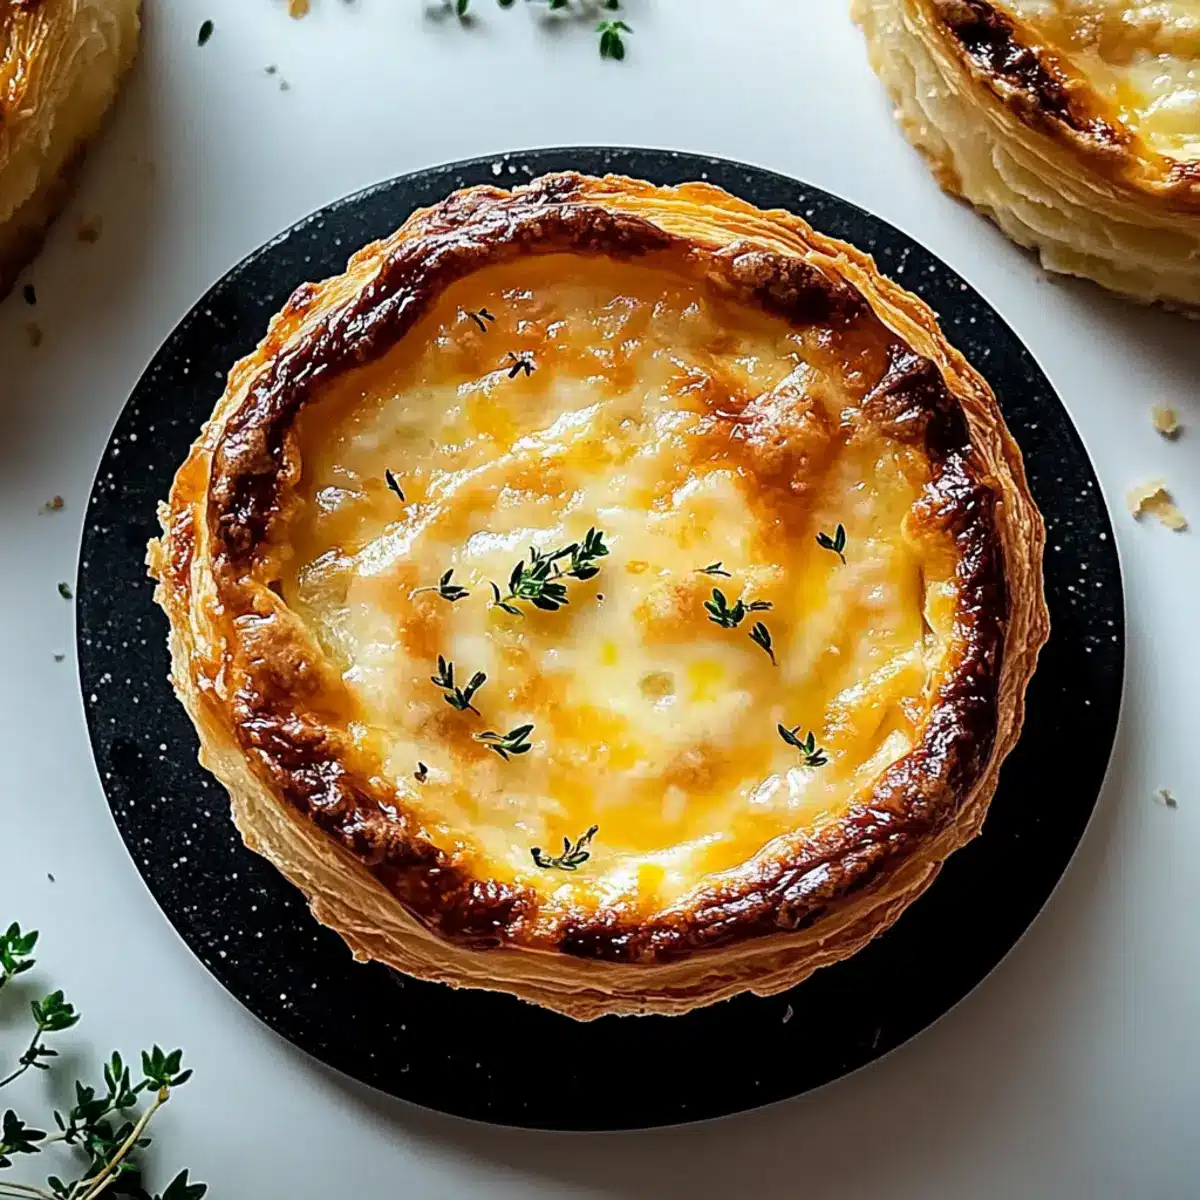
The moment I pulled the Cheesy Garlic Cruffins from the oven, my kitchen transformed into a warm, inviting haven. The smell of buttery garlic and melted cheese danced through the air, instantly making my mouth water. Each cruffin is a delightful fusion of crispy, flaky pastry and a gooey, savory center—not only are they easy to whip up, but they’re also a guaranteed crowd-pleaser that will elevate any gathering or quiet night in. Imagine savoring each layered bite, where the cheese stretches just right while a hint of garlic beckons you to take another. If you’ve been searching for a snack that feels indulgent but is simple to make, look no further! Curious about what else you can add to make these cruffins even more irresistible?
What makes Cheesy Garlic Cruffins special?
Irresistible Aroma: From the moment they bake, your kitchen will be filled with the mouthwatering scent of garlic and cheese—a true comfort food experience.
Layered Delight: The flaky pastry envelops a gooey center that creates a perfect harmony in every bite—crunchy on the outside, soft and cheesy on the inside!
Versatile Treat: Enjoy them as a snack, appetizer, or paired with a fresh salad or a bowl of French Garlic Soup.
Quick & Easy: With straightforward steps, you’ll have these warm, delectable cruffins ready in no time, satisfying those cravings without the fuss.
Crowd-Pleasing Goodness: Whether for family gatherings or cozy nights at home, these cruffins make for an impressive treat everyone will love!
Cheesy Garlic Cruffin Ingredients
• The ingredients for these delightful Cheesy Garlic Cruffins are simple yet essential for crafting that perfect flaky pastry with a cheesy centerpiece.
For the Dough
- All-Purpose Flour – Provides the structure needed for a tender dough. You can substitute it with gluten-free flour blend for a delicious gluten-free cruffin.
- Granulated Sugar – Adds a hint of sweetness to balance the flavors beautifully. Omit if you prefer a savory treat.
- Salt – Enhances overall flavor and strengthens the dough. It’s a must-have for seasoning!
- Instant Yeast – Essential for the lovely rise, contributing to the cruffin’s light texture. Active dry yeast is a suitable substitute; just increase the blooming time.
- Warm Milk – Offers hydration and flavor; both skim and full-fat options work well, or switch to a dairy-free alternative.
- Unsalted Butter (melted & softened) – Imparts richness and moisture to the dough. Margarine can be used for a dairy-free version.
- Warm Water – Activates the yeast; ensure it’s body temperature for best results.
- Large Egg – Binds the ingredients while adding richness. Flax eggs are great if you’re opting for a vegan option.
For the Filling
- Parmesan Cheese – Provides a sharp, salty flavor enhancing the richness of the cruffins. Pecorino or nutritional yeast can be used for a vegan alternative.
- Shredded Mozzarella Cheese – Adds that gooey stretch inside each cruffin. Feel free to use cheddar or a dairy-free cheese for different flavor profiles.
- Garlic (minced) – The heart of the flavor, providing that irresistible savory kick. Adjust according to your taste—sautéing it first gives a milder flavor.
- Fresh Parsley (chopped) – Brightens flavor and adds a splash of color; chives can also be used for variety.
Step‑by‑Step Instructions for Cheesy Garlic Cruffin
Step 1: Prepare Dough
In a large mixing bowl, whisk together all-purpose flour, granulated sugar, salt, and instant yeast. Create a well in the center and slowly pour in warm milk, melted butter, warm water, and the large egg. Mix until the ingredients are just combined, forming a shaggy dough, before transitioning to the countertop to begin kneading.
Step 2: Knead Dough
Turn the shaggy dough out onto a lightly floured surface and knead it for about 8-10 minutes. Use the palms of your hands to push the dough away and fold it back over itself until it becomes smooth and elastic. When it’s ready, the dough should spring back when poked but still feel slightly tacky.
Step 3: First Rise
Place the kneaded dough into a lightly greased bowl, covering it with a damp kitchen towel. Allow it to rise in a warm, draft-free area for about 1 hour, or until it has doubled in size. This crucial step ensures that your Cheesy Garlic Cruffin will be light and airy!
Step 4: Prepare Filling
While the dough rises, mix minced garlic, softened butter, and chopped parsley in a separate bowl. This garlic butter mixture will infuse flavor into your cruffins, creating that irresistible aroma when baked. Set this bowl aside, as it will unite with the cheese in the next steps.
Step 5: Shape Cruffins
After the first rise, punch down the dough and turn it out onto a floured surface. Roll it into a large rectangle about ¼ inch thick. Spread the garlic butter mixture evenly across the dough, then sprinkle the shredded mozzarella and grated Parmesan cheese on top. Start from one edge, roll the dough tightly into a log, and slice it into equal rounds.
Step 6: Second Rise
Take each sliced dough piece and place it upright in a greased muffin tin, allowing them to rest for about 20 minutes. This second rise helps the Cheesy Garlic Cruffins become fluffy and will create those beautiful layers after baking. Make sure they don’t overcrowd; a little space goes a long way.
Step 7: Bake
Preheat your oven to 375°F (190°C). Once the cruffins have rested, bake them in the preheated oven for 20-25 minutes. Keep an eye on them, as they should turn golden brown, puffed up, and exude an enticing aroma that fills your kitchen.
Step 8: Cool & Serve
When the cruffins are golden and delicious, remove them from the oven and allow them to cool slightly in the tin for about 5 minutes. Gently transfer them to a wire rack; serve warm, and feel free to garnish with additional chopped parsley for that extra touch of freshness and color.

Cheesy Garlic Cruffin Variations
Feel free to get creative with your Cheesy Garlic Cruffins—each variation brings its own delightful twist!
-
Flavorful Cheeses: Try different cheeses like cheddar, gouda, or blue cheese to create unique flavor profiles. Each cheese introduces its own character, enhancing that gooey goodness you love.
-
Savory Add-ins: Add sautéed spinach, sun-dried tomatoes, or cooked bacon to the filling for an extra flavor burst and delicious texture. Imagine sinking your teeth into the rich layers, discovering a delightful surprise within!
-
Herb Infusion: Incorporate fresh thyme or rosemary into the garlic butter for an aromatic twist. Not only do they elevate the flavor, but they also introduce a lovely fragrance that fills your kitchen.
-
Spicy Heat: For those craving a kick, mix in some red pepper flakes or diced jalapeños into the filling. These heat sources make each bite a flavor adventure, perfect for spice lovers!
-
Nutty Touch: Sprinkle in some sliced almonds or pine nuts with the cheese for a delightful crunch. The added texture creates an enjoyable contrast to the soft layers of the cruffin.
-
Gluten-Free Option: Substitute the all-purpose flour with a gluten-free flour blend to make this cruffin accessible for everyone. You’ll still enjoy that light and flaky goodness without compromise!
-
Dairy-Free Delight: Use dairy-free cheese alternatives along with coconut oil in place of butter for a completely dairy-free cruffin. Everyone deserves to indulge in this tasty treat!
-
Herbed Cream Cheese: Swap in herbed cream cheese for a rich and creamy filling. This twist will elevate the flavor profile while staying true to the essence of Cheesy Garlic Cruffins.
If you’re eager to explore more delicious garlic-infused recipes, check out the cozy flavors of Garlic Pasta Comfort or the savory delight of Garlic Butter Steak. Enjoy your baking journey!
What to Serve with Cheesy Garlic Cruffin
Indulging in these warm, flaky delights opens the door to a world of delicious pairings that will elevate your meal experience.
- Fresh Garden Salad: A crisp salad drizzled with lemon vinaigrette balances the rich flavors of the cruffins, adding brightness to each bite.
- Classic Tomato Soup: The creamy texture of tomato soup makes a perfect dip for the cruffins, enhancing that gooey cheesy goodness.
- Garlic Herb Butter Pasta: Complement the cruffins with pasta tossed in garlic herb butter for a delightful fusion of flavors that play off each other beautifully.
- Roasted Vegetables: Seasoned and roasted veggies add a delightful crunch and natural sweetness, creating a wholesome harmony alongside the cheesy treats.
- Savory Herb Dip: Serve with a garlic-infused herb dip for a decadent touch that echoes the flavors of the cruffin filling, inviting more bites.
- Chilled White Wine: A glass of chilled white wine, like Sauvignon Blanc, offers a refreshing contrast to the rich, cheesy cruffins, enhancing the overall dining experience.
- Homemade Garlic Butter: Melted garlic butter drizzled over the cruffins adds extra flavor, turning them into an irresistible indulgence.
- Chocolate Chip Cookies: For dessert, enjoy some warm chocolate chip cookies; the sweet pairing after the savory cruffins will be simply divine.
Make Ahead Options
These Cheesy Garlic Cruffins are perfect for busy cooks looking to streamline meal prep! You can prepare the dough and shape the cruffins up to 24 hours ahead. After shaping, simply cover them with plastic wrap and refrigerate. To maintain quality and texture, make sure the cruffins are well-sealed to prevent drying out. When ready to bake, allow them to rest for 20 minutes at room temperature before popping them in the oven. You’ll have delightful, fluffy cruffins with gooey cheese and aromatic garlic, all with minimal last-minute effort! Enjoy these warm, flaky delights without sacrificing time during a busy week!
Expert Tips for Cheesy Garlic Cruffin
- Fresh Yeast Check: Always ensure your yeast is fresh for proper rising; expired yeast can lead to dense cruffins.
- Dough Texture: Aim for a dough that’s slightly tacky but not overly sticky. Adjust flour or water as needed to get it just right.
- Crispy Edges: For that perfect crispy crust, consider using a baking stone if you have one; it helps maintain an even heat.
- Monitor Baking: Keep a close eye on the cruffins while they bake; look for golden tops to avoid overbaking and maintain that delightful texture.
- Herb Infusion: Experiment with fresh herbs beyond parsley in the garlic mixture, like thyme or rosemary, for added fragrance and flavor in your Cheesy Garlic Cruffin.
How to Store and Freeze Cheesy Garlic Cruffins
Room Temperature: Store cruffins in an airtight container at room temperature for up to 2 days to maintain their flaky texture.
Fridge: For longer storage, refrigerate cruffins in an airtight container for up to 5 days. Reheat in the oven to restore warmth and crispiness.
Freezer: Wrap each cruffin tightly in plastic wrap and then in foil; freeze for up to 2 months. When ready to enjoy, thaw overnight in the fridge and reheat in the oven.
Reheating: For the best taste and texture, reheat cruffins in a preheated oven at 350°F (175°C) for about 10-15 minutes until warmed through and crispy.
Cheesy Garlic Cruffin Recipe FAQs
How do I select the right garlic for my Cheesy Garlic Cruffins?
Absolutely! Look for garlic cloves that are firm and plump, without any soft spots or signs of sprouting. Fresh garlic enhances the flavor significantly. If you see dark spots or shriveled skins, it may be past its prime.
How should I store my Cheesy Garlic Cruffins?
To keep them fresh, store your cruffins in an airtight container at room temperature for 1-2 days. If you want to prolong their life, refrigerate them for up to 5 days. Just remember to reheat them in the oven to regain that delightful crunch!
Can I freeze Cheesy Garlic Cruffins?
Yes, you can! Wrap each cooled cruffin tightly in plastic wrap, and then place them in a zip-top freezer bag. They will stay fresh for up to 2 months. When ready to enjoy, simply thaw them overnight in the fridge and reheat in a preheated oven at 350°F (175°C) for about 10-15 minutes.
What if my dough isn’t rising properly?
If your dough doesn’t rise, try checking that your yeast is fresh. Active dry yeast should be dissolved in warm water (about 110°F/43°C) before mixing. If it’s not bubbly after a few minutes, it may be expired. Ensure the dough is also in a warm place, free from drafts, for optimal rising.
Can my Cheesy Garlic Cruffins be made vegan?
Absolutely! For a vegan option, substitute the egg with a flax egg (1 tablespoon ground flaxseed mixed with 2.5 tablespoons water) and use plant-based milk and butter. Nutritional yeast can replace Parmesan cheese, providing that savory flavor without any dairy.
What’s the best way to reheat leftover Cheesy Garlic Cruffins?
For the best results, preheat your oven to 350°F (175°C) and place the cruffins on a baking sheet. Heat them for about 10-15 minutes until they’re warmed through and regain some crispiness. Enjoy that fresh-baked taste!
Cheesy Garlic Cruffin Bliss: Soft, Flaky, and Irresistibly Good
Ingredients
Equipment
Method
- In a large mixing bowl, whisk together all-purpose flour, granulated sugar, salt, and instant yeast. Create a well in the center and slowly pour in warm milk, melted butter, warm water, and the large egg. Mix until just combined, forming a shaggy dough.
- Turn the shaggy dough out onto a lightly floured surface and knead it for about 8-10 minutes until smooth and elastic.
- Place the kneaded dough into a lightly greased bowl, cover it with a damp kitchen towel, and allow it to rise in a warm area for about 1 hour until doubled in size.
- While the dough rises, mix minced garlic, softened butter, and chopped parsley in a separate bowl for the filling.
- After the first rise, punch down the dough, roll it into a large rectangle about ¼ inch thick, spread the garlic butter mixture, sprinkle cheeses, roll tightly, and slice into rounds.
- Place each sliced dough piece upright in a greased muffin tin and allow to rest for about 20 minutes.
- Preheat oven to 375°F (190°C) and bake for 20-25 minutes until golden brown.
- Once baked, cool slightly in the tin for about 5 minutes, then transfer to a wire rack and serve warm.
Leave a Reply