
As I scrolled through my favorite recipe sites, I stumbled upon a dessert that instantly transported me back to that cozy café where the air was thick with the smell of chocolate. Enter the Chocolate Brownie Cheesecake Bars: a delightful fusion of chewy brownie and creamy, dairy-free cheesecake that’s both indulgent and guilt-free. Perfect for anyone craving a sweet fix, these bars are not just gluten-free and paleo-friendly; they also cater to those with dairy sensitivities. With quick prep and luscious layers of flavor, they bring joy to every bite. Curious how to whip up this heavenly treat? Let’s dive into the recipe!
Why Are These Cheesecake Bars a Must-Try?
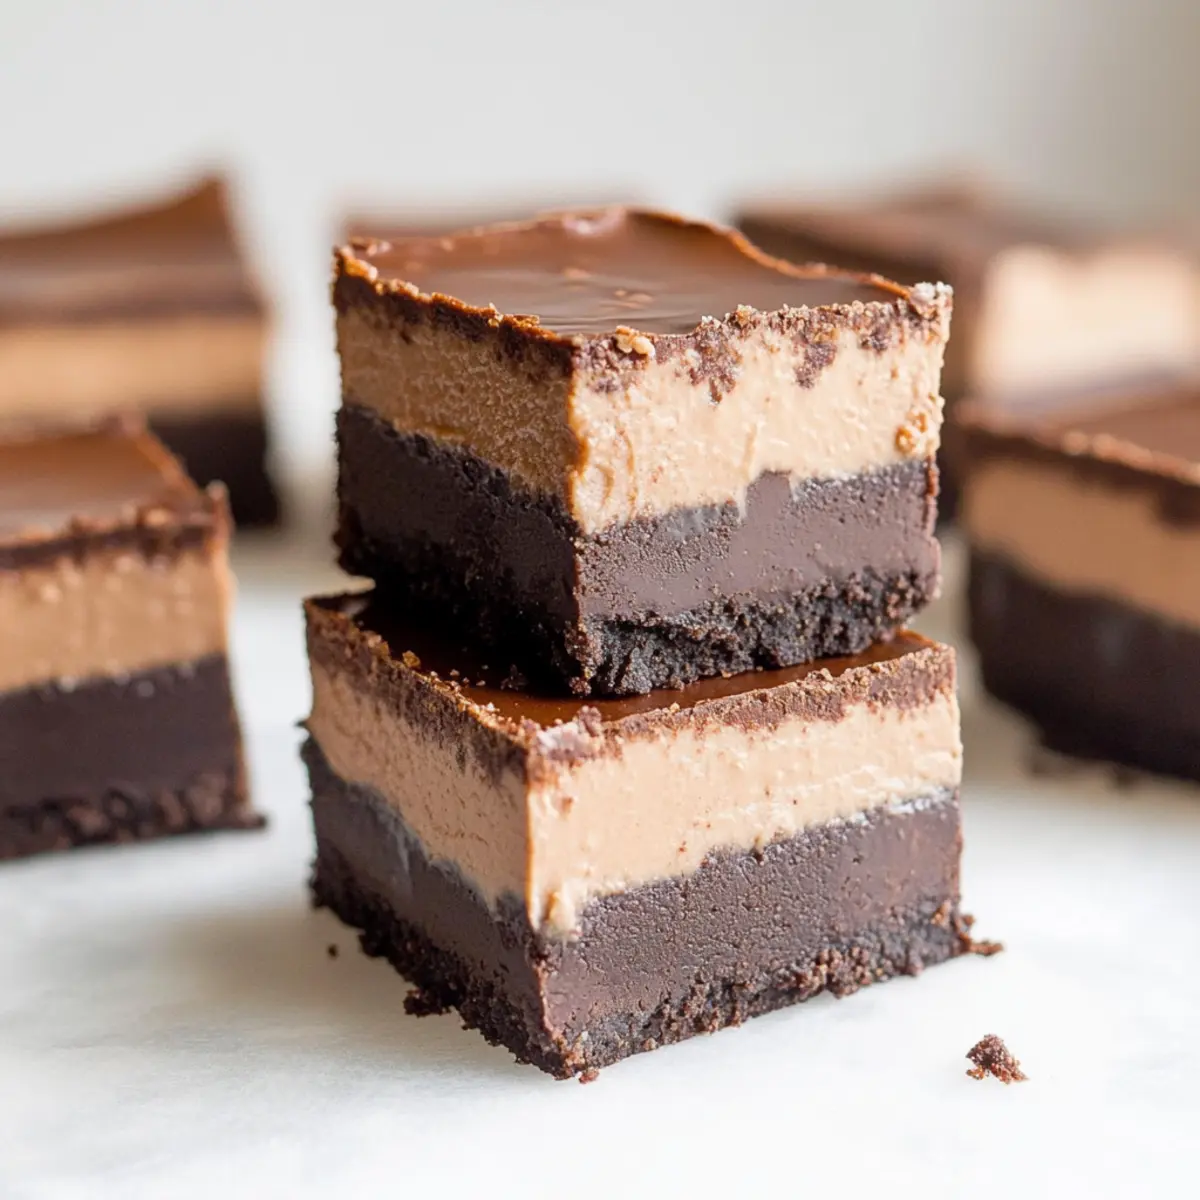
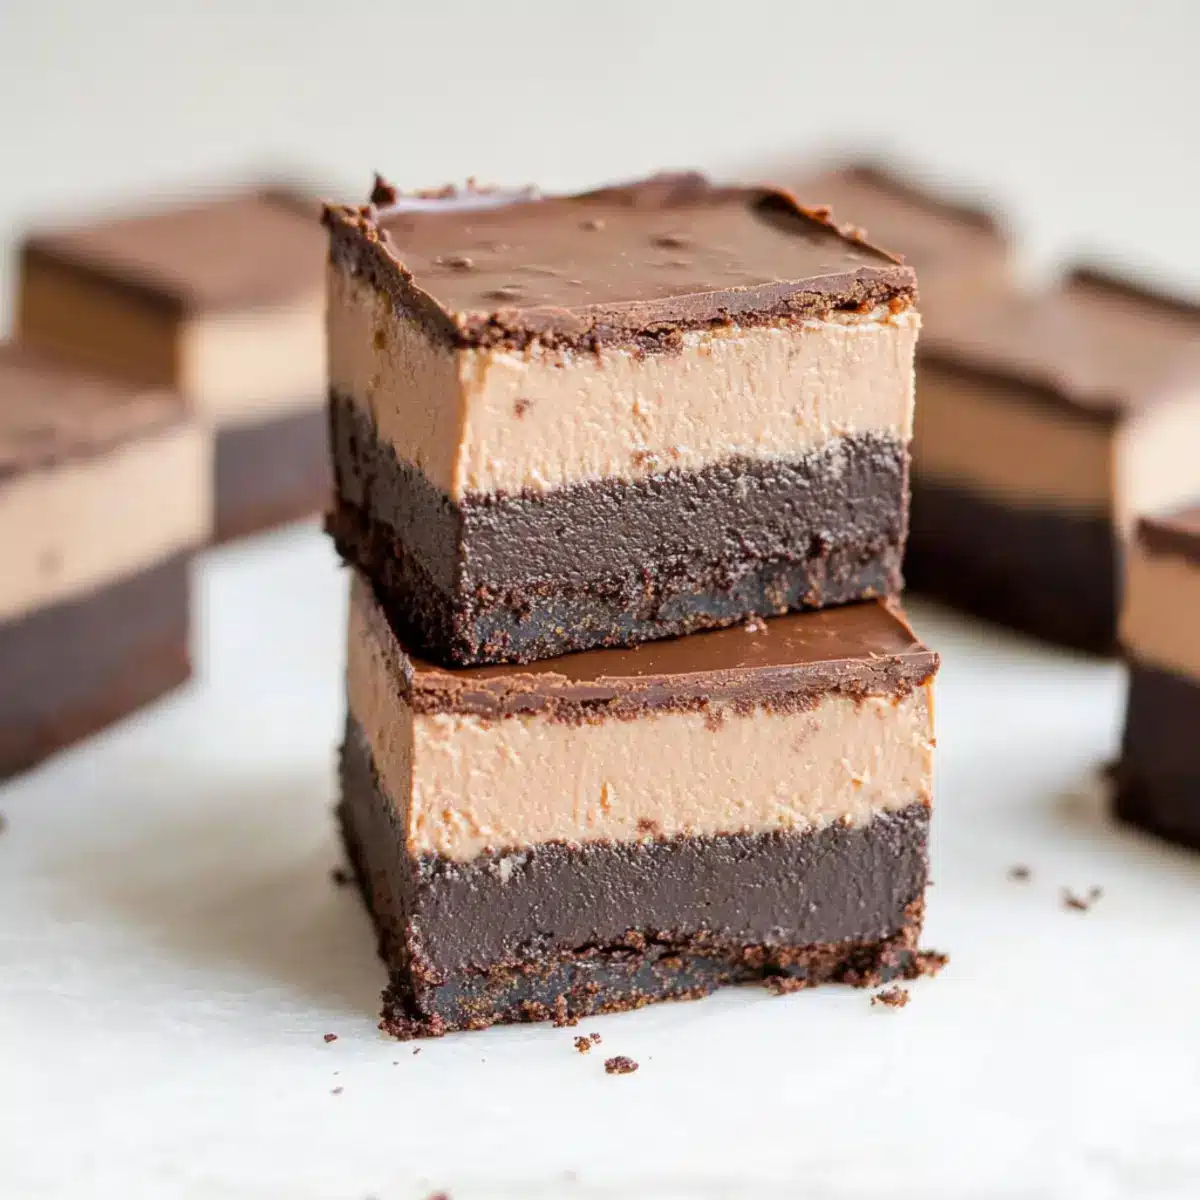
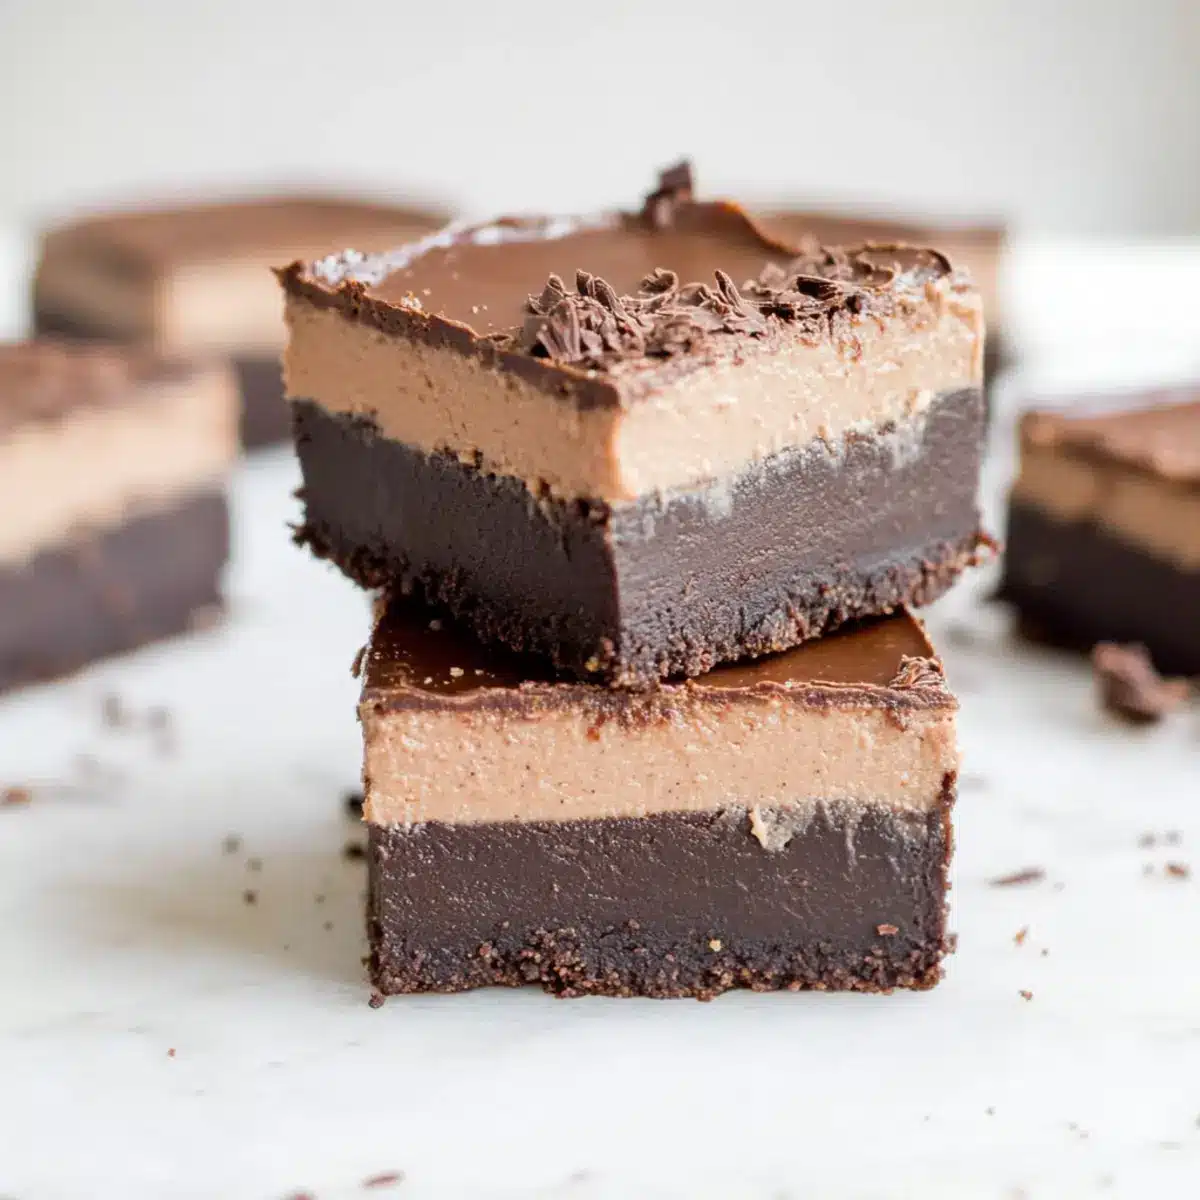
Decadent Layering: Each bite combines a fudgy brownie base with a velvety cheesecake topping—a harmony of flavors.
Healthier Indulgence: Made with wholesome ingredients, these bars are gluten-free and paleo-friendly, ensuring you can satisfy cravings guilt-free.
Vegan Option: The recipe easily adapts to a vegan delight—just swap in a flax egg and enjoy!
Time-Efficient: With a quick prep time and simple steps, major dessert wins can be yours without lengthy kitchen hours.
Crowd Pleaser: Impress family and friends with this bakery-quality treat ideal for gatherings or just a cozy night in—don’t be surprised if they ask for seconds!
For more delightful chocolate inspirations, check out my Chocolate Orange Cheesecake or the delightful Brownie Bottom Mini Cheesecakes.
Chocolate Brownie Cheesecake Bars Ingredients
For the Brownie Base
• Unsweetened Chocolate – Provides a deep chocolate flavor and richness. Substitution: Unsweetened cocoa powder may work in some contexts but will alter texture and flavor.
• Coconut Oil – Adds moisture and a slight coconut flavor. Substitution: Use vegetable or sunflower oil if desired.
• Almond Butter – Offers creaminess and healthy fats. Substitution: Any nut or seed butter can be used, but taste may vary.
• Vanilla Extract – Enhances overall flavor. Substitution: Use almond extract for a different profile.
• Maple Syrup – Acts as a natural sweetener. Substitution: Honey or agave syrup can be utilized, though it may not be vegan.
• Egg – Provides structure and moisture. Substitution: Use a flax egg (1 tbsp flaxseed meal + 2.5 tbsp water) for a vegan version.
• Blanched Almond Flour – Offers a gluten-free flour alternative for texture. Substitution: Coconut flour can be substituted but use less as it absorbs more moisture.
• Cacao Powder – Adds an intense chocolate richness. Substitution: Unsweetened cocoa powder can be used, but flavor may differ slightly.
For the Cheesecake Layer
• Raw Cashews – Base for the dairy-free cheesecake layer; creaminess and texture. Important: Soak cashews for at least 15 minutes to ensure blending is smooth.
• Coconut Milk – Provides creaminess and a hint of coconut flavor. Substitution: Full-fat almond or oat milk may work, but will change flavor and texture.
• Instant Coffee Granules – Intensifies chocolate flavor. Optional: Omit if not preferred.
• Sea Salt – Enhances flavor and balances sweetness. Important: Do not skip, as it complements the chocolate beautifully.
Step‑by‑Step Instructions for Chocolate Brownie Cheesecake Bars
Step 1: Prep the Cashews and Oven
Begin by soaking 2 cups of raw cashews in hot water for at least 15 minutes to ensure they blend smoothly. Meanwhile, preheat your oven to 350°F (175°C) and line an 8×8-inch baking pan with parchment paper. This will prevent sticking and make it easier to lift out the finished bars.
Step 2: Make the Brownie Layer
In a double boiler, melt 4 ounces of unsweetened chocolate, 1/3 cup of coconut oil, and 1/2 cup of almond butter, stirring until fully combined and shiny. Remove from heat and whisk in 1/2 cup of maple syrup and 1 teaspoon of vanilla extract. Once cooled slightly, incorporate 1 egg, then gently fold in 1 cup of blanched almond flour and 1/4 cup of cacao powder until smooth. Spread this rich mixture evenly in the prepared pan and bake for 15-17 minutes, until firm.
Step 3: Blend the Cheesecake Layer
After the brownie layer has cooled, drain the soaked cashews and place them in a high-powered blender. Add 1/4 cup of cacao powder, 1/2 cup of coconut milk, 1 tablespoons of coconut oil, 1/4 cup of maple syrup, 1 teaspoon of instant coffee granules (if using), and a pinch of sea salt. Blend on high until the mixture is completely smooth and creamy, scraping down the sides if necessary.
Step 4: Assemble and Chill
Pour the luscious cheesecake layer over the cooled brownie base, using a spatula to smooth the top nicely. Ensure an even spread for a delightful presentation. Once done, place the pan in the freezer for 2-3 hours, allowing the bars to set firmly.
Step 5: Slice and Serve
Once the layer has set, let the Chocolate Brownie Cheesecake Bars sit at room temperature for about 15-20 minutes for easier slicing. Using a sharp knife, carefully cut into 16 squares, cleaning the knife in between cuts for clean edges. Optionally, sprinkle a little sea salt on top for an extra flavor boost before serving.
How to Store and Freeze Chocolate Brownie Cheesecake Bars
Fridge: Store the bars in an airtight container for up to 1 week. This helps maintain their rich flavor and creamy texture while keeping them fresh.
Freezer: For extended storage, freeze the bars in a single layer on a baking sheet until solid. Transfer to an airtight container or freezer bag for up to 3 months.
Thawing: To enjoy, simply transfer the frozen bars to the fridge for several hours or overnight before serving. This gradual thaw ensures the cheesecake layer remains velvety and delicious.
Reheating: If you prefer a warm dessert, briefly microwave individual squares for 10-15 seconds. This enhances the fudgy brownie base and creamy cheesecake topping!
Expert Tips for Chocolate Brownie Cheesecake Bars
Soak Cashews: Ensure you soak the cashews for at least 15 minutes; this step is crucial for a smooth cheesecake layer.
Blend with Care: If your mixture is too thick, add a splash of coconut milk to help it blend perfectly for those luscious cheesecake bars.
Cooling Time: Don’t rush the cooling process! Allow the brownie layer to cool completely before adding the cheesecake layer for the best texture.
Using a Sharp Knife: When slicing, use a sharp knife and clean it between cuts to keep the edges tidy and appealing.
Storage Tips: Store leftovers in an airtight container in the fridge for up to a week or freeze for longer preservation—just remember to thaw before enjoying!
What to Serve with Chocolate Brownie Cheesecake Bars
Indulging in these heavenly bars creates a wonderful opportunity to craft a full, memorable meal experience.
-
Fresh Berries: The tartness of strawberries or raspberries offers a delightful contrast, cutting through the richness of the bars. Their vibrant colors also make the dessert visually appealing.
-
Whipped Coconut Cream: Light and fluffy, this cream adds an airy sweetness that will elevate your bars to a whole new level of decadence.
-
Espresso or Coffee: A warm cup of rich coffee intensifies the chocolate flavor while providing a wonderful balance to the sweetness, creating a perfect pairing.
-
Nuts or Nut Butter Drizzle: A sprinkle of chopped nuts or a drizzle of almond butter creates a crunchy texture that beautifully complements the creamy layers in each bite.
-
Chocolate Sauce: Drizzling some chocolate sauce over the top amplifies the chocolate experience. It’s a simple touch that feels luxurious and indulgent.
-
Vanilla Ice Cream: The creamy coldness of vanilla ice cream pairs wonderfully with the warm flavors of the brownie bars, creating a delightful contrast in temperature and texture.
-
Herbal Tea: A soothing cup of chamomile tea offers a gentle contrast to the richness of the cheesecake bars, providing a calming finish to your sweet treat.
-
Caramel Sauce: A light drizzle of salted caramel will add a sweet, buttery flavor that complements the chocolate and rounds out the experience beautifully.
-
Peanut Butter Sauce: A warm peanut butter sauce enhances the flavors and adds a delightful nuttiness, creating a balance with the sweetness of the cheesecake bars.
Chocolate Brownie Cheesecake Bars Variations
Customize your Chocolate Brownie Cheesecake Bars to suit your taste and dietary preferences—let your creativity shine with these delightful twists!
-
Nut-Free: Substitute almond butter with sunflower seed butter and almond flour with a seed-based flour for a nut-free version. Taste the rich flavor without worrying about allergens!
-
Fruity Swirl: Add swirls of fruit purée or chocolate ganache on top for an enhanced visual appeal and flavor contrast. Imagine the delightful burst of fruitiness complementing the chocolatey goodness!
-
Fresh Fruit Layer: Incorporate a layer of fresh raspberries or strawberries for a refreshing tartness that cuts through the richness. These vibrant pops of color make each bite a joyful surprise!
-
Gluten-Free Flour Swap: If almond flour isn’t available, try using coconut flour—but remember to use less, as it absorbs more moisture. This subtler switch should still yield that divine texture!
-
Chocolate Chip Additions: Toss in dairy-free chocolate chips to the brownie layer for added texture and bursts of melty chocolate in every bite. Because, let’s be honest—who can resist extra chocolate?
-
Higher Heat Level: For those who enjoy a little spice, add a dash of cayenne pepper to the brownie mixture for a surprising kick! It’s an exciting twist that complements the sweetness beautifully.
-
Decadent Topping: Sprinkle crushed nuts or dark chocolate shavings on top for an added crunch and an even more indulgent experience. The contrast will elevate your dessert to a whole new level!
-
Coffee Infusion: Enhance the flavor with an espresso shot in the cheesecake layer. The coffee richness pairs exceptionally well with chocolate, creating a delightful depth to the dessert.
If you’re seeking more chocolatey inspiration, check out my Dark Chocolate Peppermint Mousse Tart or indulge in some White Chocolate Peppermint Cookies. Enjoy experimenting!
Make Ahead Options
These Chocolate Brownie Cheesecake Bars are perfect for meal prep enthusiasts looking to save time during busy weeks! You can prepare the brownie layer up to 24 hours in advance; simply bake it, allow it to cool completely, and store it in an airtight container in the fridge. The cheesecake layer can be blended and poured on top of the brownie base up to 3 days in advance—just keep it tightly covered in the refrigerator. To maintain quality, ensure the bars are chilled properly and slice them shortly before serving; letting them sit at room temperature for 15-20 minutes brings out their delicious flavors. With these make-ahead tips, you’ll have a delectable dessert ready in no time!
Chocolate Brownie Cheesecake Bars Recipe FAQs
What kind of chocolate should I use for the brownie base?
For the richest flavor, I recommend using unsweetened chocolate. It provides a deep chocolate richness essential for these bars. If you don’t have unsweetened chocolate on hand, unsweetened cocoa powder can substitute in a pinch; however, keep in mind that it may alter the texture and flavor slightly.
How do I store Chocolate Brownie Cheesecake Bars?
Absolutely! To keep your bars fresh, store them in an airtight container in the fridge for up to 1 week. This will help maintain their rich flavor and creamy texture. If you want to keep them longer, freezing is a great option for up to 3 months—just remember to thaw them in the fridge before serving!
Can I freeze Chocolate Brownie Cheesecake Bars?
Yes, you can! To freeze, place the bars in a single layer on a baking sheet and freeze until solid. Once firm, transfer them to an airtight container or freezer bag. They’ll stay delicious for up to 3 months. When you’re ready to enjoy, let them thaw in the fridge for several hours or overnight.
What if my cheesecake layer is too thick?
If your cheesecake mixture is too thick while blending, don’t worry! Just add a splash of coconut milk to help it blend smoothly. This will help achieve that velvety texture that makes these Chocolate Brownie Cheesecake Bars so divine. Additionally, a high-powered blender works best for an ultra-smooth finish.
Are these Chocolate Brownie Cheesecake Bars allergen-friendly?
Definitely! This recipe is not only perfect for paleo and gluten-free diets, but it also offers a dairy-free option. If you wish to make it nut-free, consider swapping the almond butter with sunflower seed butter and using seed-based flour instead of almond flour. Just always check ingredient labels for any specific allergens relevant to your diet or guests’.

Irresistible Chocolate Brownie Cheesecake Bars You Need to Try
Ingredients
Equipment
Method
- Soak 2 cups of raw cashews in hot water for at least 15 minutes. Preheat your oven to 350°F (175°C) and line an 8x8-inch baking pan with parchment paper.
- In a double boiler, melt 4 ounces of unsweetened chocolate, 1/3 cup of coconut oil, and 1/2 cup of almond butter. Remove from heat and whisk in 1/2 cup of maple syrup and 1 teaspoon of vanilla extract. Incorporate 1 egg, then gently fold in 1 cup of blanched almond flour and 1/4 cup of cacao powder until smooth and bake for 15-17 minutes.
- Once cooled, drain the soaked cashews and place them in a high-powered blender. Add 1/4 cup of cacao powder, 1/2 cup of coconut milk, 1 tablespoon of coconut oil, 1/4 cup of maple syrup, 1 tablespoon of instant coffee granules, and sea salt. Blend until smooth.
- Pour the cheesecake layer over the cooled brownie base, smooth the top, and freeze for 2-3 hours.
- Let the bars sit at room temperature for 15-20 minutes. Cut into 16 squares, option to sprinkle sea salt on top before serving.
Leave a Reply