
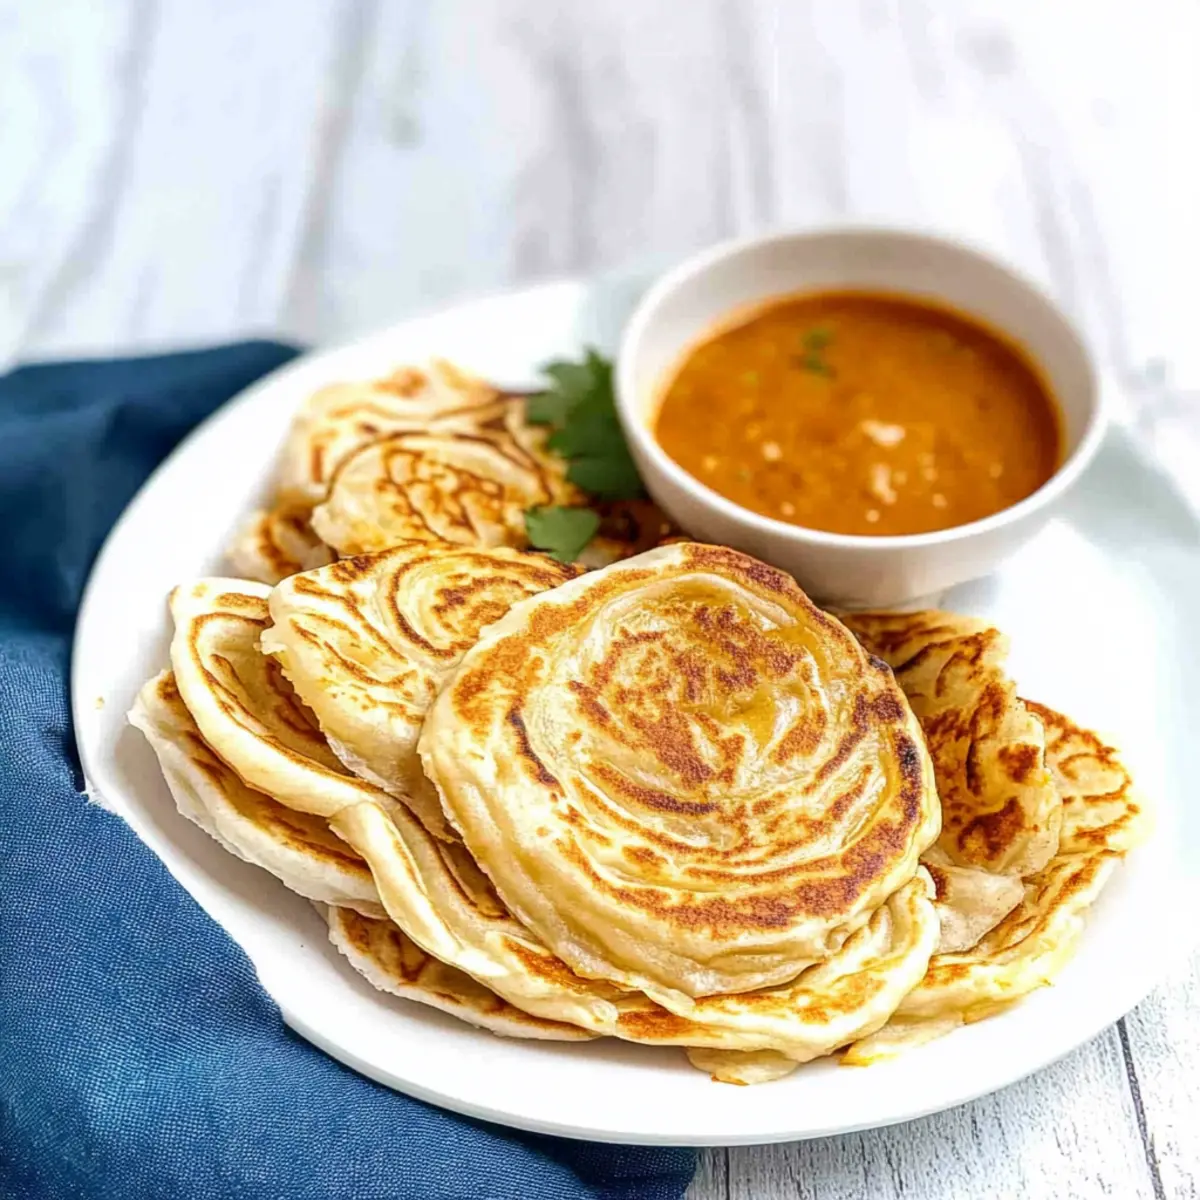
As I was savoring the warm, flaky layers of a freshly made Flaky Roti Canai, I couldn’t help but marvel at how this beloved dish connects generations of cooks, especially in the heart of Sri Lanka. This Flaky Roti Canai Recipe offers a delightful balance of crispiness and softness, making it an ideal companion for your favorite curries or even on its own as a snack. With its simple yet rewarding preparation process, you’ll find that mastering this dish not only impresses family and friends but also fills your kitchen with irresistible aromas. Plus, it’s such a fun kitchen project that brings a touch of South Asian tradition right to your dining table! Are you ready to roll out some dough and transform a simple meal into something truly special?
Why is Flaky Roti Canai a Must-Try?
Irresistible Layers: Each bite of Flaky Roti Canai offers a delightful contrast of crispy and soft textures, incredibly satisfying to the palate.
Versatile Pairing: Whether served with your favorite curry or enjoyed alone with a cup of tea, the flavor combinations are endless!
Homemade Joy: Creating this dish brings joy to your kitchen, allowing you to bond with family over the process, similar to the art of making Coconut Oatmeal Cookies.
Cultural Connection: This recipe celebrates South Asian traditions and invites you to explore the culinary heritage of Sri Lanka right at home.
Time to Shine: With some practice, impress your guests with restaurant-quality roti, elevated even further when served alongside Duchess Potatoes Elegance.
Get ready to savor the magic of homemade roti that will surely become a family favorite!
Flaky Roti Canai Ingredients
For the Dough
• 500 g all-purpose flour – The backbone of the roti, providing structure and chewiness.
• 1 tsp sea salt – Essential for enhancing the overall flavor of the roti.
• 180 mL boiling water – Activates the gluten for a softer, more pliable dough.
• 180 mL room temperature water – Adjusts the dough consistency for optimum elasticity.
For Layering & Cooking
• Oil – Used for coating and layering the dough to create those irresistible flaky layers.
• Butter or ghee (optional) – Adds a rich, buttery flavor that elevates the roti experience.
Mastering the Flaky Roti Canai recipe is simple, and each ingredient plays a key role in its delicious texture and taste. Happy cooking!
Step‑by‑Step Instructions for Flaky Roti Canai Recipe
Step 1: Dough Preparation
In a large mixing bowl, combine 500 g of all-purpose flour with 1 tsp of sea salt. Gradually add 180 mL of boiling water, using a fork to mix until the dough starts to clump together. Next, incorporate 180 mL of room temperature water until the mixture becomes slightly sticky. Cover the bowl with a damp cloth and let the dough rest for 30-60 minutes to allow the gluten to develop.
Step 2: Kneading the Dough
After the resting period, transfer the dough onto a lightly floured surface. Knead the dough for about 2-3 minutes until it’s smooth and elastic. Divide the kneaded dough into 8 equal portions and shape each portion into a ball. Lightly coat each dough ball with oil to prevent sticking, then cover them with a damp cloth and let them rest for at least 2 hours or up to 12 hours for optimal texture.
Step 3: Shaping the Roti
Once the dough has rested, take one ball and flatten it gently with your hands or a rolling pin on a floured surface. Aim to roll it out into a thin round shape, approximately 8-10 inches in diameter. As you work, ensure that the dough remains thin with no tears, allowing the layers of your Flaky Roti Canai to develop beautifully. Repeat this process for each of the remaining dough balls.
Step 4: Layering the Dough
Using a pastry brush, spread a thin layer of oil over the surface of the rolled-out dough. Carefully roll the dough into a tube, starting from one edge to the other, and then coil it into a spiral shape. This layering technique is vital for achieving that characteristic flakiness in your roti. Place the coiled dough on a plate and let it rest for another hour to relax the gluten.
Step 5: Cooking the Roti
Heat a non-stick pan over medium heat. Flatten each coiled dough piece into a round disk, about 6-7 inches in diameter. Place the flattened roti on the hot pan and cook for about 2-3 minutes on each side until golden brown and crispy. You may need to adjust the heat as necessary to prevent burning. Repeat this process for each roti, adding a touch of oil to the pan as needed for a perfect golden finish.
How to Store and Freeze Flaky Roti Canai
Fridge: Store cooked Flaky Roti Canai in an airtight container for up to 3 days. Reheating in a pan helps restore its crispy exterior while keeping the inside soft.
Freezer: For longer storage, freeze the cooled roti in a single layer, then transfer to a freezer-safe bag for up to 2 months. Reheat directly from frozen, using a skillet to maintain flakiness.
Room Temperature: If you plan to eat the roti the same day, keep it covered at room temperature for up to 4 hours to prevent it from drying out.
Reheating: Warm leftover roti in a non-stick pan over medium heat, flipping occasionally until heated through, preserving that delightful texture you love.
Expert Tips for Flaky Roti Canai
Rest the Dough: Ensure your dough is rested adequately; this resting period is crucial for gluten development, making it easier to stretch and layer.
Oil Moderation: Use just enough oil to coat the dough while layering. Too much oil can result in a greasy texture, affecting the final outcome of your Flaky Roti Canai.
Stretching Technique: Practice gentle stretching to achieve a thin dough without tearing. The key to those irresistible layers is keeping the dough as thin as possible.
Cook with Care: Monitor the heat closely while cooking; a medium flame is best to ensure even cooking and a beautiful golden-brown crust. Adjust the temperature if you notice any burning.
Storage Tips: If you’re not serving all the roti immediately, store the cooked pieces in an airtight container to preserve their flaky texture. Reheat in a pan for the best results.
Flaky Roti Canai Variations
Feel free to let your culinary creativity shine as you explore these exciting variations of Flaky Roti Canai!
-
Egg Roti: Crack an egg onto the pan before placing the rolled-out roti for a delicious breakfast twist! The egg cooks to a perfect soft scramble, pairing beautifully with the flaky roti.
-
Sweet Roti: Add a bit of sugar and cinnamon to your dough to create a delightful dessert version! Serve it warm with ice cream or fresh fruits for a comforting treat that’s sure to please everyone.
-
Stuffed Roti: Fill your roti with a savory blend of vegetables or spiced meat before rolling it up. This hearty variation transforms traditional roti into a filling meal that’s wonderful for lunch or dinner.
-
Crispy Herb Roti: Mix chopped herbs like cilantro or basil into the dough for a fragrant and fresh flavor. The herbs give the roti a vibrant twist that complements any curry or dip.
-
Garlic Roti: Mix minced garlic into the oil used for layering to infuse each bite with robust flavor. This aromatic addition not only elevates the taste but also makes your kitchen smell amazing.
-
Coconut Roti: For a taste of the tropics, add shredded coconut to the dough. This variation lends a subtle sweetness and chewy texture that pairs fabulously with spicy curries.
-
Heat-It-Up Roti: Sprinkle some chili flakes or finely chopped green chilies into the dough for a kick of heat! This spicy version is sure to awaken your taste buds and satisfy any heat-seeker.
-
Savory Potato Roti: Mash cooked potatoes with spices and use them as a filling before rolling the roti. This comforting stuffing pairs wonderfully with a side of Corn Pudding Wow for a delectable meal.
Embrace the beauty of customization in your cooking journey! Each variation offers a unique taste and experience while treasuring the essence of the classic Flaky Roti Canai.
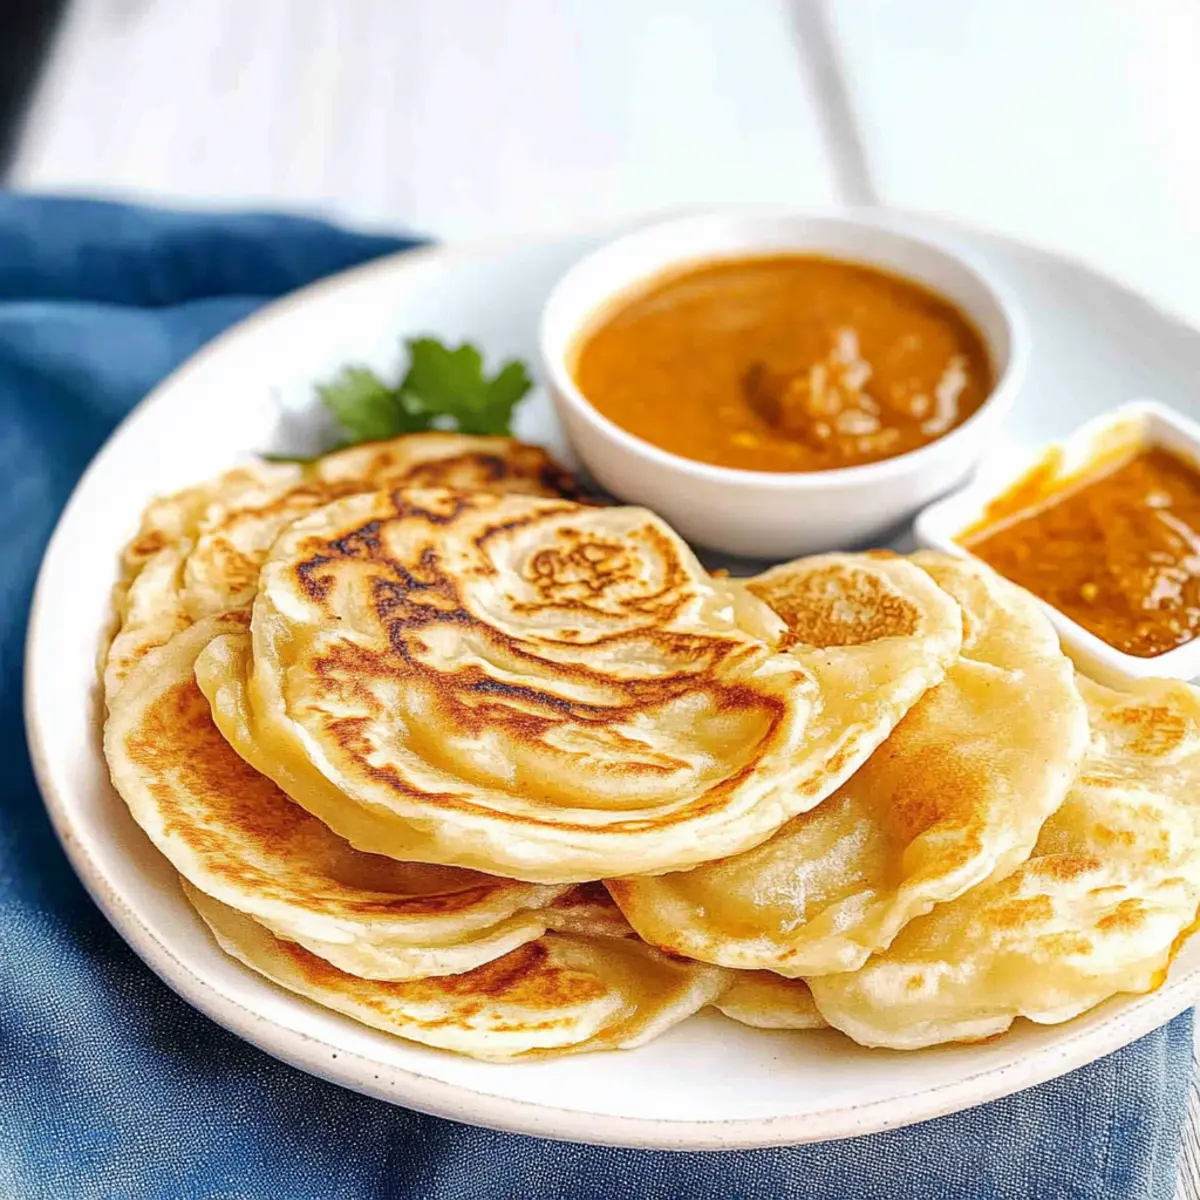
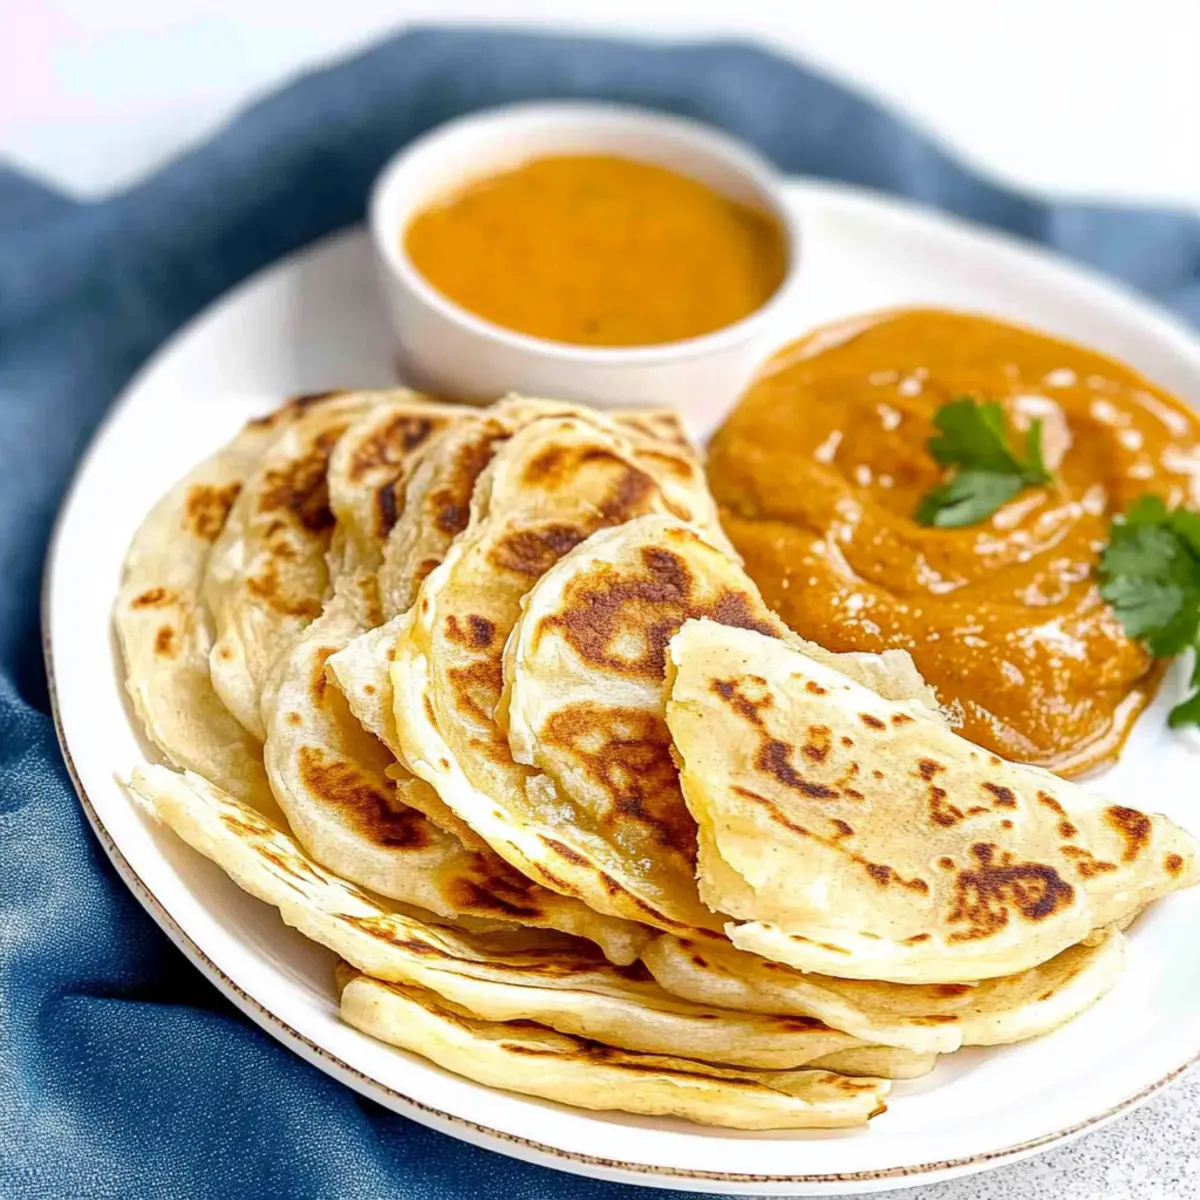
What to Serve with Flaky Roti Canai
The delightful layers of Flaky Roti Canai are the perfect canvas for a variety of flavorful accompaniments.
- Savory Curry: A rich chicken or vegetable curry drapes over the roti beautifully, soaking into its layers for an irresistible taste experience.
- Spicy Sambal: A tangy sambal adds an explosion of flavor that complements the flaky roti, enhancing each bite with spice and zest.
- Coconut Daal: The creamy textures of coconut daal create a lovely contrast, allowing the roti to absorb the flavorful lentils.
- Sweet Chutney: A garnish of sweet mango chutney balances the savory notes, creating a delightful sweet-savory harmony with every bite.
- Fresh Salad: A crisp cucumber and tomato salad offers a refreshing crunch, cutting through the richness of the roti and curry.
- Masala Tea: Pair your meal with a steaming cup of masala tea, as its warm spices beautifully echo the flavors of the roti and curries.
- Dessert Lassi: A sweet mango lassi serves as a refreshing palate cleanser after enjoying the savory roti, tying the meal together with a delightful finish.
- Indian Pickles: These provide an additional layer of flavor with their bold tangy and spicy notes, a great sidekick to the chewy roti.
- Roasted Vegetables: Bright, caramelized veggies not only add color but a wonderful earthy flavor that complements the dish’s richness.
Make Ahead Options
These Flaky Roti Canai are perfect for meal prep, allowing you to savor this delightful dish on busy weeknights! You can prepare the dough up to 24 hours in advance—simply follow the initial steps of mixing and kneading, then divide the dough into balls, coat them lightly with oil, and store them in an airtight container in the fridge. For best quality, remember to bring them to room temperature before shaping. On your cooking day, just roll, layer, and cook as instructed, and enjoy those irresistibly flaky layers without the fuss of starting from scratch!

Flaky Roti Canai Recipe FAQs
What type of flour is best for Flaky Roti Canai?
Absolutely, using all-purpose flour is ideal as it provides the right balance of structure and tenderness. Be sure to measure it accurately by spooning and leveling it to avoid too much density in your dough.
How should I store Flaky Roti Canai?
To preserve those delightful layers, store the cooked roti in an airtight container in the fridge for up to 3 days. Reheat them in a non-stick pan to keep the exterior crispy while the interior remains soft.
Can I freeze Flaky Roti Canai?
Yes, indeed! To freeze, let the cooked roti cool completely, then place them in a single layer in a freezer-safe bag. You can store them for up to 2 months. When ready to enjoy, reheat directly from the freezer in a skillet until warmed through.
What should I do if my dough is too sticky?
If you find your dough too sticky, it’s likely from excess moisture. Simply sprinkle a little more flour while kneading until you reach the desired consistency. Remember, the dough should be slightly tacky but manageable for the best outcome.
Are there any allergies I should consider with this recipe?
The primary ingredients in this Flaky Roti Canai recipe—flour, water, and oil—are generally safe for most; however, if anyone has a gluten allergy, substituting with a gluten-free flour blend can work well. Always ensure to check for cross-contamination with any substitutes.
What variations can I try with Flaky Roti Canai?
Very! You can scale up the flavor by adding spices like cumin into the dough or create a sweet version with sugar and cinnamon. You can also experiment by stuffing the roti with vegetables or meats before rolling and cooking for a hearty meal.
Master the Flaky Roti Canai Recipe for Irresistible Layers
Ingredients
Equipment
Method
- In a large mixing bowl, combine 500 g of all-purpose flour with 1 tsp of sea salt. Gradually add 180 mL of boiling water, using a fork to mix until the dough starts to clump together. Next, incorporate 180 mL of room temperature water until the mixture becomes slightly sticky. Cover the bowl with a damp cloth and let the dough rest for 30-60 minutes to allow the gluten to develop.
- After the resting period, transfer the dough onto a lightly floured surface. Knead the dough for about 2-3 minutes until it’s smooth and elastic. Divide the kneaded dough into 8 equal portions and shape each portion into a ball. Lightly coat each dough ball with oil to prevent sticking, then cover them with a damp cloth and let them rest for at least 2 hours or up to 12 hours for optimal texture.
- Once the dough has rested, take one ball and flatten it gently with your hands or a rolling pin on a floured surface. Aim to roll it out into a thin round shape, approximately 8-10 inches in diameter.
- Using a pastry brush, spread a thin layer of oil over the surface of the rolled-out dough. Carefully roll the dough into a tube, starting from one edge to the other, and then coil it into a spiral shape. Let it rest for another hour to relax the gluten.
- Heat a non-stick pan over medium heat. Flatten each coiled dough piece into a round disk, about 6-7 inches in diameter. Place the flattened roti on the hot pan and cook for about 2-3 minutes on each side until golden brown and crispy.
Leave a Reply