
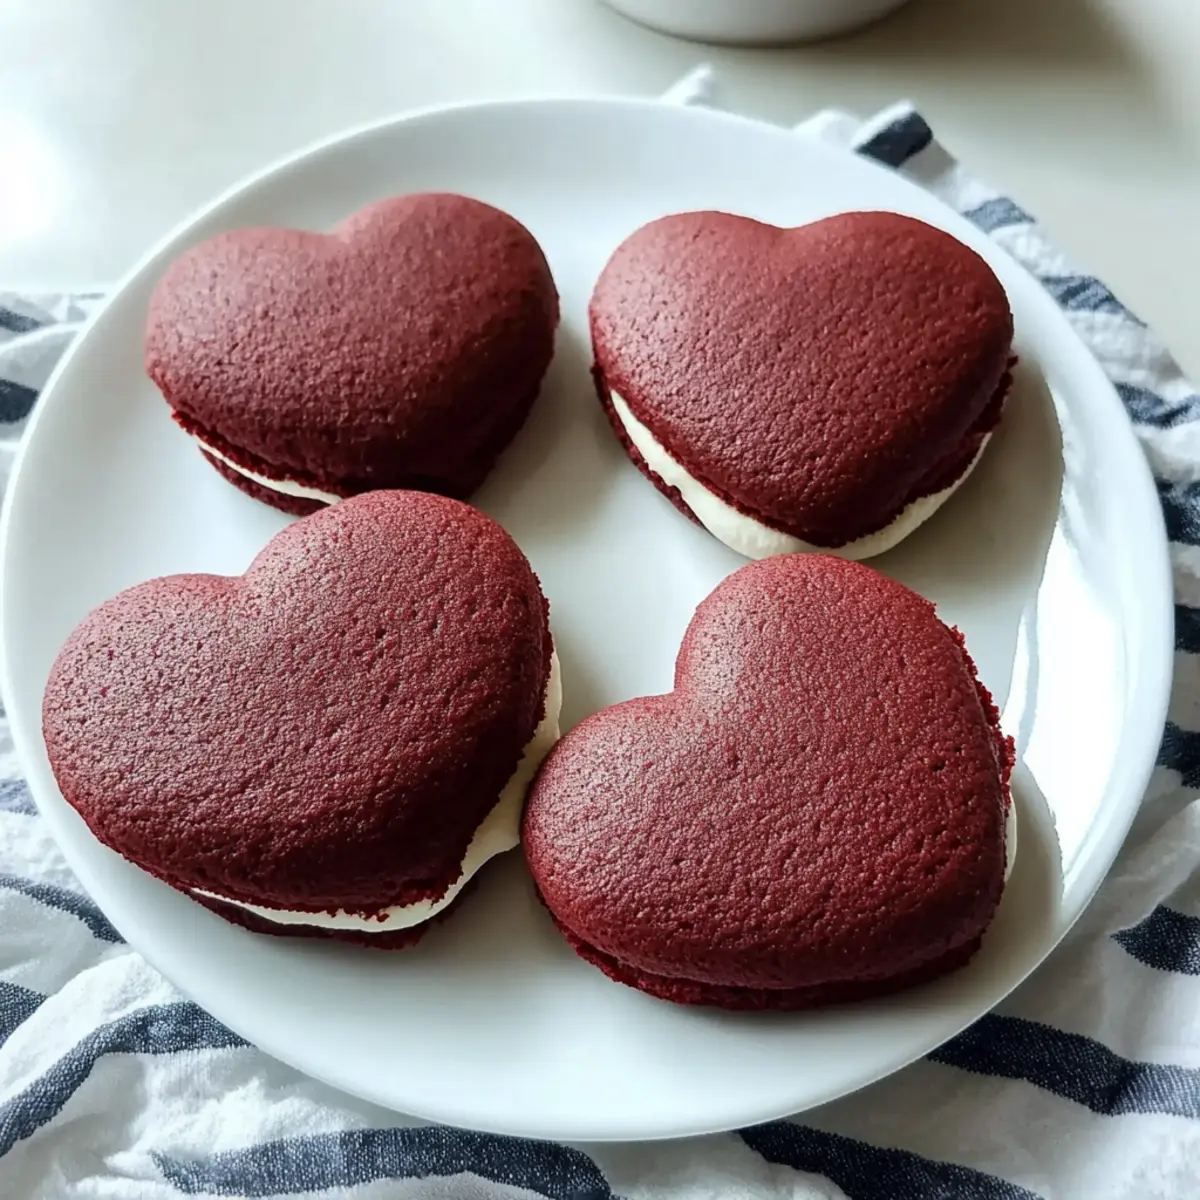
“Love is in the oven, and it smells heavenly! These heart-shaped red velvet whoopie pies are not just visually stunning; they’re the perfect way to show affection this Valentine’s Day. With their soft, cake-like texture and rich cream cheese filling, these delightful sandwich cookies are a fun dessert that anyone can whip up in no time. Imagine the smiles on your loved ones’ faces as they take a bite of these sweet treats! Plus, they’re an easy baking project that will impress even the most seasoned bakers, making your Valentine’s celebration stress-free. So, ready to bake a little love into your kitchen? Let’s get started!”
Why Choose Heart-Shaped Whoopie Pies?
Irresistible Appeal: These sweet treats are adorable and perfect for any romantic occasion.
Easy to Make: Even novice bakers can master these delightful whoopie pies in no time!
Soft Texture: With a luscious cake-like consistency, each bite melts in your mouth.
Creamy Filling: The tangy cream cheese frosting adds a rich layer of flavor, elevating the taste!
Festive Fun: Ideal for Valentine’s Day, they bring a splash of love to your dessert table!
Personal Touch: Feel free to customize the filling or add sprinkles for extra flair—everyone will love them!
So why not surprise your loved ones with these heart-shaped red velvet whoopie pies this season? Your kitchen will be the spot where love blooms!
Heart-Shaped Red Velvet Whoopie Pies Ingredients
Get ready to bake some love!
For the Whoopie Pies
• Unsweetened Cocoa Powder – Provides the classic chocolate flavor to your heart-shaped delights.
• All-Purpose Flour – Helps create a sturdy yet tender structure for the whoopie pies.
• Baking Powder & Baking Soda – These leavening agents ensure your cookies are light and fluffy.
• Salt – A pinch enhances the sweetness and overall flavor profile.
• Unsalted Butter – Adds richness and moisture, making every bite delightful.
• Granulated Sugar & Brown Sugar – A mix gives depth and complexity to the sweetness.
• Egg – Binds the ingredients together and adds moisture for a fudgy texture.
• Vanilla Extract – Infuses an aromatic sweetness that’s simply irresistible.
• Buttermilk – Contributes to a tender crumb while adding a slight tanginess.
• Red Food Coloring – Achieves that iconic red velvet color for a show-stopping look.
For the Cream Cheese Filling
• Cream Cheese – The star ingredient adds a tangy richness that’s a perfect balance to the sweetness.
• Powdered Sugar – Sweetens and thickens the frosting for that dreamy filling.
Using these heart-shaped red velvet whoopie pies ingredients, you can create a delicious and appealing treat that will surely win hearts this Valentine’s Day!
Step‑by‑Step Instructions for Heart-Shaped Red Velvet Whoopie Pies
Step 1: Preheat and Prepare
Begin by preheating your oven to 350°F (180°C). While the oven warms up, line your baking sheet with parchment paper. To create beautiful heart shapes, you can use a stencil to guide your piping. This preparation will ensure that your heart-shaped red velvet whoopie pies come out perfectly shaped and ready for baking.
Step 2: Mix Dry Ingredients
In a medium bowl, whisk together the all-purpose flour, baking powder, baking soda, salt, and unsweetened cocoa powder. Mix these dry ingredients until they’re well combined, ensuring there are no lumps. This step is crucial because it sets the foundation for the soft, cake-like texture of your whoopie pies, which will be wonderfully tender when baked.
Step 3: Cream the Butters and Sugars
In a separate large bowl, use an electric mixer to beat the unsalted butter, granulated sugar, and brown sugar together until the mixture is light and fluffy, about 3-4 minutes. Next, add the egg and vanilla extract, mixing until the batter is smooth and well incorporated. This creamy mixture adds richness to your heart-shaped red velvet whoopie pies and provides a delightful sweetness.
Step 4: Combine Wet and Dry Ingredients
Gradually add the whisked dry ingredients to the butter mixture in two batches, alternating with the buttermilk. Mix just until smooth after each addition, ensuring you do not overmix. Once fully combined, add the red food coloring gradually until you achieve your desired vibrant shade. This colorful batter will create enchanting heart-shaped red velvet whoopie pies that are as eye-catching as they are delicious.
Step 5: Pipe the Batter
Transfer the batter into a piping bag fitted with a round tip. Carefully pipe the batter onto the prepared baking sheet, following the heart outlines you created earlier. Aim for even sizes for each heart, leaving enough space between them to expand during baking. Bake in the preheated oven for about 10 minutes or until the edges are set but the centers still look slightly soft.
Step 6: Cool the Cookies
Once baked, remove the heart-shaped cookies from the oven and allow them to cool on the baking sheet for about 5 minutes. Then, transfer them to a wire rack to cool completely. Ensure the cookies are entirely cool before you proceed to the filling, preventing melted frosting and ensuring a delightful bite of your heart-shaped red velvet whoopie pies!
Step 7: Make the Cream Cheese Filling
While the cookies cool, prepare the cream cheese filling. In a medium bowl, beat the cream cheese and unsalted butter until the mixture is smooth and creamy, about 2-3 minutes. Gradually add in the powdered sugar and vanilla extract, mixing until the filling is fluffy and light. This rich filling will add the perfect sweet contrast to your heart-shaped red velvet whoopie pies.
Step 8: Assemble the Whoopie Pies
To assemble, take half of the cooled cookies and pipe a generous dollop of the cream cheese filling onto the flat side of each cookie. Sandwich them together with the remaining cookie halves, pressing gently to adhere. Your heart-shaped red velvet whoopie pies are now ready to showcase!
Expert Tips for Heart-Shaped Whoopie Pies
Control the Color: Start with just a teaspoon of red food coloring and gradually add more until you reach your desired shade.
Mix With Care: Avoid overmixing after adding flour to keep the whoopie pies soft and tender.
Room Temperature Ingredients: Ensure cream cheese and butter are at room temperature for a smooth, easy-to-spread filling.
Cool Completely: Let the cookies cool entirely before frosting to prevent melting and achieve a beautiful finish.
Perfectly Pipe: Use an even pressure when piping the batter onto the baking sheet for consistent heart shapes and sizes in your heart-shaped red velvet whoopie pies.
Experiment with Flavor: Don’t hesitate to explore different extracts or add-ins, like almond extract or sprinkles, to personalize your creamy filling!
How to Store and Freeze Heart-Shaped Red Velvet Whoopie Pies
Room Temperature: Store whoopie pies in an airtight container at room temperature for up to 2 days. Be sure to keep parchment paper between layers to avoid sticking.
Fridge: These delightful treats last up to 5 days in the fridge when kept in an airtight container. This helps maintain their soft texture while keeping the cream cheese filling fresh.
Freezer: You can freeze heart-shaped red velvet whoopie pies for up to 2 months. Place them in a single layer in a freezer-safe container or bag, with parchment paper between layers.
Thawing: To enjoy, simply move the whoopie pies to the fridge and let them thaw overnight. This keeps their taste and texture intact, making every bite just as delightful as the day they were made!
Heart-Shaped Red Velvet Whoopie Pies Variations
Feel free to sprinkle your creativity into this delightful recipe, making it uniquely yours!
-
Dutch Cocoa Swap: Replace unsweetened cocoa powder with Dutch-process cocoa for a richer flavor profile.
-
Almond Extract Twist: Use almond extract in the cream filling for a nutty, fragrant burst of flavor.
-
Festive Sprinkles: Add colorful sprinkles to the cream filling for an extra touch of fun, perfect for celebrations.
-
Gluten-Free Option: Substitute all-purpose flour with a 1:1 gluten-free baking blend to cater to dietary needs.
-
Cream Cheese Alternative: For a lighter filling, use mascarpone cheese instead of cream cheese—still rich yet slightly less tangy.
-
Spicy Hint: Add a pinch of cayenne pepper to the batter for a surprising yet delightful heat that contrasts with sweetness.
-
Boozy Bash: Mix in a splash of vanilla vodka or rum into the cream filling for an adult-only version sure to impress!
-
Chocolate Ganache Drizzle: Top your whoopie pies with a drizzle of warm chocolate ganache for a decadent finish that’s simply swoon-worthy.
Don’t forget to explore delectable companions to your sweet creations, like fresh berries or a lovely scoop of ice cream. These heart-shaped red velvet whoopie pies will be the talk of your Valentine’s bash, and they might just steal the show!
Make Ahead Options
These Heart-Shaped Red Velvet Whoopie Pies are perfect for meal prep enthusiasts! You can bake the cookies up to 3 days in advance—just be sure to let them cool completely before storing them in an airtight container with parchment paper between layers to prevent sticking. The cream cheese filling can also be prepared up to 24 hours ahead; store it in the refrigerator until you’re ready to assemble. When it’s time to serve, simply pipe the chilled filling onto half of the cookies and sandwich with the rest. This way, you’ll have fresh, delicious whoopie pies ready to impress your loved ones with minimal effort!
What to Serve with Heart-Shaped Red Velvet Whoopie Pies
Indulging in these sweet, heart-shaped delights creates a perfect occasion to complement them with a few delightful pairings.
-
Cold Glass of Milk: A classic combination that balances the sweetness, providing a refreshing contrast to the rich filling.
-
Coffee or Tea: The warm notes of coffee or a soothing herbal tea enhance the flavors, making each bite feel cozy and special.
-
Fresh Berries: Add a pop of color and freshness with strawberries or raspberries; their tartness beautifully offsets the sweet whoopie pies.
-
Chocolate-Covered Strawberries: Indulge further by adding these luxurious treats; their smooth chocolate exterior makes them an irresistible pairing.
-
Whipped Cream: A dollop of whipped cream adds an airy lightness, offering a simple yet elegant touch that elevates your dessert experience.
-
Red Wine: For an adult twist, a light red wine can complement the red velvet beautifully, adding depth to your romantic dessert.
By combining heart-shaped red velvet whoopie pies with these delightful additions, you are sure to create a memorable and cherished Valentine’s Day dessert experience!
Heart-Shaped Red Velvet Whoopie Pies Recipe FAQs
What type of cocoa powder should I use for the whoopie pies?
Absolutely! Opt for unsweetened cocoa powder for the best flavor and color in your heart-shaped red velvet whoopie pies. Sweetened cocoa products can alter both the taste and sweetness of the cookies, making them overly sweet and less chocolatey.
How should I store the whoopie pies after baking?
To keep your whoopie pies fresh, store them in an airtight container in the fridge for up to 5 days. It’s crucial to place parchment paper between layers to prevent them from sticking together. This way, they’ll maintain their delicious texture and creamy filling.
Can I freeze heart-shaped red velvet whoopie pies?
Yes, you can freeze these delightful treats! Place the whoopie pies in a single layer in a freezer-safe container or bag, separated by parchment paper to avoid sticking. They can be frozen for up to 2 months. To enjoy, thaw them in the fridge overnight for a perfect texture when you’re ready to indulge!
What if my frosting turns out too thin?
If your cream cheese frosting is too thin, don’t worry! Simply add a bit more powdered sugar, a tablespoon at a time, until you reach your desired consistency. Additionally, you can chill the frosting in the fridge for about 15-20 minutes, which can help thicken it up and make it easier to pipe onto your whoopie pies.
Are these whoopie pies suitable for individuals with gluten allergies?
For gluten-free options, substitute the all-purpose flour with a gluten-free flour blend that measures 1:1. Make sure to check that all other ingredients, such as baking powder and cocoa, are gluten-free as well. However, be aware that the texture may differ slightly from traditional whoopie pies.
Is it okay to use store-bought frosting for the filling?
Very! Using store-bought frosting is a convenient alternative if you’re short on time. Feel free to personalize it by adding a splash of vanilla extract or a pinch of salt to enhance the flavor. However, homemade cream cheese filling does add a special touch to your heart-shaped red velvet whoopie pies!
Heart-Shaped Red Velvet Whoopie Pies for Sweethearts
Ingredients
Equipment
Method
- Preheat your oven to 350°F (180°C) and line your baking sheet with parchment paper.
- In a medium bowl, whisk together the flour, baking powder, baking soda, salt, and cocoa powder.
- In a large bowl, beat the butter and sugars until light and fluffy. Add egg and vanilla, mixing well.
- Gradually add dry ingredients and buttermilk, alternating them, until well combined. Add food coloring to desired shade.
- Pipe the batter onto the prepared baking sheet in heart shapes, leaving space between them. Bake for about 10 minutes.
- Allow cookies to cool on the baking sheet for 5 minutes, then transfer to a wire rack to cool completely.
- Beat cream cheese and butter until smooth, add powdered sugar and vanilla, mix until fluffy.
- Pipe cream cheese filling onto half of the cooled cookies and sandwich them with the remaining cookies.
Leave a Reply