
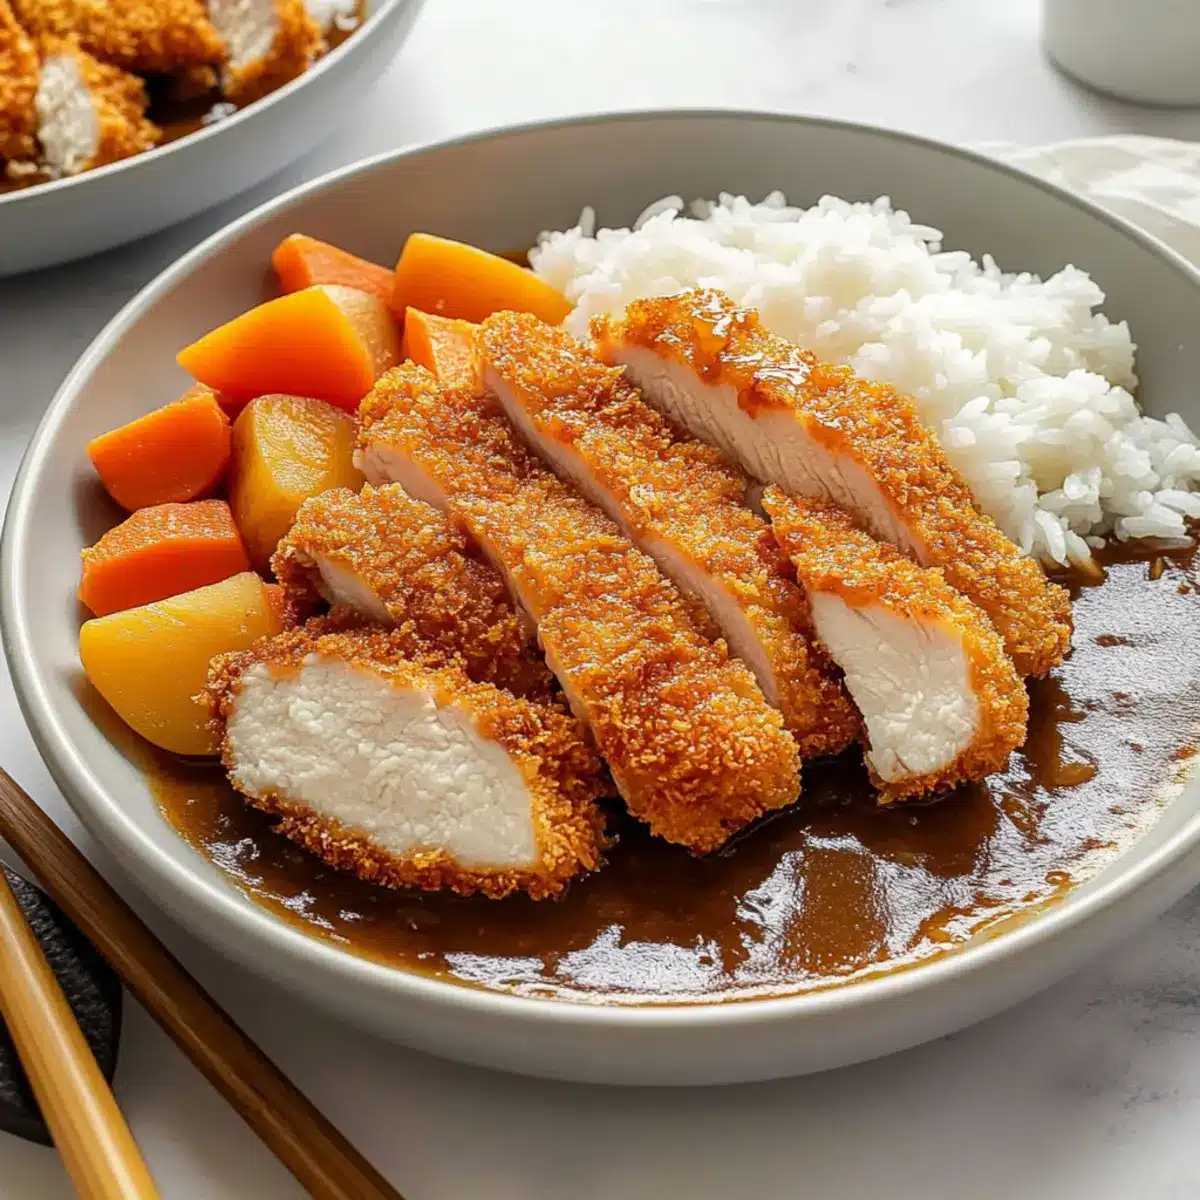
The sound of sizzling chicken fills the kitchen as I dip my fingers into the crispy panko. There’s something undeniably heartwarming about making Japanese Katsu Curry—this dish is a staple comforting delight and a bustling weeknight lifesaver. The juicy breaded chicken katsu pairs perfectly with a rich, umami-packed curry sauce, creating a harmonious blend of flavors that comforts like a warm hug. Plus, this recipe is not only quick to whip up but also a crowd-pleaser that transforms any meal into a memorable event. Whether it’s a cozy family dinner or a gathering with friends, this dish brings everyone to the table, ready to enjoy. Are you ready to dive into making your own crispy chicken katsu curry? Let’s explore this delicious adventure together!
Why is Japanese Katsu Curry so beloved?
Comforting, warm flavors: This dish embodies the essence of home-cooked happiness, combining juicy chicken katsu with a rich curry sauce that wraps you in nostalgia.
Quick to prepare: With simple ingredients and straightforward steps, you can have a restaurant-quality meal on the table in no time.
Versatile and customizable: Feel free to adapt the recipe by swapping proteins or adding your favorite vegetables for a unique twist.
Crowd-pleaser: Perfect for any gathering, this dish has a knack for bringing family and friends together, making every meal special.
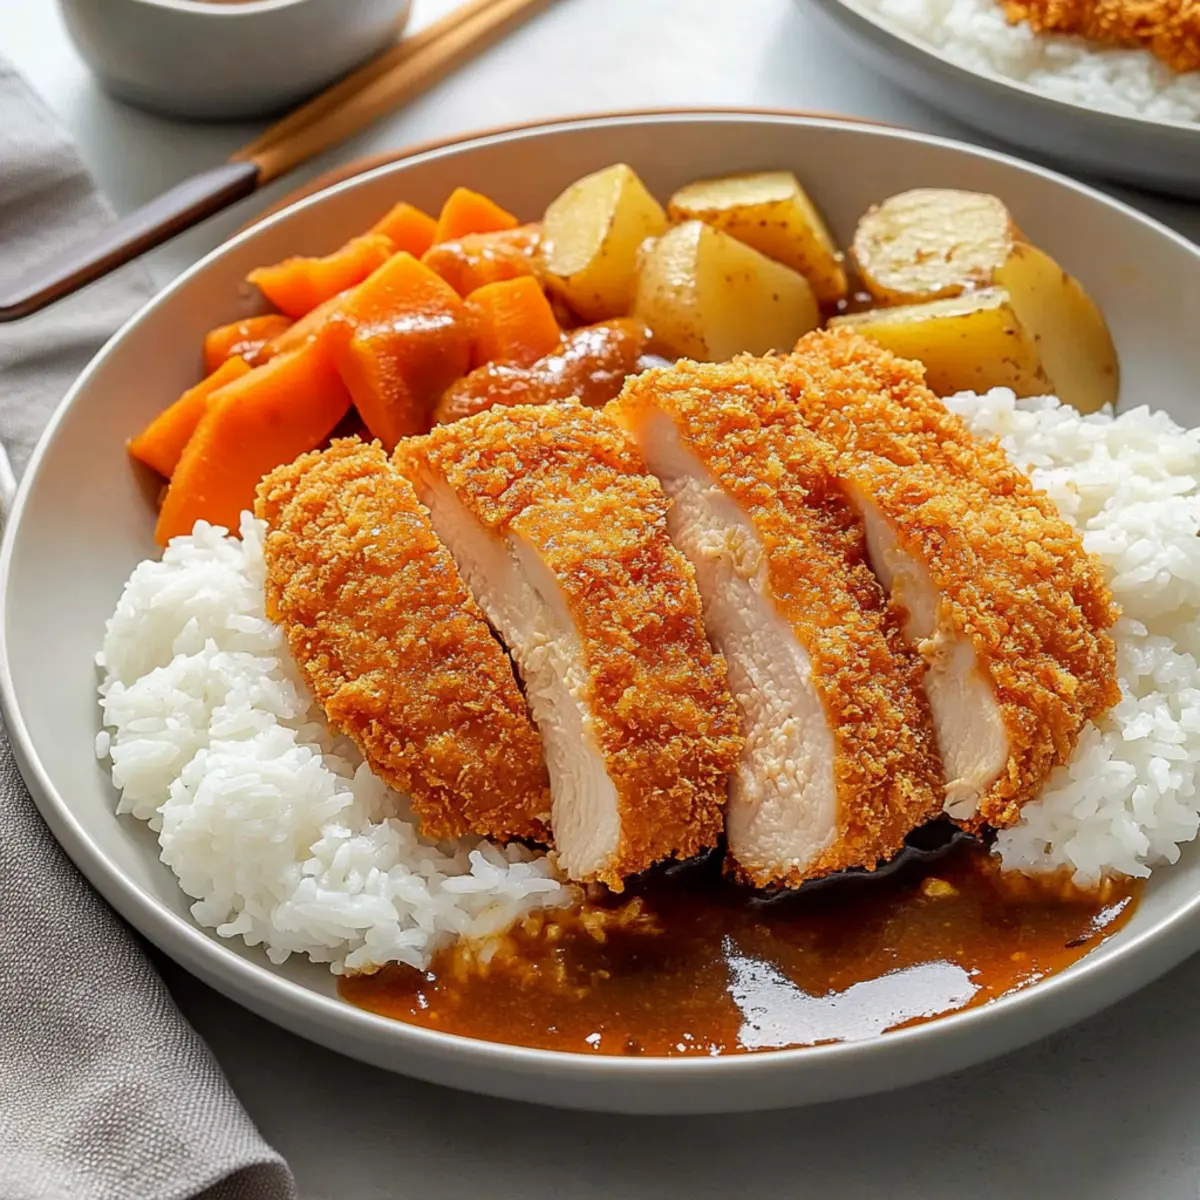
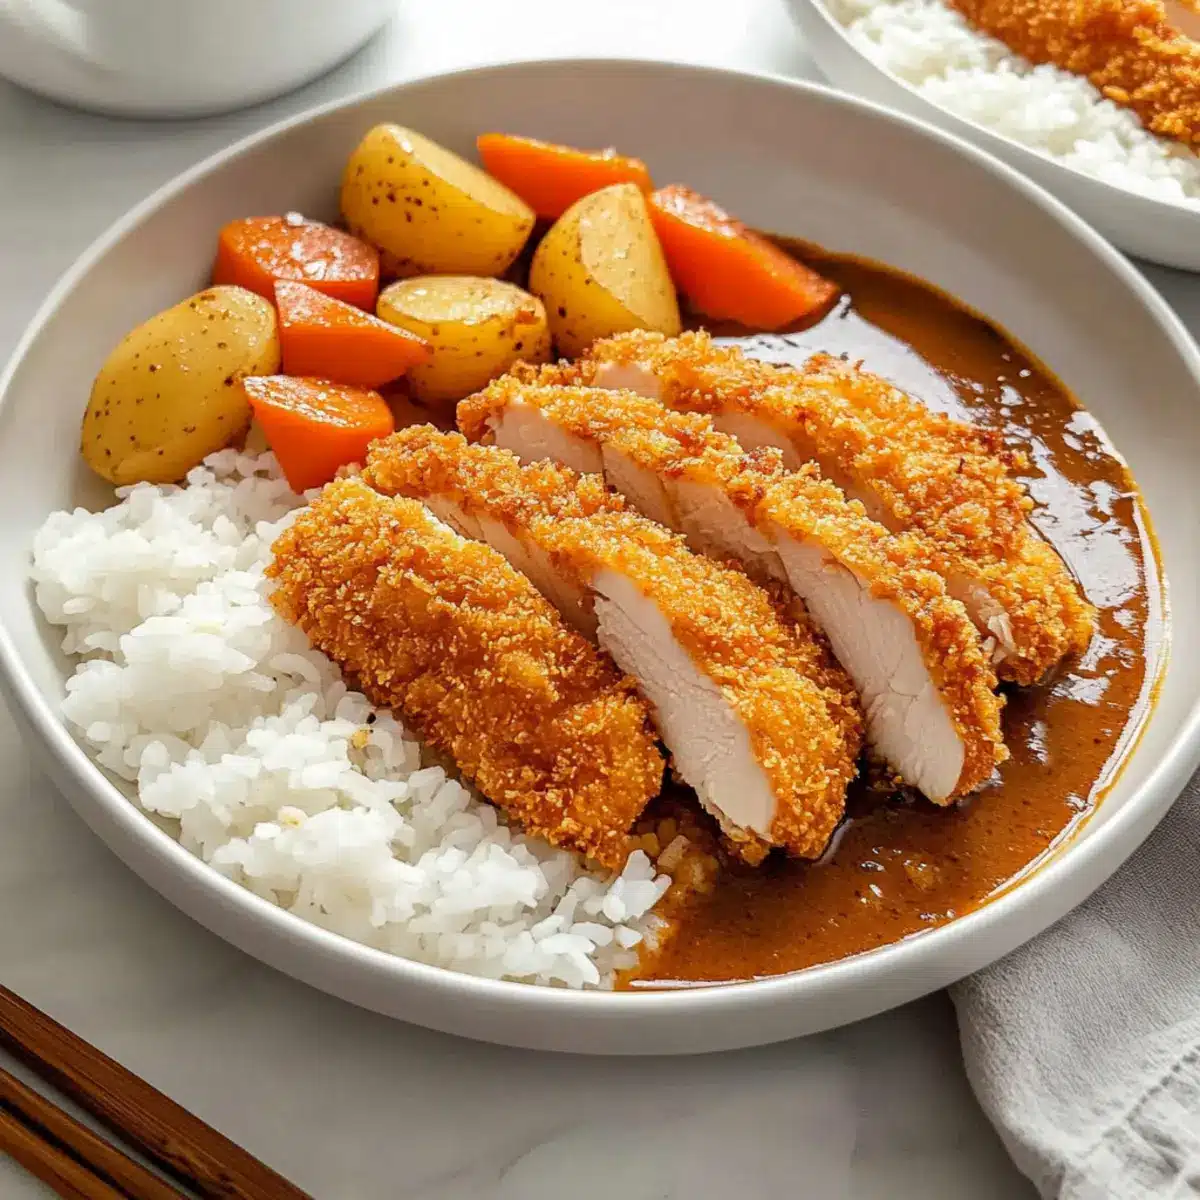
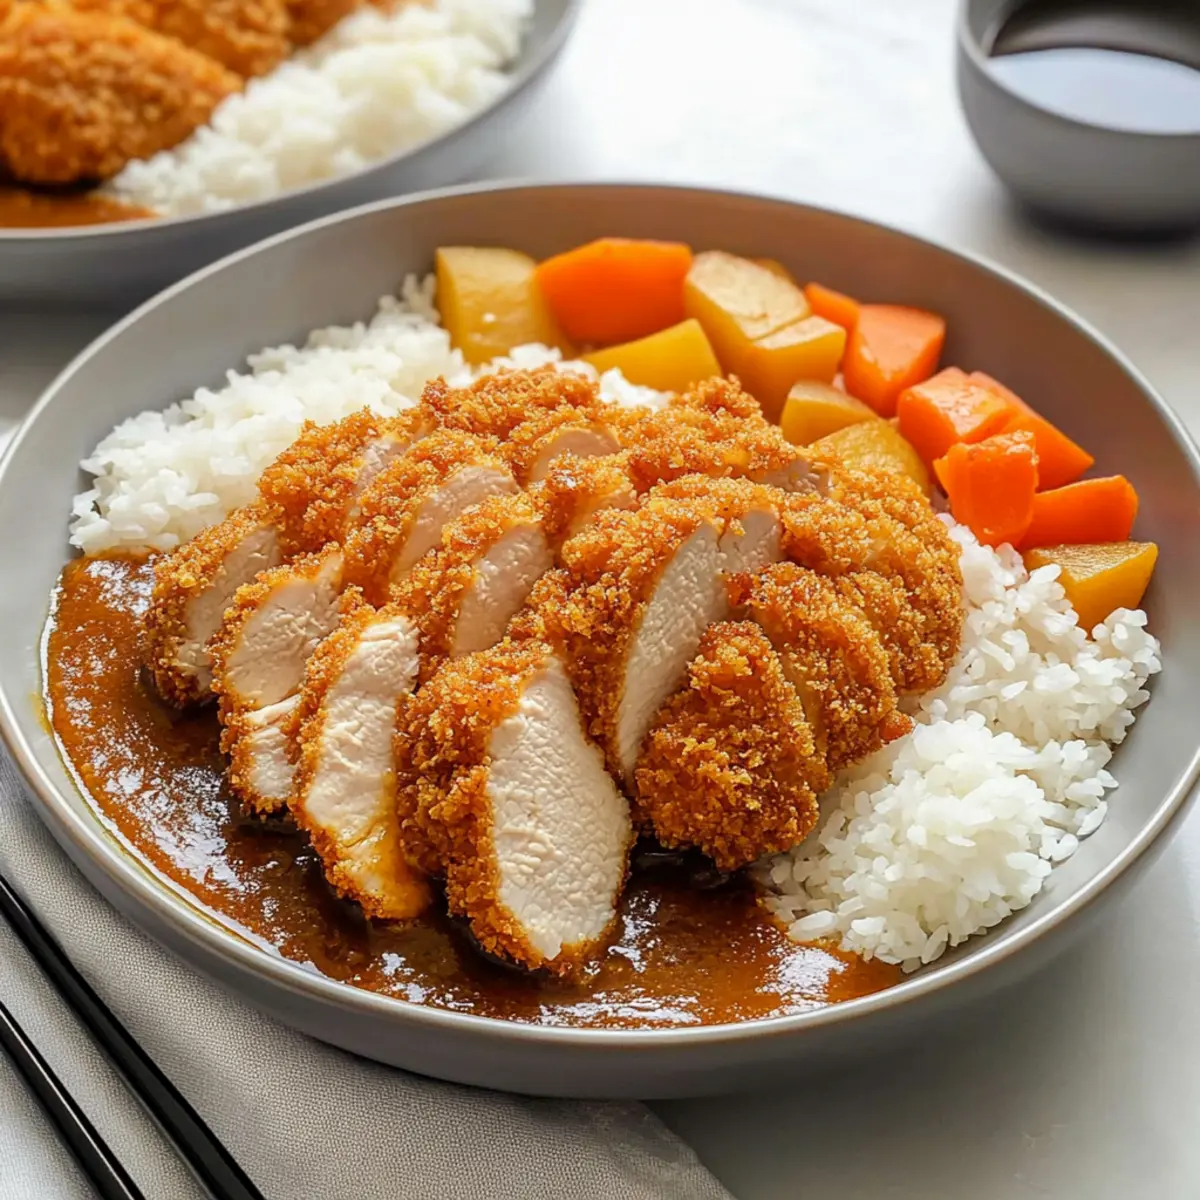
Eye-catching presentation: The vibrant colors and layering of textures make this not only a delight to eat but also a feast for the eyes! Enjoy serving it with a side of salad or pickles for extra crunch.
Japanese Katsu Curry Ingredients
For the Chicken Katsu
• Chicken Breasts – Tender, juicy chicken, pounded for even cooking.
• Salt – Enhances the chicken’s flavor, ensuring every bite is delicious.
• Black Pepper – Adds a hint of seasoning to elevate the taste.
• All-Purpose Flour – Helps create that crispy texture when breading the chicken.
• Egg – Binds the breadcrumbs to the chicken for a perfect coating.
• Panko Breadcrumbs – Provides the signature crunch and lightness of katsu.
• Vegetable Oil – Ideal for frying; ensures the katsu gets a golden finish.
For the Curry Sauce
• Japanese Curry Roux – The star ingredient that brings sweet and savory notes to the sauce.
• Yellow Onion – Adds sweetness and enhances the depth of flavor in the curry.
• Russet Potato – Gives heartiness to the dish; can substitute with Yukon Gold for better texture.
• Carrot – Contributes natural sweetness and a pop of color.
• Olive Oil – Used for sautéing vegetables for an aromatic base.
• Garlic – Infuses the curry with a robust flavor.
• Red Apple – Adds a touch of natural sweetness; can be replaced with grated pear for variation.
• Chicken Stock – Forms the liquid base of the curry; vegetable stock works well for a vegetarian option.
• Water – Adjusts the sauce’s consistency to your liking.
• Soy Sauce – Introduces umami flavor, enhancing the overall taste of the dish.
• Honey – Balances the savory elements with a hint of sweetness.
For Serving
• Cooked White Rice – Acts as a fluffy base that soaks up the rich curry sauce, making for a comforting meal.
Step‑by‑Step Instructions for Japanese Katsu Curry
Step 1: Prepare Chicken
Start by butterflying chicken breasts and pounding them to about ½ inch thickness. Season both sides generously with salt and black pepper to enhance the flavors. This step is crucial for ensuring that the chicken katsu will be juicy and tender when cooked.
Step 2: Breading Station
Set up a breading station with three shallow dishes: one for all-purpose flour, another for a beaten egg, and the last for panko breadcrumbs. This organized setup makes the coating process smoother and prevents any mess, ensuring that your chicken katsu will have a wonderful crunch.
Step 3: Coat Chicken
Dredge each piece of seasoned chicken in the flour first, shaking off any excess. Next, dip the chicken into the beaten egg mixture, allowing it to coat thoroughly, and finally, press it into the panko breadcrumbs until fully covered. This triple-coating method guarantees the perfect crispy texture for your katsu.
Step 4: Fry Chicken
In a deep pan, heat vegetable oil to 340°F (170°C) for frying. Gently place the breaded chicken katsu in the hot oil, cooking for about 3-4 minutes on each side until they are golden brown and crispy. Once cooked, transfer the chicken to a wire rack to drain and maintain its irresistible crunch.
Step 5: Make Curry
While the chicken is frying, heat a tablespoon of olive oil in a large pot over medium heat. Sauté diced yellow onions and minced garlic until the onion is translucent and fragrant, about 3-4 minutes. This aromatic base is essential for developing the deep, rich flavor in your Japanese katsu curry.
Step 6: Simmer Curry
To the pot, add chopped carrots and russet potatoes, cooking them for an additional 5-6 minutes until slightly softened. Then, stir in chicken stock, water, soy sauce, honey, and grated apple. Bring the mixture to a boil, then reduce the heat and simmer. As it thickens, add the Japanese curry roux, stirring frequently until smooth and creamy.
Step 7: Serve
Once the chicken katsu is crispy and the curry sauce is rich and thick, slice the chicken into strips. Serve the warm, fluffy cooked white rice on plates, lay the chicken on top, and generously ladle the flavorful Japanese katsu curry over everything. Warm colors and aromas will invite everyone to the table for this delightful meal!
What to Serve with Japanese Katsu Curry
Delight in the cozy ambiance of shared meals as you explore various pairings to accompany this beloved dish.
-
Pickled Vegetables: These tangy bites add a refreshing contrast to the rich curry, enhancing the dining experience.
-
Crispy Green Salad: A crisp salad featuring mixed greens and a light vinaigrette brings freshness and helps cut through the curry’s richness.
-
Steamed Broccoli: The slight bitterness and tender crunch of broccoli offer a lovely textural balance to the soft katsu and curry sauce.
-
Japanese Miso Soup: This savory soup offers warmth and umami, complementing the flavors of the katsu curry and providing a comforting start to your meal.
-
Sushi Rolls: A variety of sushi rolls can serve as a delightful side, adding different flavors and textures to your table, making for a diverse and exciting eating experience.
-
Cold Soba Noodles: These noodles can be enjoyed chilled with a dipping sauce, providing a refreshing counterpoint to the warm, hearty curry.
-
Cold Beer or Sake: Pair your meal with a crisp beer or smooth sake, which beautifully balances the savory depth of the curry and enhances the overall experience.
-
Fruit Salad: For a light and refreshing finish, a fruit salad of seasonal fruits rounds out the meal, adding a sweet contrast to the savory goodness of your katsu curry.
-
Mochi Ice Cream: This delightful dessert adds a sweet-ending touch, with the chewy mochi wrapping around smooth, creamy ice cream flavors.
Make Ahead Options
These Japanese Katsu Curry components are perfect for meal prep, making your weeknight cooking much easier! You can prepare the chicken katsu up to 24 hours in advance; bread the chicken and refrigerate it until you’re ready to fry. For the curry sauce, you can cook it entirely and store it in an airtight container for up to 3 days in the refrigerator. Just remember to cool it completely before refrigerating to maintain its quality. When you’re ready to serve, simply reheat the curry on the stovetop while frying the katsu fresh to ensure that it stays crispy. This way, you’ll enjoy the same delicious flavors and comforting experience, with minimal effort on busy nights!
Expert Tips for Japanese Katsu Curry
-
Chicken Prep: Let chicken reach room temperature before cooking. This ensures even cooking throughout, guaranteeing juicy katsu.
-
Frying Temperature: Use a thermometer to maintain oil temperature. If it’s too hot, the katsu may burn; if too cool, it can become soggy.
-
Cooling Technique: After frying, place katsu on a wire rack instead of paper towels. This keeps the bottom crispy and prevents moisture buildup.
-
Uniform Veggies: Cut potatoes and carrots into similar-sized pieces for even cooking. Uneven sizes can lead to some being undercooked while others are overdone.
-
Making Leftovers Shine: If you have leftovers, store the curry and rice separately. This keeps the katsu crispy if reheated, ensuring a delightful second serving!
-
Customization Note: Feel free to experiment with the curry roux. Different varieties can alter the flavor profile, so choose one that suits your taste preference!
Japanese Katsu Curry Variations & Substitutions
Feel free to get creative with this comforting dish and make it your own with these delightful twists!
-
Protein Swap: Switch chicken for pork, beef, or crispy tofu for a different flavor and texture while keeping that beloved katsu crunch.
-
Vegetable Boost: Add colorful veggies like bell peppers, peas, or zucchini to the curry for an extra nutrient punch and vibrant colors.
-
Heat Level: Select a hotter curry roux or add a pinch of chili flakes to spice things up for those who enjoy a fiery twist.
-
Gluten-Free: Use gluten-free breadcrumbs and swap the flour for a gluten-free blend to enjoy this dish without the gluten.
-
Fruit Variations: Instead of red apple, try grated pear or diced mango for a uniquely sweet flavor that complements the savory curry beautifully.
-
Creamy Texture: For an ultra-luxurious curry, stir in a splash of coconut milk toward the end of cooking, adding a rich, velvety finish.
-
Broth Choices: Use homemade chicken stock or vegetable broth to elevate the depth of flavor in your curry sauce—perfect for a personal touch.
-
Serving Idea: Serve with a side of freshly made Japanese pickles to add that delightful crunch and tangy contrast to the rich curry.
Feel inspired? The beauty of Japanese katsu curry lies in its adaptability—each variation brings a new experience to your dinner table!
How to Store and Freeze Japanese Katsu Curry
Fridge: Store leftovers in separate airtight containers for up to 3 days. This keeps your flavorful curry sauce and crispy chicken katsu fresh and ready to reheat.
Freezer: You can freeze the curry for up to 3 months. Make sure to cool it completely before transferring to a freezer-safe bag or container, removing as much air as possible.
Reheating: For best results, defrost the frozen curry overnight in the fridge. Reheat gently on the stovetop or in the microwave until warmed through. If reheating the katsu, place it in a hot oven for a few minutes to regain its crispiness.
Storage Tip: Keep the chicken katsu and curry sauce stored separately to maintain the crispy texture of the katsu until ready to serve.
Japanese Katsu Curry Recipe FAQs
How do I choose the best chicken for katsu?
Absolutely! Look for chicken breasts that are plump and firm, with a pink color. Avoid any that have dark spots or an off smell. Fresh chicken will ensure your katsu is tender and juicy!
What’s the best way to store leftover katsu curry?
Very good question! Store leftovers in separate airtight containers in the fridge for up to 3 days. This way, you’ll keep both the curry and chicken katsu fresh, ready for a comforting meal.
Can I freeze Japanese katsu curry?
You sure can! The curry can last up to 3 months in the freezer. Let it cool completely, then transfer it to a freezer-safe bag, removing as much air as possible. For reheating, defrost it overnight in the fridge and reheat gently on the stovetop.
How do I prevent my chicken katsu from getting soggy?
A common concern! After frying, place the katsu on a wire rack instead of a plate or paper towels. This allows air to circulate around the chicken, keeping it crispy and preventing moisture buildup.
Are there any dietary considerations I need to keep in mind?
Great thought! If you have allergies, be mindful of the ingredients—such as gluten in the flour and panko. You can substitute with gluten-free alternatives or try using different proteins like tofu or pork for a delicious twist!
Irresistible Japanese Katsu Curry That Warms the Soul
Ingredients
Equipment
Method
- Butterfly chicken breasts and pound them to about ½ inch thickness. Season both sides with salt and black pepper.
- Set up a breading station with shallow dishes for flour, beaten egg, and panko breadcrumbs.
- Dredge chicken in flour, dip in egg, and press into panko breadcrumbs until covered.
- Heat vegetable oil to 340°F (170°C). Fry chicken for about 3-4 minutes on each side until golden brown.
- In a pot, heat olive oil and sauté onions and garlic until onion is translucent.
- Add carrots and potatoes. Cook for 5-6 minutes. Stir in stock, water, soy sauce, honey, and grated apple.
- Bring to a boil, reduce heat, add curry roux, and stir until smooth and creamy.
- Slice chicken, serve with rice and curry, and enjoy!
Leave a Reply