
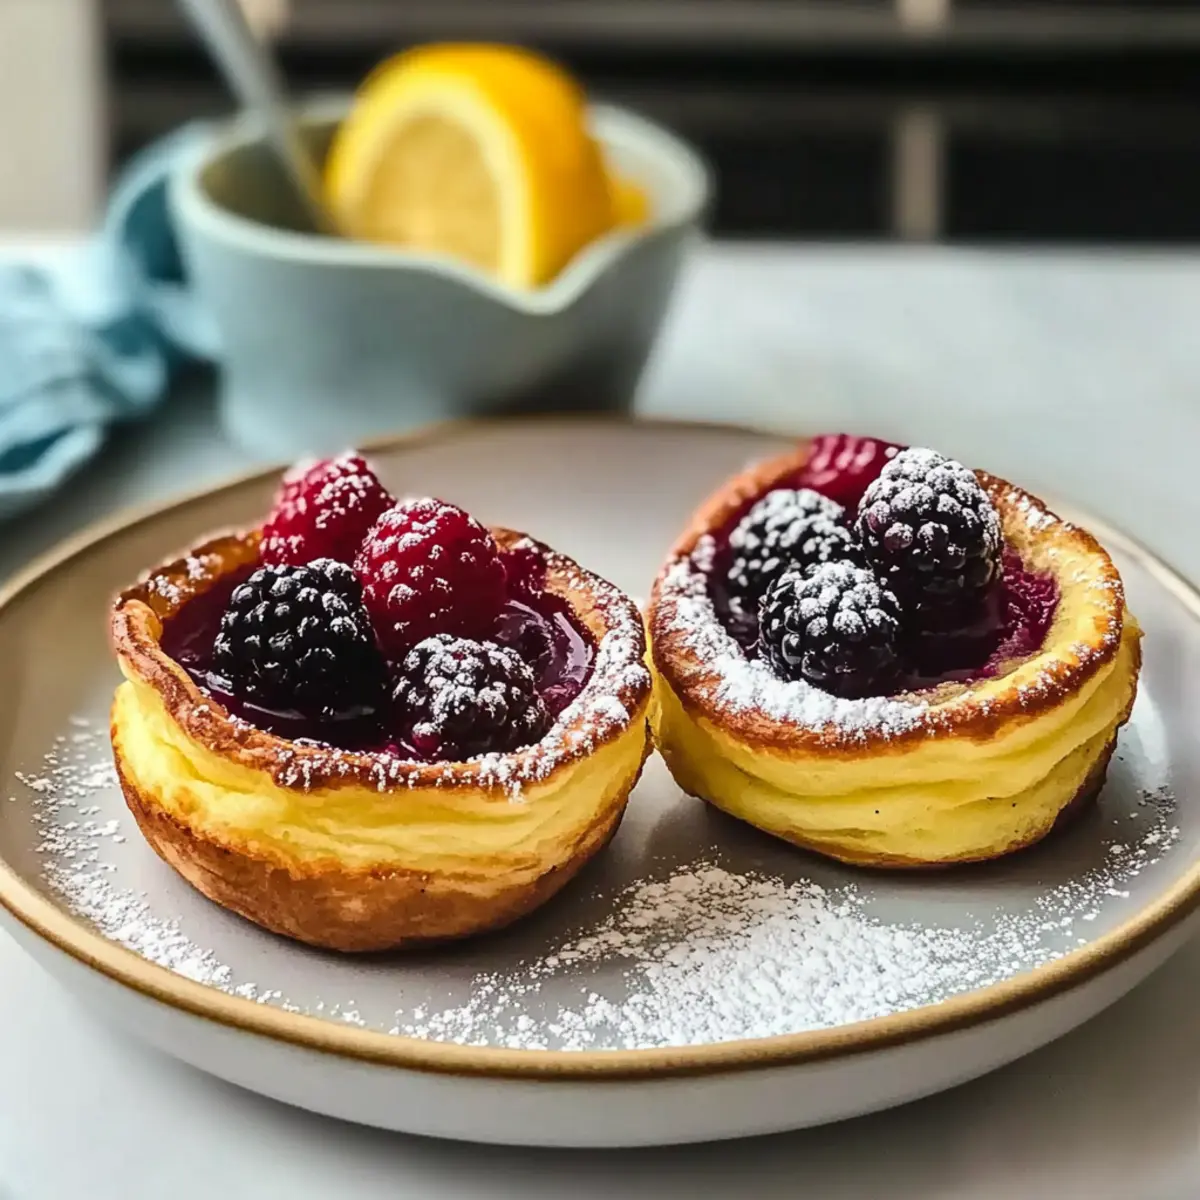
A waft of warm, buttery goodness filled my kitchen as I pulled these delightful mini Dutch baby pancakes from the oven. Instantly puffed and golden-brown, they’re a show-stopping breakfast that elevates even the simplest of mornings. Perfect for gatherings, these airy treats bring a joyful twist to your brunch table and are easily customizable—it’s a joy to discover how effortlessly you can adapt flavors by removing sugar for savory options or swapping in gluten-free flour. Whether you pile them high with powdered sugar and fresh berries or sprinkle in some herbs for a unique bite, these mini Dutch baby pancakes promise a crowd-pleasing experience. Curious about how to make them swoon-worthy? Let’s whip up some magic together!
Why You’ll Love Mini Dutch Baby Pancakes
Effortless Preparation: These pancakes require minimal effort, making them perfect for busy mornings or weekend brunches. With just a few simple ingredients, you can have a show-stopping dish ready in no time.
Endless Customization: Whether you prefer sweet or savory, these pancakes can adapt to any palate. Switch things up with toppings like fresh berries or choose savory options like cheese and herbs for a delightful twist.
Impressive Presentation: Their dramatic puff and golden-brown color create an eye-catching centerpiece on your breakfast table, sure to impress family and friends alike.
Perfect for Sharing: Made in a muffin pan, these mini delights are easy to serve and share, making them ideal for gatherings or casual brunches. Pair with crispy bacon or a bowl of fresh fruit for the ultimate spread.
Diet-Friendly Options: With a gluten-free alternative available, everyone can enjoy these fluffy bites. If you’re looking for more delicious family-friendly recipes, check out these Brownie Bottom Mini or Mini Grilled Cheese options for your next meal!
Get ready to transform your breakfast game with these delightful mini Dutch baby pancakes!
Mini Dutch Baby Pancakes Ingredients
• Ready to create these delightful bites? Here’s what you’ll need!
For the Batter
- All-Purpose Flour – Essential for creating the base; feel free to substitute with gluten-free flour for a delicious alternative.
- Milk – Adds moisture and richness; plant-based milk works as a great dairy-free option.
- Eggs – Provide the lift and airy texture that makes these pancakes so special; direct substitutions aren’t recommended.
- Granulated Sugar – Sweetens the batter; you can omit this for a savory twist!
- Vanilla Extract – Enhances flavor beautifully; optional for those choosing savory variations.
- Salt – A little goes a long way in balancing sweetness; don’t skip this ingredient!
- Unsalted Butter – Delivers richness and ensures crisp edges; margarine or oil can work if you’re looking for substitutes.
Serving Ideas
- Powdered Sugar – A sprinkle of this adds a touch of sweetness and elegance; perfect for a classic breakfast presentation.
- Fresh Berries – Use seasonal fruits for a burst of flavor and color; they nicely complement the soft texture.
- Savory Toppings – Consider cheese, herbs, or smoked salmon for a delightful savory experience; get creative with your combinations!
Embrace the joy of making these mini Dutch baby pancakes with this simple ingredient list, and get ready for some morning magic!
Step‑by‑Step Instructions for Mini Dutch Baby Pancakes
Step 1: Preheat and Prepare
Begin by preheating your oven to 425ºF (220ºC). As the oven warms, place a muffin pan inside to heat up, which is crucial for achieving the signature puffiness of the mini Dutch baby pancakes. This process will take about 10-15 minutes, allowing both the oven and the pan to reach the right temperature.
Step 2: Blend the Batter
In a mixing bowl, combine your flour, milk, eggs, sugar, vanilla extract, and salt. Use a whisk or an electric mixer to blend these ingredients until smooth and fully combined. After mixing, let the batter rest for 10 minutes. This resting period allows the gluten to relax, which contributes to the airy texture of your mini Dutch baby pancakes.
Step 3: Add Butter to the Muffin Pan
Once the oven has preheated, carefully remove the hot muffin pan. Cut your unsalted butter into chunks and place a piece into each well of the muffin tin. Return the pan to the oven for about 1-2 minutes, or until the butter is sizzling and melted. This not only flavors the pancakes but also creates crisp edges.
Step 4: Pour in the Batter
Using caution as the pan will be extremely hot, take the rested batter and pour it into each well, filling them about one-third full. This gives the mini Dutch baby pancakes room to rise beautifully. Immediately place the muffin pan back into the oven to bake, ensuring you don’t lose any heat.
Step 5: Bake to Puff Perfection
Bake the mini Dutch baby pancakes for 12-15 minutes, watching closely as they rise and turn a golden brown. You’ll know they’re ready when they’re puffed up dramatically with crisp edges and a light, airy center. The visual transformation is part of the magic of these delightful pancakes!
Step 6: Cool and Serve
Once baked, carefully remove the muffin pan from the oven and let it cool for about 1 minute. This brief cooling time helps them set before you serve. Gently loosen the pancakes from the edges of the tin with a fork or spatula, then transfer them to a serving plate. Top with your favorite garnishes, and enjoy these delightful mini Dutch baby pancakes!
Mini Dutch Baby Pancakes: Flavorful Twists Await
Feel free to play around with these mini Dutch baby pancakes to elevate your breakfast experience!
-
Gluten-Free: Swap conventional flour for a gluten-free blend to make these pancakes suitable for everyone.
-
Dairy-Free: Use your favorite plant-based milk, such as almond or oat milk, for a dairy-free delight.
-
Savory Swap: Skip the sugar and vanilla, adding cheese, herbs, or sautéed vegetables for a delicious savory twist.
-
Fruit-Filled: Instead of traditional toppings, add sautéed apples or pears into the batter for a fragrant fruity experience.
-
Lemon Poppy Seed: Mix in lemon zest and poppy seeds for a refreshing and zesty flavor that brightens the dish.
-
Spicy Kick: Try adding a pinch of cayenne pepper or chili flakes to the batter for a spicy edge that’s sure to awaken your taste buds.
-
Chocolate Drizzle: A rich chocolate drizzle can transform these mini pancakes into a decadent treat, particularly with fresh strawberries on top!
For more creative ideas, explore our scrumptious video on preparing Spanish Churro Pancakes or add a fun twist to grilling with our Mini Grilled Cheese. Enjoy experimenting with your pancake creation!
Expert Tips for Mini Dutch Baby Pancakes
- Preheat Perfectly: Ensure your oven and muffin pan are fully preheated to achieve that iconic puff; this is key to their airy texture.
- Don’t Overfill: Fill each muffin cup only about one-third full to allow enough space for the pancakes to rise dramatically.
- Rest the Batter: Allowing the batter to rest for 10 minutes is essential; it helps develop a light, fluffy quality for your mini Dutch baby pancakes.
- Butter Sizzle: Make sure the butter is sizzling in the hot muffin tin before adding the batter; this will create crisp edges and enhance flavor.
- Watch Closely: Keep an eye on them as they bake; the last few minutes are crucial for that perfect golden-brown color and optimal puff.
Storage Tips for Mini Dutch Baby Pancakes
Fridge: Store leftover mini Dutch baby pancakes in an airtight container for up to 3 days. This keeps them fresh and ready for a quick breakfast.
Freezer: For longer storage, freeze pancakes in a single layer on a baking sheet, then transfer to a freezer bag. They’ll last for up to 2 months.
Reheating: To maintain their fluffy texture, reheat in a preheated oven at 350°F (175°C) for about 5-7 minutes. Microwaving can make them chewy, so stick with the oven if you can!
Make-Ahead Tip: Batter can be prepared and stored in the refrigerator for up to 12 hours. Be sure to blend it again before pouring into the muffin pan for baking.
Make Ahead Options
These Easy Mini Dutch Baby Pancakes are perfect for meal prep enthusiasts! You can prepare the batter up to 12 hours in advance, storing it in the refrigerator. Just remember to blend the batter again before pouring it into the muffin pan to ensure a smooth consistency. For those who want even more flexibility, you can bake the mini pancakes and keep them in an airtight container in the fridge for up to 3 days. To maintain their delightful puffiness, reheat them in the oven at 350ºF (175ºC) for about 5-7 minutes before serving. This way, you’ll have warm, restaurant-quality mini Dutch baby pancakes ready with minimal effort on busy mornings!
What to Serve with Mini Dutch Baby Pancakes
Sprinkle your morning with joy by pairing these fluffy treats with delightful side dishes that elevate your brunch experience.
-
Crispy Bacon: The salty crunch of crispy bacon balances the airy sweetness of the pancakes, creating a perfect breakfast duo.
-
Fresh Berries: A medley of mixed berries adds a burst of juicy flavor and vibrant color, enhancing the overall presentation of your dish.
-
Whipped Cream: Light and fluffy whipped cream rounds out the sweetness, making each bite feel like a dreamy dessert experience.
-
Maple Syrup: Warm maple syrup drizzled over the pancakes creates a nostalgic flavor combination, warming your heart and tickling your taste buds.
-
Savory Cheese Medley: Offer cheese plates with sharp cheddar or creamy goat cheese for a savory twist; these flavors contrast beautifully with the pancake’s sweetness.
-
Herb Salad: A fresh, lightly dressed herb salad with basil and parsley provides a refreshing bite, making your brunch table bright and lively.
-
Mimosa: Toast to delightful mornings with a bubbly mimosa, refreshing and light, perfectly complementing the sweet fluffiness of your mini Dutch baby pancakes.
Mini Dutch Baby Pancakes Recipe FAQs
What kind of flour can I use for Mini Dutch Baby Pancakes?
Absolutely! You can use all-purpose flour for a classic taste, or swap it with gluten-free flour to cater to dietary needs. Just be sure to pick a gluten-free blend that includes xanthan gum for better texture!
How should I store leftover Mini Dutch Baby Pancakes?
For fridge storage, keep them in an airtight container for up to 3 days; they’ll stay fresh and delicious. For longer duration storage, freeze them! Simply lay them out in a single layer on a baking sheet, freeze until solid, then transfer to a freezer bag. They can last for up to 2 months.
Can I prepare the batter in advance?
Very much so! You can prepare the batter up to 12 hours ahead. Just store it in the fridge, and remember to blend it again before pouring into the muffin pan for baking. This will help restore its smooth texture!
What if my Mini Dutch Baby Pancakes don’t puff up?
No worries! If they don’t puff as expected, it could be due to insufficient preheating or too much batter in the cups. Make sure your oven and muffin pan are preheated to 425ºF, and fill each cup about one-third full to let them rise beautifully.
Are Mini Dutch Baby Pancakes safe for people with allergies?
If you’re catering to someone with allergies, you’ll want to pay attention to the ingredients. The eggs and dairy can be omitted or substituted for alternatives—use a flax egg or a plant-based milk to make them suitable for different dietary preferences. Always check labels for potential allergens in substitutes.
Can I serve Mini Dutch Baby Pancakes to my pets?
As much as we love to share with our furry friends, it’s best to avoid giving them mini Dutch baby pancakes. Ingredients like eggs and sugar aren’t ideal for their diets. Stick to pet-safe treats instead!
Mini Dutch Baby Pancakes: Fluffy Bites of Morning Happiness
Ingredients
Equipment
Method
- Preheat your oven to 425ºF (220ºC) and place a muffin pan inside to heat up.
- Combine flour, milk, eggs, sugar, vanilla extract, and salt in a mixing bowl and blend until smooth. Let batter rest for 10 minutes.
- Remove the hot muffin pan and add a piece of butter to each well. Return to the oven until butter is melted.
- Pour rested batter into each muffin well, filling about one-third full. Place the pan back in the oven to bake.
- Bake for 12-15 minutes until pancakes are puffed and golden brown.
- Let cool for 1 minute, then loosen pancakes from the edges and transfer to a serving plate.
Leave a Reply