
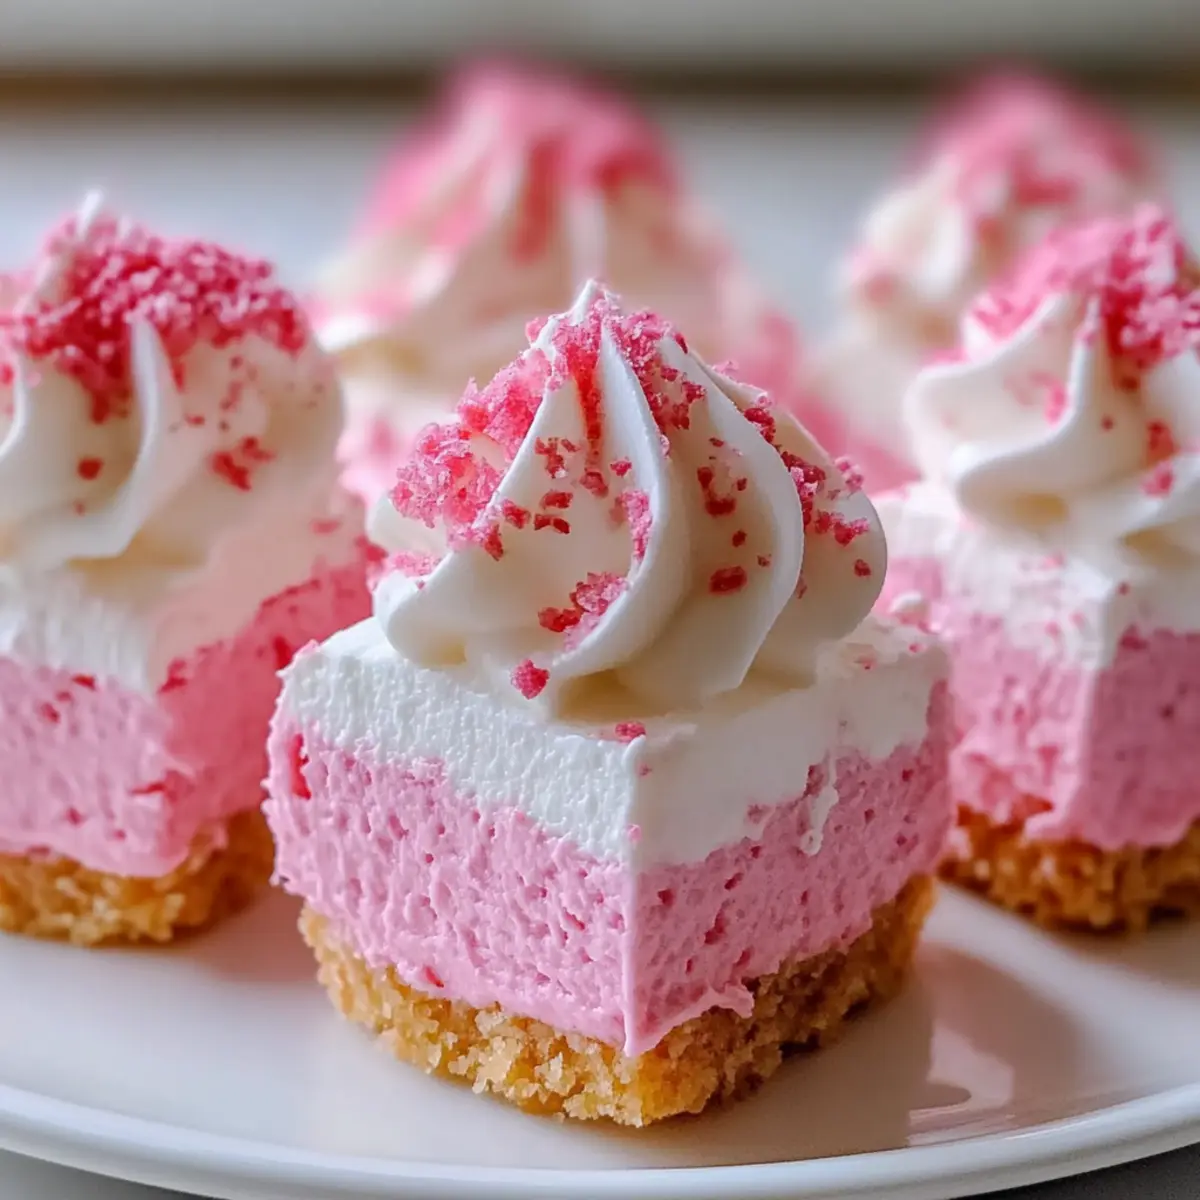
As I stood in my kitchen, mixing the vibrant pink batter for my latest dessert adventure, the scent of vanilla filled the air and instantly transported me back to childhood birthday parties. These No-Bake Pink Velvet Cheesecake Bites are the perfect blend of nostalgia and elegance, offering a delightful escape from the ordinary. Not only are they a show-stopping addition to any celebration, but their easy no-bake preparation makes them a breeze for even the busiest home-chefs. Each bite provides a creamy, melt-in-your-mouth experience that’s sure to impress guests of all ages. Whether you’re hosting a festive gathering or simply craving something sweet, these little pink bites are sure to spark joy. Curious how to whip up this delightful dessert? Let’s dive into the recipe!
Why Try No-Bake Pink Velvet Cheesecake?
Nostalgic Flavors: These bites bring a wave of childhood joy with a modern twist. Simplicity: No need for an oven—perfect for busy chefs or last-minute dessert preparations. Eye-Catching Appeal: The vibrant pink color makes them an irresistible addition to any table. Creamy Texture: A harmonious blend of cream cheese and whipped cream creates a melt-in-your-mouth experience. If you love festive treats, check out my Lemon Cheesecake Cake or explore variations like the Chocolate Orange Cheesecake for more creamy delights. Customizable Options: Tailor these bites to your taste by adding fruit purees or switch up the crust for unique flavors!
No-Bake Pink Velvet Cheesecake Ingredients
For the Crust
• Graham Cracker Crumbs – Forms a delicious, buttery base; gluten-free crumbs can be used as a substitute.
• Melted Butter – Binds the crust together; you can use coconut oil for a dairy-free option.
For the Filling
• Cream Cheese – Provides rich creaminess; substitute with mascarpone for an even smoother texture.
• Powdered Sugar – Adds sweetness and helps achieve a smooth mixture; granulated sugar blended until fine works too.
• Vanilla Extract – Enhances the flavor; swap for almond extract for a different twist.
• Whipping Cream – Creates a light, airy filling; ensure it’s chilled for best results or substitute with coconut cream for a dairy-free option.
• Pink Food Coloring – Adds a cheerful hue; adjust the amount according to your desired intensity or omit for a classic white cheesecake.
These ingredients come together to create a delightful No-Bake Pink Velvet Cheesecake that will dazzle your guests and satisfy your sweet cravings!
Step‑by‑Step Instructions for No-Bake Pink Velvet Cheesecake Bites
Step 1: Prepare the Crust
In a mixing bowl, combine graham cracker crumbs and melted butter, stirring until well mixed. The mixture should resemble wet sand. Press this crumbly blend firmly into the bottom of a lined 8×8-inch baking dish, ensuring an even layer. Use the back of a measuring cup for a smooth, firm crust. Place the dish in the refrigerator to set while preparing the filling.
Step 2: Make the Cream Cheese Filling
In a large bowl, beat the softened cream cheese with an electric mixer on medium speed until smooth and creamy, about 2 minutes. Gradually add powdered sugar and vanilla extract, mixing until fully incorporated and no lumps remain. The mixture should be velvety and thick, perfect for your No-Bake Pink Velvet Cheesecake Bites.
Step 3: Whip the Cream
In a separate bowl, utilize an electric mixer to whip the chilled whipping cream on medium-high speed until soft peaks form, approximately 3-4 minutes. Be careful not to over-whip, as the cream should remain light and airy. This step is crucial for achieving that dreamy texture in your cheesecake filling.
Step 4: Combine Filling Ingredients
Gently fold the whipped cream into the cream cheese mixture using a spatula, taking care to maintain the lightness of the whipped cream. Once combined, add a few drops of pink food coloring, blending just until the color is evenly distributed throughout the mixture, giving your No-Bake Pink Velvet Cheesecake a delightful blush.
Step 5: Assemble the Cheesecake Bites
Carefully pour the creamy filling over the prepared graham cracker crust, spreading it evenly with a spatula. Smooth the top for a polished finish. It’s important to fill every corner of the dish to avoid air pockets, ensuring each bite is deliciously consistent.
Step 6: Chill and Set
Cover the baking dish with plastic wrap and refrigerate for at least 4 hours, or until the cheesecake is firm. This resting time is vital for the No-Bake Pink Velvet Cheesecake Bites to achieve the perfect texture. Once firm, check for firmness by gently pressing on the surface; it should feel set and slightly springy.
Step 7: Cut and Serve
After chilling, remove the cheesecake from the refrigerator and carefully lift it out of the dish using the parchment paper edges. Cut into bite-sized squares, and serve chilled, garnishing with fresh berries or whipped cream if desired. These delightful bites are ready to be enjoyed at any festive occasion!
How to Store and Freeze No-Bake Pink Velvet Cheesecake
Fridge: Store your No-Bake Pink Velvet Cheesecake Bites in an airtight container in the refrigerator for up to 1 week to maintain their freshness.
Freezer: For longer storage, freeze the bites in a single layer on a baking sheet before transferring to an airtight container. They can last for up to 2 months in the freezer.
Thawing: When you’re ready to enjoy them, simply transfer the cheesecake bites to the fridge for several hours or overnight to thaw gently for the best texture.
Reheating: These bites are best enjoyed chilled; there’s no need to reheat, just serve straight from the fridge!
What to Serve with No-Bake Pink Velvet Cheesecake Bites?
Imagine a delightful spread that complements the lusciousness of these creamy pink bites, adding a perfect touch to your dessert table.
-
Fresh Berries: Juicy strawberries or raspberries brighten up each bite, providing a refreshing contrast to the creamy texture of the cheesecake.
-
Chocolate Drizzle: A warm, rich chocolate sauce adds a decadent touch that pairs beautifully with the sweetness of the cheesecake.
-
Whipped Cream: Fluffy whipped cream is a classic accompaniment, enhancing the dessert’s indulgence while adding lightness to each mouthful.
-
Mint Leaves: Fresh mint leaves not only add a pop of color but also bring a subtle freshness that enhances the overall flavor profile.
-
Coffee or Espresso: A bold cup of coffee or a shot of espresso offers a delightful balance to the sweetness, making for a perfect after-dinner treat.
-
Sparkling Wine: A glass of fruity sparkling wine can elevate the festive feeling, making your gathering feel even more special.
Take your gathering to new heights by mixing and matching these delightful pairings with your No-Bake Pink Velvet Cheesecake Bites!
Make Ahead Options
These No-Bake Pink Velvet Cheesecake Bites are a fantastic choice for meal prep, saving you time when the occasion arises! You can prepare the crust and filling up to 24 hours in advance. Simply make the crust, press it into the dish, and refrigerate it. Prepare the filling and store it in an airtight container until you’re ready to assemble. When it’s time to serve, just fold the whipped cream into the cheese mixture, pour it over the crust, and chill for at least 4 hours to ensure it sets beautifully. To maintain that delightful texture, cover tightly to prevent any moisture loss, and your cheesecake bites will be just as delicious as if freshly made!
Expert Tips for No-Bake Pink Velvet Cheesecake
-
Room Temperature Ingredients: Ensure all ingredients, especially cream cheese, are at room temperature for easier blending and a smoother filling.
-
Whip Carefully: When whipping the cream, stop as soon as you see soft peaks; over-whipping can lead to grainy texture, affecting your no-bake pink velvet cheesecake.
-
Chill to Perfection: Patience is key! Allow the cheesecake to set in the fridge for at least 4 hours; this helps achieve the creamy, velvety texture you desire.
-
Avoid Air Pockets: When pouring the filling over the crust, make sure to fill every corner and smooth the top to prevent air pockets that can disrupt the creamy consistency.
-
Flavor Experimentation: Feel free to personalize your no-bake pink velvet cheesecake! Try adding pureed fruits like strawberries or raspberries for a fruity twist or a hint of citrus extract for zing.
No-Bake Pink Velvet Cheesecake Variations
Feel free to get creative with these delightful cheesecake bites and customize them to suit your taste buds!
-
Dairy-Free: Replace cream cheese with vegan cream cheese and use coconut cream instead of whipping cream for a luscious, dairy-free treat.
-
Fruit-Infused: Add blended strawberries or raspberry puree to the filling for a burst of fruity flavor and vibrant color. It’s a delicious twist that offers brightness!
-
Chocolate Twist: Substitute graham cracker crumbs with crushed chocolate cookies for a rich chocolate crust that adds depth to each bite. This decadent spin is a chocolate lover’s dream!
-
Citrus Zing: Use lemon or orange extract instead of vanilla for a refreshing citrus kick that balances the sweetness beautifully. This will awaken your senses in every creamy bite.
-
Nutty Crunch: Fold in finely chopped nuts like almonds or walnuts to the cream cheese mixture for added texture. The crunch complements the smooth filling perfectly, making every bite exciting.
-
Sugar Swap: Use honey or maple syrup as a natural sweetener in place of powdered sugar for a healthier option. This will still provide that lovely sweetness with a unique flavor profile.
-
Classy Chocolate Drizzle: Drizzle melted dark chocolate over the top before serving for an elegant finish. It not only looks stunning but adds a delightful richness that pairs wonderfully!
For more delicious cheesecake ideas, be sure to check out my tempting Pistachio Mushroom Cheesecake or the delightful Brownie Bottom Mini Cheesecakes. Each variation is a wonderful opportunity to explore your creativity and bring something special to your dessert table!
No-Bake Pink Velvet Cheesecake Recipe FAQs
How do I choose ripe ingredients for the No-Bake Pink Velvet Cheesecake?
Absolutely! For the best flavor, ensure your cream cheese is at room temperature, which makes it easier to blend smoothly into the filling. If you’re using fruits like strawberries for possible variations, look for ones that are firm, bright in color, and fragrant. Avoid any with dark spots or mold.
What is the best way to store my No-Bake Pink Velvet Cheesecake?
Store your cheesecake bites in an airtight container in the refrigerator for up to 1 week. To maintain their best quality, keep them covered, ensuring they are well-protected from any strong odors in the fridge. They will retain their delicious flavor and creamy texture!
Can I freeze No-Bake Pink Velvet Cheesecake Bites?
Definitely! For longer storage, place the bites in a single layer on a baking sheet for about 1-2 hours until they are firm. Then transfer them to an airtight container or a freezer-safe zip-lock bag. They can be stored for up to 2 months. Thaw in the fridge overnight before serving for the best texture.
What if my whipped cream becomes grainy while making the cheesecake?
Very good question! To avoid over-whipping your cream, monitor it closely and stop as soon as soft peaks form—this usually takes about 3-4 minutes on medium-high speed. If you accidentally over-whip, simply fold in a little more chilled heavy cream gently until you smooth out the texture—this will help bring it back to that creamy, airy consistency.
Are there any dietary considerations for the No-Bake Pink Velvet Cheesecake?
Certainly! This recipe is vegetarian-friendly and can easily be made dairy-free. To do this, substitute the cream cheese and whipping cream with dairy-free alternatives, such as coconut cream and vegan cream cheese. Always check for any allergies related to the ingredients, like gluten in graham crackers; choose gluten-free alternatives to accommodate. Your guests will appreciate the consideration!
No-Bake Pink Velvet Cheesecake
Ingredients
Equipment
Method
- In a mixing bowl, combine graham cracker crumbs and melted butter. Press mixture into the bottom of a lined 8x8-inch baking dish. Refrigerate while preparing the filling.
- In a large bowl, beat cream cheese until smooth. Gradually add powdered sugar and vanilla, mixing until velvety and thick.
- In another bowl, whip the chilled whipping cream until soft peaks form. Be careful not to over-whip.
- Gently fold whipped cream into the cream cheese mixture. Add pink food coloring and mix until color is evenly distributed.
- Pour the filling over the crust, spreading evenly. Smooth the top to avoid air pockets.
- Cover and refrigerate for at least 4 hours, or until firm. Check for springiness to ensure it's set.
- Remove cheesecake from refrigerator, lift it out, and cut into bite-sized squares. Serve chilled.
Leave a Reply