
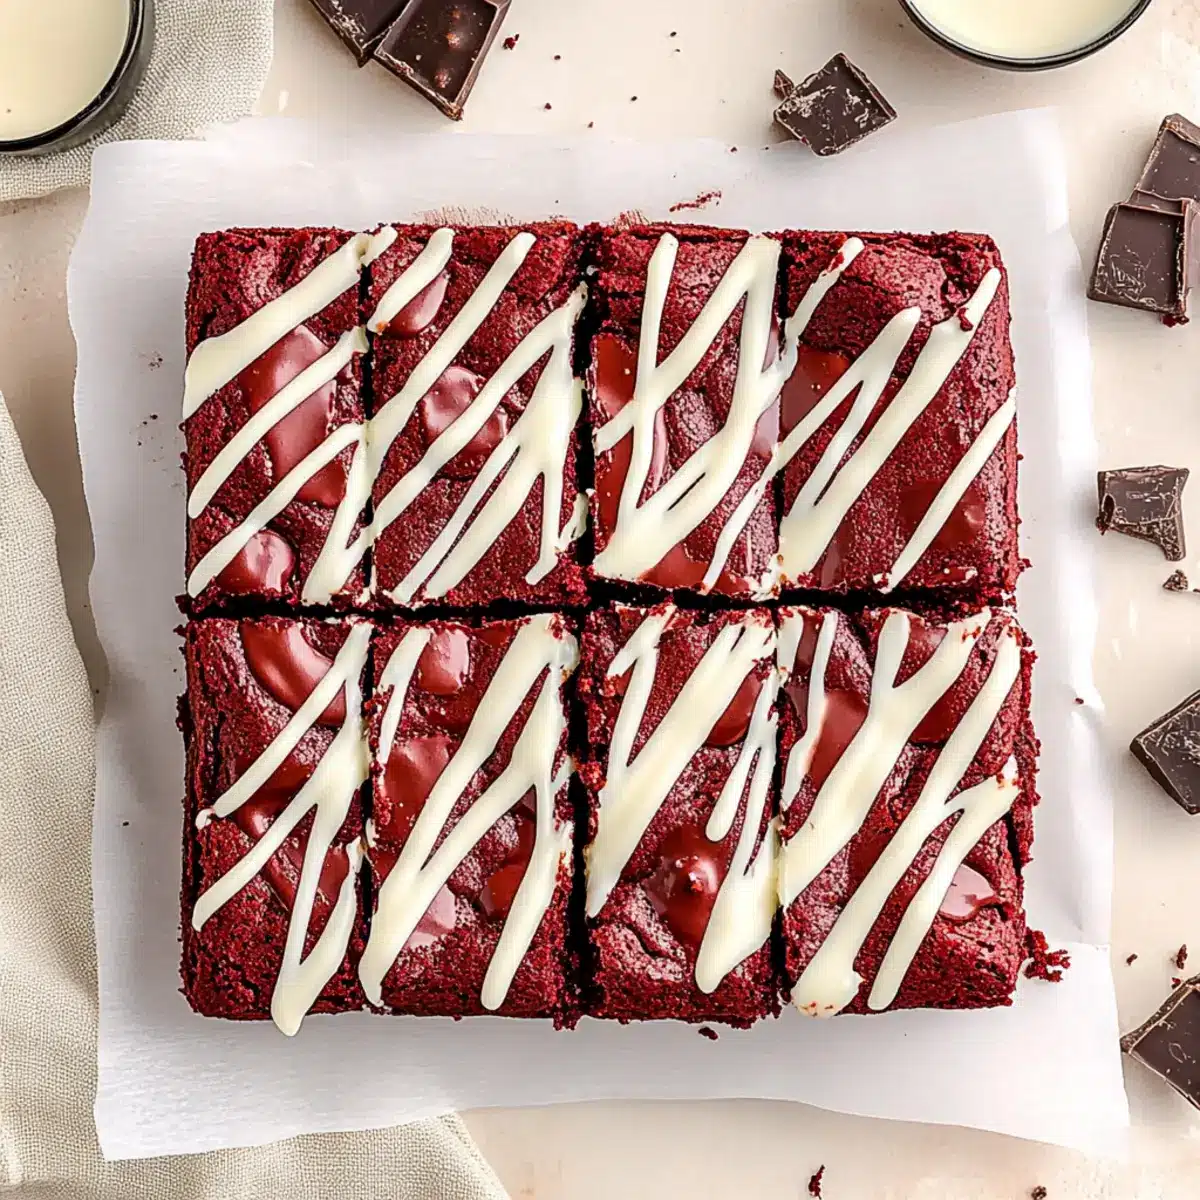
As soon as I laid eyes on those luscious Red Velvet Brownies, I knew I was in for a treat. Their rich crimson hue beckons like a warm hug on a chilly day, promising a delightful experience with every bite. But it’s not just about looks—these gooey, fudgy brownies also deliver on flavor, offering a perfect blend of chocolatey goodness topped with a silky white chocolate drizzle. Not only are they incredibly easy to whip up, making them ideal for impromptu gatherings or cozy nights in, but they also cater to those looking for gluten-free alternatives. Whether you’re celebrating a special occasion or simply treating yourself, these Red Velvet Brownies are bound to become a new favorite. Ready to dive into a world of chocolatey bliss?
Why Are Red Velvet Brownies Irresistible?
Mouthwatering Appearance: The stunning crimson color of these brownies is sure to impress any guest, making them the star of any dessert table.
Decadent Flavor: A heavenly blend of rich chocolate and creaminess from the white chocolate drizzle elevates this dessert into an indulgent experience.
Quick and Easy: You don’t need to be a baking pro to whip up these delights—perfect for anyone craving a homemade treat without all the fuss!
Gluten-Free Options: With simple substitutions, these brownies can easily cater to gluten-sensitive friends, so everyone can enjoy a slice without worry.
Crowd-Pleasing Delight: Perfect for parties, family gatherings, or just a cozy night in, these brownies are a surefire way to satisfy sweet cravings. For more delicious ideas, check out these Ferrero Rocher Brownies and Red Velvet Oreo treats!
Red Velvet Brownies Ingredients
For the Brownies
• Granulated Sugar – Provides sweetness and moisture; can be swapped for coconut sugar for a healthier bite.
• Large Eggs – Offer structure and richness; use room temperature for better emulsification.
• Semi-Sweet Dark Chocolate Chips – Add deep chocolate flavor; feel free to substitute with milk chocolate or dairy-free chips for a lighter touch.
• Vegetable Oil – Ensures a fudgy texture; melted butter can elevate the taste if preferred.
• Red Gel Food Coloring – Gives those iconic red velvet vibes; omit for standard brownies but increase cocoa for richer chocolate.
• White Vinegar – Reacts with baking soda for the perfect rise; essential for authentic red velvet flavor.
• Vanilla Extract – Enhances depth of flavor; no substitutions needed here.
• All-Purpose Flour – Provides structure; can easily switch to a gluten-free flour blend for a safe alternative.
• Dutch Cocoa Powder – Contributes rich flavor; regular unsweetened cocoa works if needed.
• Cornstarch – Creates chewiness and moisture retention; no substitute required.
• Salt – Balances sweetness and flavors; keep as is or reduce for low-sodium diets.
• White Chocolate (melted) – Adds a sweet, creamy finish as a topping; dark chocolate is a fantastic alternative for a richer drizzle.
Step‑by‑Step Instructions for Decadent Red Velvet Brownies with White Chocolate Drizzle
Step 1: Preheat the Oven
Begin by preheating your oven to 160ºC (325ºF). While your oven heats up, take a 20×20 cm (8×8 inch) pan and line it with parchment paper, ensuring it hangs over the sides for easy removal later. This step sets the stage for baking those luscious Red Velvet Brownies to perfection.
Step 2: Melt the Chocolate
In a microwave-safe bowl, add semi-sweet dark chocolate chips and heat them in the microwave in 20-second intervals, stirring in between, until fully melted and smooth. This process usually takes about 1-2 minutes. Allow the melted chocolate to cool slightly before moving to the next step; you want it warm, not hot.
Step 3: Combine Dry Ingredients
While the chocolate cools, grab a medium bowl and sift together the all-purpose flour, Dutch cocoa powder, cornstarch, and salt. This not only combines the ingredients but also aerates them for a lighter texture. The dry mixture should be well mixed with no lumps remaining, ensuring an even bake for your brownies.
Step 4: Whip Eggs and Sugar
In a separate large bowl, whip the room temperature large eggs and granulated sugar together using an electric mixer for about 2 minutes. Expect the mixture to become light and fluffy, taking on a pale yellow hue. This step is essential for creating a rich, fudgy texture in your Red Velvet Brownies.
Step 5: Mix in Wet Ingredients
Once your egg and sugar mixture is fluffy, gently fold in the cooled melted chocolate, vegetable oil, white vinegar, red gel food coloring, and vanilla extract. Stir until well combined, making sure the vibrant color of the red velvet stands out against the glossy chocolate mixture. This creates the beautiful base for your brownies.
Step 6: Combine Mixtures
Gradually add your sifted dry ingredients into the wet chocolate mixture. Use a spatula to gently fold them together until just combined, being careful not to overmix. The batter should be thick and rich, showcasing the lovely red color without any visible flour streaks, ready to transform into decadent Red Velvet Brownies.
Step 7: Bake
Pour the brownie batter into the prepared pan, using a spatula to smooth out the top evenly. Place it in the preheated oven and bake for 40-50 minutes. Keep an eye on the brownies towards the end of the cooking time; they should look slightly puffed with a toothpick inserted in the center coming out with moist crumbs, not wet batter.
Step 8: Cool and Drizzle
Once baked, remove the Red Velvet Brownies from the oven and let them cool in the pan on a wire rack for about 30 minutes. After they are cooled completely, melt white chocolate to drizzle over the top. Use a spoon or a piping bag for a beautiful finish, adding a sweet creaminess that beautifully complements the fudgy brownie base.
Expert Tips for Red Velvet Brownies
-
Use Room Temperature Eggs: For a better-emulsified mixture, always use room temperature eggs. Cold eggs can lead to a denser texture, which isn’t what you want for fudgy Red Velvet Brownies.
-
Avoid Overmixing: When combining wet and dry ingredients, mix just until combined. Overmixing can result in tough brownies, so embrace the lumps for a perfect bake.
-
Test for Doneness Carefully: A toothpick should come out with moist crumbs, not wet batter. Too much time in the oven can dry out your brownies, so check them a few minutes early!
-
Chill for Extra Fudginess: If you can wait, chilling the brownies in the fridge overnight enhances their fudgy texture. Your patience will reward you with an even richer experience.
-
Parchment Paper Joy: Line your baking pan with parchment paper, allowing some to overhang. This makes removing the brownies a breeze while ensuring no sticky leftovers cling to the pan.
What to Serve with Decadent Red Velvet Brownies with White Chocolate Drizzle
Imagine enjoying these heartwarming brownies surrounded by delightful companions that amplify their charm and taste.
-
Creamy Vanilla Ice Cream: The cool, creamy texture of vanilla ice cream contrasts beautifully with the warm, fudgy brownies, creating a delectable balance. Each bite becomes a heavenly experience, merging hot and cold in a dance of flavors.
-
Rich Chocolate Ganache: Drizzling rich ganache over your brownies takes indulgence to the next level. The extra chocolatey flavor enhances the overall experience while adding a glossy finish that makes every brownie even more tempting.
-
Fresh Berries: Juicy strawberries or raspberries bring a splash of freshness and tartness that cuts through the sweetness. Their vibrant colors also add a visual pop, making your dessert table even more inviting.
-
Whipped Cream: A dollop of lightly sweetened whipped cream adds a luxurious lightness to each brownie. It’s like giving your brownies a cloud-like embrace, making each mouthful a bit dreamier.
-
Coffee or Espresso: A cup of rich coffee or espresso complements the chocolate perfectly, enhancing the flavor profile of your brownies. The warmth and bitterness of the coffee create a harmonious balance, making for an indulgent pairing.
-
Chocolate-Covered Strawberries: Treat yourself to the ultimate combination of flavors with chocolate-covered strawberries. The luscious fruit adds a juicy, fresh element that pairs wonderfully with the rich, fudgy brownies.
-
Sparkling Wine: For a celebratory touch, serve your brownies with a glass of sparkling wine. The bubbles elevate the experience, providing a bubbly counterpoint to the dense chocolate treat, making it perfect for special occasions.
Make Ahead Options
These Red Velvet Brownies are a perfect time-saver for busy bakers! You can prepare the brownie batter up to 24 hours in advance by mixing all your ingredients and storing it in an airtight container in the refrigerator. This not only enhances the flavors but also ensures you have a delicious treat ready to bake anytime. If you’ve already baked the brownies, they can be stored in an airtight container at room temperature for up to 3 days or in the refrigerator for up to a week. To maintain their fudginess, allow them to cool completely before sealing. When you’re ready to serve, simply drizzle with melted white chocolate for that extra touch of heaven, and you’ll have rich, mouthwatering Red Velvet Brownies in no time!
Red Velvet Brownies Variations & Substitutions
Feel free to explore exciting twists on these delicious Red Velvet Brownies for an even more personalized experience!
- Gluten-Free: Use a gluten-free flour blend instead of all-purpose flour to make these brownies accessible for everyone.
- Dairy-Free: Substitute coconut oil or dairy-free chocolate chips to create a yummy dairy-free version without compromising taste.
- Nutty Delight: Add chopped walnuts or pecans for a crunchy texture that complements the fudgy brownies beautifully.
- Chocolate Lovers: Replace a portion of the flour with cocoa powder for an intensified chocolate flavor that will satisfy any sweet tooth.
- Extra Moisture: Incorporate a little applesauce or yogurt into the batter for added moisture and a subtle flavor twist.
- Decadent Swirls: Swirl in some cream cheese or marshmallow fluff before baking for a delightful surprise in each bite.
- Spicy Kick: For a unique flavor profile, add a pinch of cayenne or cinnamon to the batter, enhancing the richness with a warm spice.
- Fruity Spin: Mix in fresh raspberries or cherries for a burst of fruitiness that pairs perfectly with the chocolatey goodness.
Don’t forget to check out these delightful treats, too — the Ferrero Rocher Brownies will bring a nutty richness, and for a delightful red velvet twist, try the Red Velvet Oreo dessert!
How to Store and Freeze Red Velvet Brownies
Room Temperature: Store your Red Velvet Brownies in an airtight container at room temperature for up to 3 days to maintain their scrumptious texture.
Fridge: If you prefer a cooler treat, refrigerate the brownies in an airtight container for up to 1 week. This will also enhance their fudginess!
Freezer: For longer storage, freeze the brownies in a single layer, wrapped tightly in plastic wrap and then aluminum foil, for up to 3 months. Just thaw at room temperature before enjoying.
Reheating: To enjoy the brownies warm, pop them in the microwave for 10-15 seconds. Drizzle with a bit more white chocolate for an extra touch of indulgence!
Red Velvet Brownies Recipe FAQs
What is the best way to select ripe ingredients for Red Velvet Brownies?
Absolutely! When selecting ingredients, opt for fresh eggs that feel heavy and have clean shells. It’s also best to choose high-quality chocolate chips, as they significantly enhance the chocolate flavor in your brownies. For red gel food coloring, look for deep, vibrant shades to ensure your brownies have that signature hue.
How should I store Red Velvet Brownies?
Store your scrumptious Red Velvet Brownies in an airtight container at room temperature for up to 3 days. If you want them to last longer, refrigerate them for up to a week. Just remember to let them come to room temperature before serving to enjoy their gooey texture!
Can I freeze Red Velvet Brownies and how?
Yes, definitely! To freeze your brownies, wrap them tightly in plastic wrap and then aluminum foil to prevent freezer burn. They will stay fresh for up to 3 months. When you’re ready to enjoy, simply thaw them at room temperature or pop them in the microwave for a quick warm-up (about 10-15 seconds is perfect!).
What should I do if my brownies are too cakey?
Very! If your Red Velvet Brownies turn out too cakey instead of fudgy, it may be due to overmixing or baking them for too long. To fix this next time, mix the wet and dry ingredients just until combined and start checking for doneness 5-10 minutes earlier than the recommended baking time. You can also try increasing the amount of vegetable oil or butter for added moisture.
Are there any dietary considerations I should be aware of when making Red Velvet Brownies?
Absolutely! If you have gluten sensitivities, you can easily substitute the all-purpose flour with a gluten-free flour blend. Additionally, for those with allergies, be mindful of the chocolate chips, as they may contain dairy or allergens. Checking labels and opting for dairy-free alternatives can accommodate various dietary needs, allowing everyone to indulge in your brownies!
Irresistibly Fudgy Red Velvet Brownies with White Chocolate Drizzle
Ingredients
Equipment
Method
- Preheat your oven to 160ºC (325ºF) and line a 20x20 cm (8x8 inch) pan with parchment paper.
- In a microwave-safe bowl, melt semi-sweet dark chocolate chips in the microwave in 20-second intervals, stirring until smooth. Allow it to cool slightly.
- Sift together all-purpose flour, Dutch cocoa powder, cornstarch, and salt in a medium bowl until well mixed and aerated.
- In a large bowl, whip large eggs and granulated sugar together until light and fluffy, about 2 minutes.
- Fold in the cooled melted chocolate, vegetable oil, white vinegar, red gel food coloring, and vanilla extract into the egg and sugar mixture.
- Gradually mix in the sifted dry ingredients, being careful not to overmix the batter.
- Pour the brownie batter into the prepared pan and smooth the top. Bake for 40-50 minutes until a toothpick comes out with moist crumbs.
- Allow the brownies to cool in the pan for about 30 minutes, then drizzle melted white chocolate over the top.
Leave a Reply