
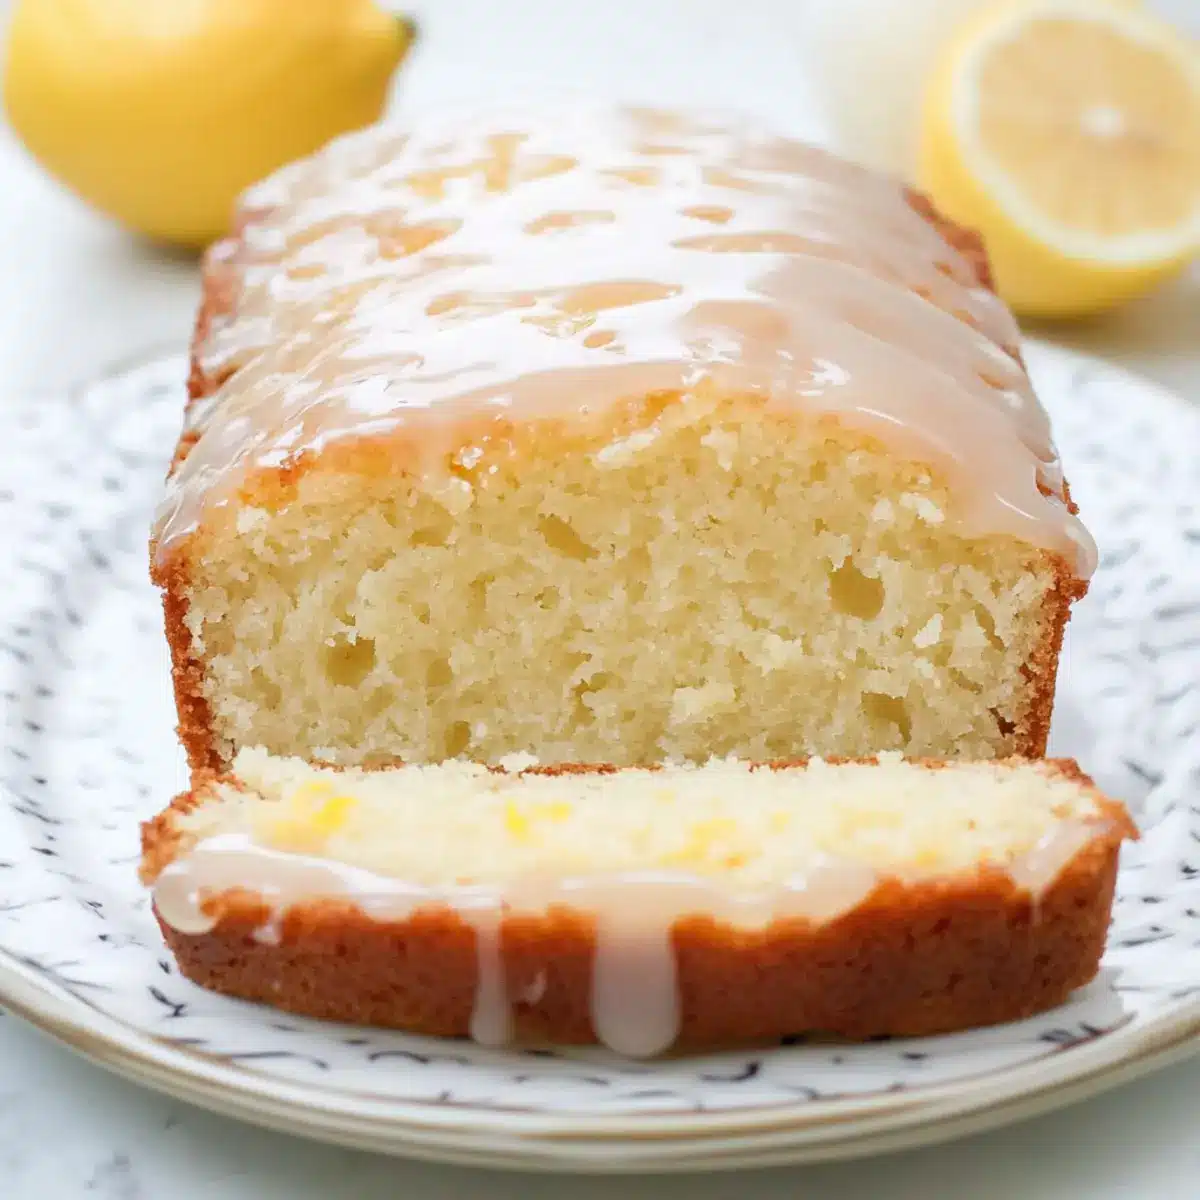
Stepping into the kitchen one rainy afternoon, I was greeted by the refreshing scent of zesty lemons lingering in the air. That invigorating aroma sparked a desire to create something uplifting, so I decided to whip up a Gluten-Free Lemon Loaf with Tangy Lemon Glaze. This easy-to-make delight radiates sunshine, offering a moist, light texture that’s perfect for any occasion—from cozy family gatherings to festive brunches. Not only is it gluten-free and dairy-free, making it suitable for various dietary needs, but it also doubles as a comforting treat that can be enjoyed any time of day. Want to elevate your dessert game and spread that citrus bliss? Keep reading to discover how to make your own irresistible loaf!
Why is this lemon loaf special?
Zesty, Bright Flavor: The combination of fresh lemon juice and zest creates an exhilarating taste that dances on your palate.
Gluten-Free Goodness: Crafted with gluten-free flour, this recipe ensures everyone can indulge without worry, making it perfect for gatherings.
Quick and Easy: With simple steps and minimal prep time, you’ll have a delicious loaf ready in no time—ideal for those busy afternoons.
Versatile Variations: Feel free to get creative! Add blueberries or try lime instead of lemon for a personal twist.
Perfect Pairing: Slice and serve this loaf alongside your favorite tea or coffee to transform any break into a refreshing treat.
Just like our Lemon Cheesecake Cake, this lemon loaf brings sunshine to your table, proving that with a bit of zest, any treat can be extraordinary.
Gluten-Free Lemon Loaf Ingredients
Discover all the key components for your delightful bake!
For the Loaf
- Gluten-Free Flour – Provides the main structure; choose a blend with xanthan gum for best results.
- Sugar – Adds sweetness and moisture; avoid maple syrup to keep the flavor intact.
- Baking Powder – Ensures a light and fluffy texture; it’s essential for leavening.
- Salt – Enhances the overall flavor, balancing the sweetness perfectly.
- Avocado or Coconut Oil – Adds moisture and richness; swap for butter if you prefer a different flavor profile.
- Almond Milk – Acts as a binder; can be substituted with cashew milk or oat milk for allergies.
- Lemon Juice – The main flavor contributor, adding a fresh and tangy burst.
- Lemon Zest – Intensifies the lemon flavor, making it more vibrant.
- Cornstarch – Helps improve texture; can be replaced with arrowroot or tapioca starch if necessary.
- Eggs – Provide structure and moisture; egg replacements weren’t discussed.
For the Lemon Glaze
- Powdered Sugar – Creates the sweet base for the glaze; sifted for smoothness.
- Lemon Juice – Adds a zing to the glaze and complements the loaf beautifully.
Gather these ingredients, and you’ll be on your way to creating a delightful Gluten-Free Lemon Loaf that will brighten any day!
Step‑by‑Step Instructions for Gluten-Free Lemon Loaf
Step 1: Preheat the Oven
Begin your delightful journey by preheating your oven to 350°F (175°C). This temperature will create the perfect environment for your Gluten-Free Lemon Loaf to rise beautifully. While the oven warms up, gather all your ingredients to streamline the process, ensuring a smooth baking experience.
Step 2: Combine Dry Ingredients
In a large mixing bowl, whisk together the gluten-free flour, baking powder, and salt until well blended. This step is crucial for ensuring an even distribution of leavening and flavor throughout your batter. The mixture should appear light and aerated, setting a strong foundation for the amazing loaf to come.
Step 3: Mix Wet Ingredients
In another bowl, combine the sugar, avocado or coconut oil, and almond milk. Stir these ingredients together until fully incorporated, creating a creamy mixture that serves as the base for your Gluten-Free Lemon Loaf. The mixture should appear smooth and slightly glossy, indicating it’s ready for the next additions.
Step 4: Add Eggs and Citrus
Crack in the eggs, then add the freshly squeezed lemon juice and lemon zest to the wet mixture. Mix until everything is well combined, allowing those vibrant citrus notes to infuse the batter. The mixture should have a uniform texture with little lumps, ensuring a scrumptious loaf.
Step 5: Combine Dry and Wet Mixtures
Gradually stir the dry ingredients into the wet mixture, using a spatula or wooden spoon. Be careful not to overmix; your goal is to combine everything until just incorporated. The batter should have a thick, somewhat sticky consistency yet remain slightly lumpy—this will help maintain a moist texture in your Gluten-Free Lemon Loaf.
Step 6: Pour into Loaf Pan
Prepare a greased loaf pan by coating it with oil or cooking spray to prevent sticking. Pour the batter into the pan, smoothing the top with a spatula. The batter should fill the pan to about two-thirds full, allowing room for it to rise while baking, crafting that perfect loaf shape.
Step 7: Bake the Loaf
Place the loaf pan into your preheated oven and bake for approximately 60 minutes. The loaf is done when it turns a beautiful golden brown, and a toothpick inserted into the center comes out clean. Keep an eye on it during the last few minutes; the aroma will fill your kitchen, signaling its readiness.
Step 8: Cool the Loaf
Once baked, carefully remove the Gluten-Free Lemon Loaf from the oven, and allow it to cool in the loaf pan for about 15 minutes. This step is essential for the loaf to set properly. Afterward, transfer it to a wire rack to cool completely, allowing the flavors to develop even further.
Step 9: Prepare the Lemon Glaze
While the loaf cools, prepare the glaze by mixing powdered sugar with fresh lemon juice in a small bowl. Stir until you achieve a smooth, pourable consistency. The glaze should be bright and glossy, ready to enhance your Gluten-Free Lemon Loaf with its sweet and tangy flavor.
Step 10: Glaze the Loaf
Once the loaf has fully cooled, drizzle the lemon glaze generously over the top, allowing it to cascade down the sides. This step will add a beautiful, shiny finish and a burst of zesty flavor. The glaze complements the light texture of the loaf, making each slice irresistibly tempting.
What to Serve with Gluten-Free Lemon Loaf with Lemon Glaze
Nothing enhances the sweet, tangy flavors of this delightful loaf like a few perfectly chosen accompaniments.
-
Herbal Tea: Pairing your lemon loaf with a warm cup of herbal tea creates a calming experience, the herbal notes complementing the citrus beautifully. Chamomile or mint varieties are especially refreshing.
-
Fresh Berries: A handful of vibrant strawberries, blueberries, or raspberries adds a juicy burst of natural sweetness that balances the tartness of the lemon, enhancing both flavor and presentation.
-
Greek Yogurt: This creamy addition provides a luscious contrast, offering a tangy richness that pairs perfectly with the lightness of the lemon loaf and adds a protein boost to your snack.
-
Avocado Toast: For a delightful contrast, serve alongside a slice of avocado toast topped with a sprinkle of sea salt and cracked pepper. This savory pairing adds depth and fullness to your meal.
-
Lemonade Spritzer: Quench your thirst with a refreshing glass of lemonade spritzer, mixing tart lemon juice with sparkling water. It enhances the citrusy notes, creating a joyful drinking experience with the loaf.
-
Honey Drizzle: A light drizzle of honey over your slice provides a touch of sweetness, harmonizing with the lemon glaze while enhancing the loaf’s moist texture.
-
Whipped Coconut Cream: For a tropical twist, a dollop of whipped coconut cream on the side can offer a rich yet dairy-free creamy partner, beautifully countering the zesty loaf.
These thoughtful pairings will elevate your gluten-free lemon loaf experience, making every bite a lovely blend of flavors and sensations.
How to Store and Freeze Gluten-Free Lemon Loaf
Room Temperature: Keep the lemon loaf wrapped in plastic wrap or in an airtight container for up to 3 days to maintain its moisture and flavor.
Fridge: If you want to extend its freshness, store the loaf in the refrigerator for up to 5-7 days. Make sure it’s well-wrapped to prevent drying out.
Freezer: For longer storage, freeze the gluten-free lemon loaf tightly wrapped in plastic wrap and aluminum foil for up to 3 months. Thaw in the fridge overnight when you’re ready to enjoy it.
Reheating: To enjoy your loaf warm, slice and microwave each piece for about 15-20 seconds; it will be just like freshly baked!
Gluten-Free Lemon Loaf Variations
Feel free to let your creativity shine by customizing this delightful loaf for your taste buds!
- Dairy-Free: Substitute almond milk with any plant-based milk like oat or soy milk to keep it creamy without dairy.
- Fruit-Infused: Fold in fresh blueberries or chopped strawberries for a fruity burst that complements the lemon zest beautifully.
- Citrus Switch: Swap lemon juice and zest with lime or orange to enjoy a refreshing twist on the classic flavor.
- Nutty Crunch: Add chopped walnuts or slivered almonds into the batter for extra crunch and a nutty depth.
- Herbaceous Notes: Mix in a teaspoon of fresh chopped rosemary or basil for a surprising yet delightful flavor contrast.
- Spice It Up: A pinch of cinnamon or ginger can elevate the loaf with a warm, aromatic kick—perfect for cozy days.
- Savory Options: Replace some of the sugar with herbs and cheese for a unique savory loaf, great for brunch.
- Cacao Delight: Add cocoa powder or chocolate chips to the batter for a delightful chocolate-lemon fusion, reminiscent of dessert lovers’ dreams.
And why not pair your gluten-free indulgence with a slice of our Free Reindeer Chow for an added treat on a special occasion? Let your imagination roam and enjoy your wonderful baking journey!
Helpful Tricks for Gluten-Free Lemon Loaf
-
Room Temperature Ingredients: Ensure all ingredients are at room temperature for better incorporation, helping the Gluten-Free Lemon Loaf rise beautifully.
-
Mixing Method: Avoid overmixing the batter. Mix just until combined to maintain a light texture; lumps are okay!
-
Xanthan Gum Check: If you’re using a gluten-free flour blend, check for xanthan gum. If absent, add ½ teaspoon per cup to improve texture and structure.
-
Monitoring Bake Time: Start checking your loaf at the 50-minute mark. Ovens can vary, and you want that toothpick to come out clean without overbaking.
-
Let It Cool: Allow the loaf to cool completely before glazing. This ensures the glaze adheres properly without slipping off, keeping that lovely finish intact.
Make Ahead Options
These Gluten-Free Lemon Loaf preparations are a lifesaver for busy home cooks! You can mix the dry ingredients (gluten-free flour, baking powder, and salt) and store them in an airtight container for up to 3 days. Additionally, the wet mixture (sugar, oil, almond milk, eggs, lemon juice, and zest) can be prepared and refrigerated for up to 24 hours to infuse those bright flavors. When you’re ready to bake, simply combine the wet and dry ingredients before pouring the batter into a greased loaf pan. For maintaining quality, make sure to store the dry mix in a cool, dry place and always bring the wet mixture to room temperature before combining. You’ll have a delightful gluten-free dessert ready in no time, perfect for any occasion!
Gluten-Free Lemon Loaf with Tangy Lemon Glaze Recipe FAQs
How do I choose the right gluten-free flour for this lemon loaf?
When selecting gluten-free flour, look for a blend that contains xanthan gum, as it helps with texture and structure. If your chosen flour doesn’t include xanthan gum, simply add ½ teaspoon per cup to improve the consistency of your Gluten-Free Lemon Loaf.
What’s the best way to store the lemon loaf?
Wrap your Gluten-Free Lemon Loaf tightly in plastic wrap or place it in an airtight container. At room temperature, it stays fresh for up to 3 days. For longer preservation, refrigerate it for 5-7 days. Always ensure it’s well-wrapped to maintain moisture and flavor without drying out.
Can I freeze the lemon loaf?
Absolutely! For freezing, tightly wrap the cooled lemon loaf in plastic wrap followed by aluminum foil to prevent freezer burn. It can be frozen for up to 3 months. When you’re ready to enjoy it, simply thaw it in the fridge overnight, and it’s as good as freshly baked!
What do I do if my batter is too runny?
If you find your batter is too runny, it may be due to excess liquid or not enough dry ingredients. To fix this, gradually add more gluten-free flour—about 1 tablespoon at a time—until you reach the right consistency. A good batter should be thick yet slightly sticky.
Are there any dietary considerations I should keep in mind?
Yes! This Gluten-Free Lemon Loaf is dairy-free, making it suitable for various dietary restrictions. If you are cooking for someone with nut allergies, simply replace almond milk with oat milk or any nut-free milk alternative. Always check ingredient labels to ensure all allergens are addressed.
How do I know when my lemon loaf is fully baked?
Check for doneness by inserting a toothpick into the center of your loaf. If it comes out clean, your lemon loaf is ready! Additionally, it should have a beautiful golden-brown color and feel firm to the touch. Start checking around the 50-minute mark to avoid overbaking.
Deliciously Light Gluten-Free Lemon Loaf with Glaze
Ingredients
Equipment
Method
- Preheat your oven to 350°F (175°C). Gather all your ingredients.
- In a large mixing bowl, whisk together gluten-free flour, baking powder, and salt until well blended.
- In another bowl, mix sugar, avocado or coconut oil, and almond milk until fully incorporated.
- Add eggs, lemon juice, and lemon zest to the wet mixture. Mix until combined.
- Gradually stir the dry ingredients into the wet mixture until just combined.
- Pour batter into a greased loaf pan, filling it about two-thirds full.
- Bake for approximately 60 minutes until golden brown and a toothpick comes out clean.
- Cool in the loaf pan for 15 minutes before transferring to a wire rack.
- Mix powdered sugar with lemon juice for the glaze. Stir until smooth.
- Drizzle the lemon glaze over the cooled loaf.
Leave a Reply