
The intoxicating aroma of simmering garlic and sweet honey always transports me back to my favorite Chinese takeout joint. That’s why I’m excited to share my recipe for Honey Garlic Chicken, a dish that brings that beloved restaurant experience right into your kitchen! In just 20 minutes, you can whip up this crispy, tender chicken coated in a glossy, sweet sauce that perfectly dances between savory and sweet. It’s an easy, quick meal that turns busy weeknights into something magical. Plus, with a gluten-free option and the ability to swap in your favorite veggies or proteins, this recipe is versatile enough to please everyone at the table. Are you ready to elevate your dinner game tonight?
Why is Honey Garlic Chicken a Must-Try?
Quick and easy: This recipe is perfect for those hectic evenings when you crave something delicious yet effortless. In just 20 minutes, you’ll have a savory dish that’s restaurant-worthy.
Irresistible flavor: A combination of sweet honey and aromatic garlic creates a mouthwatering sauce that will have everyone at the table asking for seconds!
Crispy texture: Coating the chicken in cornstarch ensures you achieve that delightful crunch, giving you the best of both worlds—crispy on the outside, juicy on the inside.
Versatile options: Feel free to switch things up! You can use shrimp, beef, or pork instead of chicken, or even tofu for a vegetarian twist. Looking for something lighter? Consider sautéing your protein with just a touch of oil.
Perfect for meal prep: This dish is also great for meal prep. Make extra to enjoy during the week! Just store in an airtight container and reheat gently to maintain that crispy texture. For an equally enticing meal, don’t forget to try my Garlic Pasta Comfort.
Honey Garlic Chicken Ingredients
• Get ready to make this delectable dish!
For the Chicken
- Chicken Breasts or Thighs – Boneless and skinless pieces work best for quick cooking in this Honey Garlic Chicken recipe.
- Egg – Helps bind the cornstarch, ensuring that crispy finish we all crave.
- Corn Starch – Gives the chicken that desirable crunch; in the UK, it’s known as cornflour.
For the Sauce
- Honey – The star ingredient that adds a delightful sweetness, essential for that sticky sauce.
- Garlic – Freshly chopped, it provides wonderful aromatic flavor and depth.
- Chicken Broth (or Water) – Adds moisture and richness to the sauce; feel free to adjust as desired.
- Rice Wine Vinegar (or Apple Cider/White Vinegar) – Introduces a touch of acidity to balance the sweetness; other vinegars can be substitutes.
- Soy Sauce – Infuses umami flavor; remember to use gluten-free options like tamari if needed.
- Red Pepper Flakes (optional) – Add a dash for a kick of heat if spice is your thing.
- Butter (optional) – Enhances the sauce’s richness, making it extra creamy.
For Frying
- Oil (Peanut or Vegetable) – Essential for frying the chicken to achieve that incredible crispy texture.
With these simple ingredients, you’re on your way to creating a beloved family meal that’s sure to be asked for time and again!
Step‑by‑Step Instructions for Honey Garlic Chicken
Step 1: Prepare the Chicken
Start by coating your chicken breasts or thighs in a bowl with a lightly beaten egg, ensuring each piece is well-covered. Then, sprinkle cornstarch generously over the chicken pieces, using your hands to coat them evenly. This step is crucial for achieving that desirable crispy texture once cooked.
Step 2: Heat the Oil
In a large skillet, heat about two tablespoons of peanut or vegetable oil over medium-high heat. You’ll know it’s ready when the oil shimmers with a hint of rippling, but be careful not to let it smoke. Once the oil is hot enough, carefully place the coated chicken pieces in the skillet, ensuring they don’t stick together and have room to cook evenly.
Step 3: Cook the Chicken
Fry the chicken in the hot skillet for about 4-5 minutes on each side, or until they are golden brown and crispy. Use tongs to gently flip the chicken, ensuring they cook evenly without overcrowding the pan. The beautiful browning will create that crispy coating we crave for our Honey Garlic Chicken.
Step 4: Make the Sauce
While the chicken is cooking, combine honey, minced garlic, chicken broth, rice wine vinegar, soy sauce, and optional red pepper flakes in a separate bowl. Stir until everything is well mixed. The sweet and savory ingredients will create a luscious sauce that will elevate the dish. If you prefer a thicker sauce, add a bit more cornstarch at this stage.
Step 5: Combine Chicken and Sauce
Once the chicken is perfectly cooked, pour the prepared sauce mixture over it in the skillet. Increase the heat to bring the sauce to a gentle boil. As the sauce heats, stir to cover the chicken pieces completely. Let it simmer for about 1-2 minutes, allowing the sauce to thicken slightly and coat the chicken beautifully.
Step 6: Finish with Butter
To add richness to your Honey Garlic Chicken, add a tablespoon of butter to the skillet and stir gently until it melts and blends into the sauce. This final touch adds creaminess and enhances the flavor of the dish. Once the butter is incorporated, take the skillet off the heat and prepare to serve.
Step 7: Serve and Enjoy
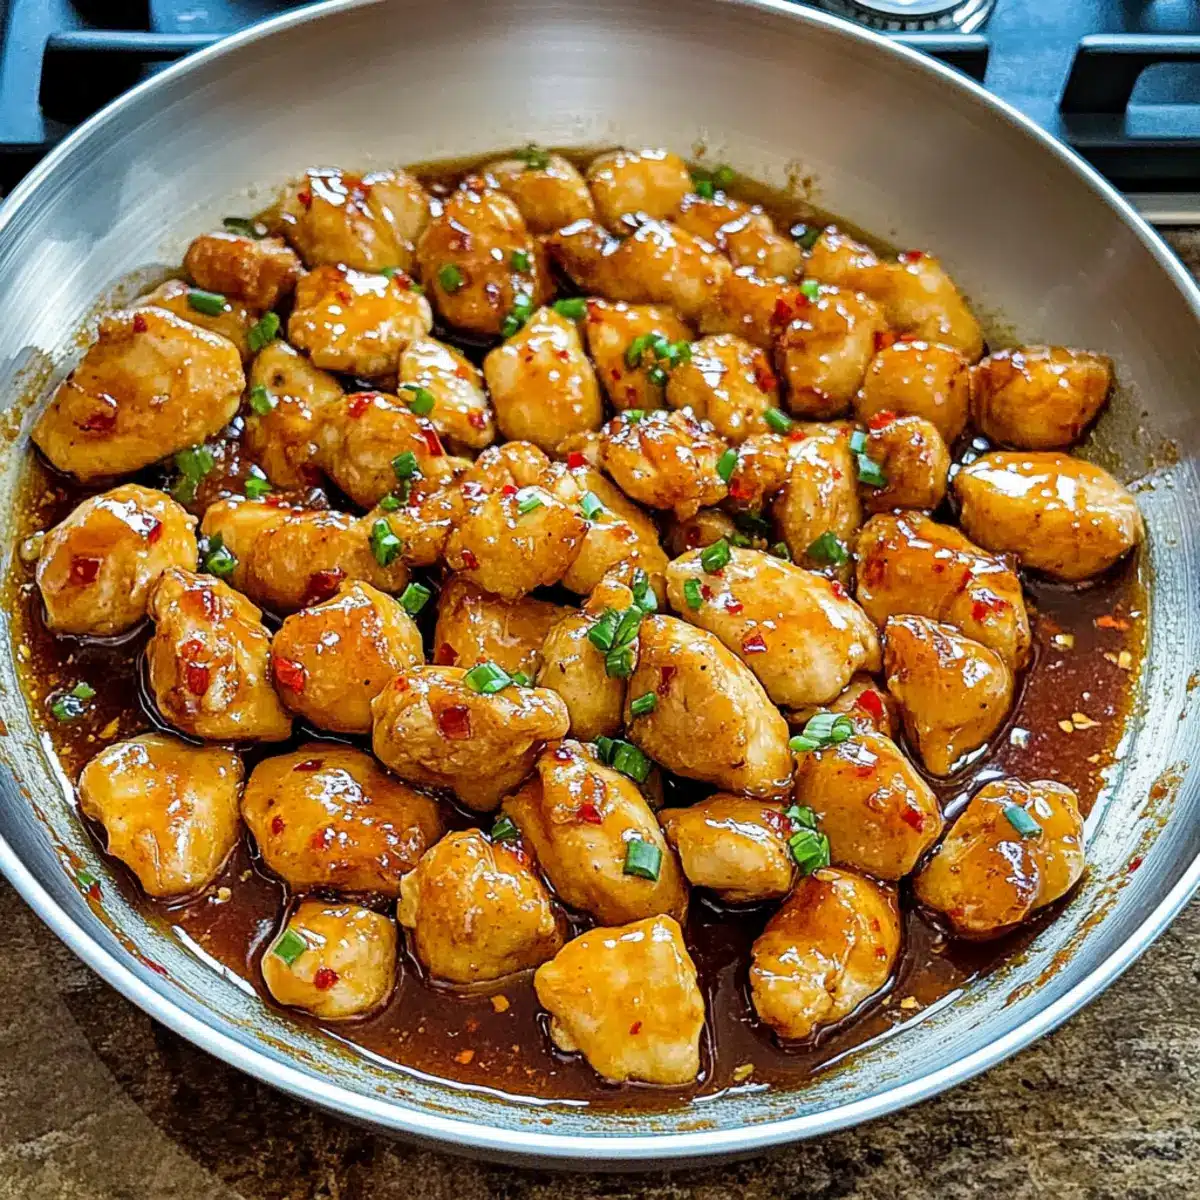
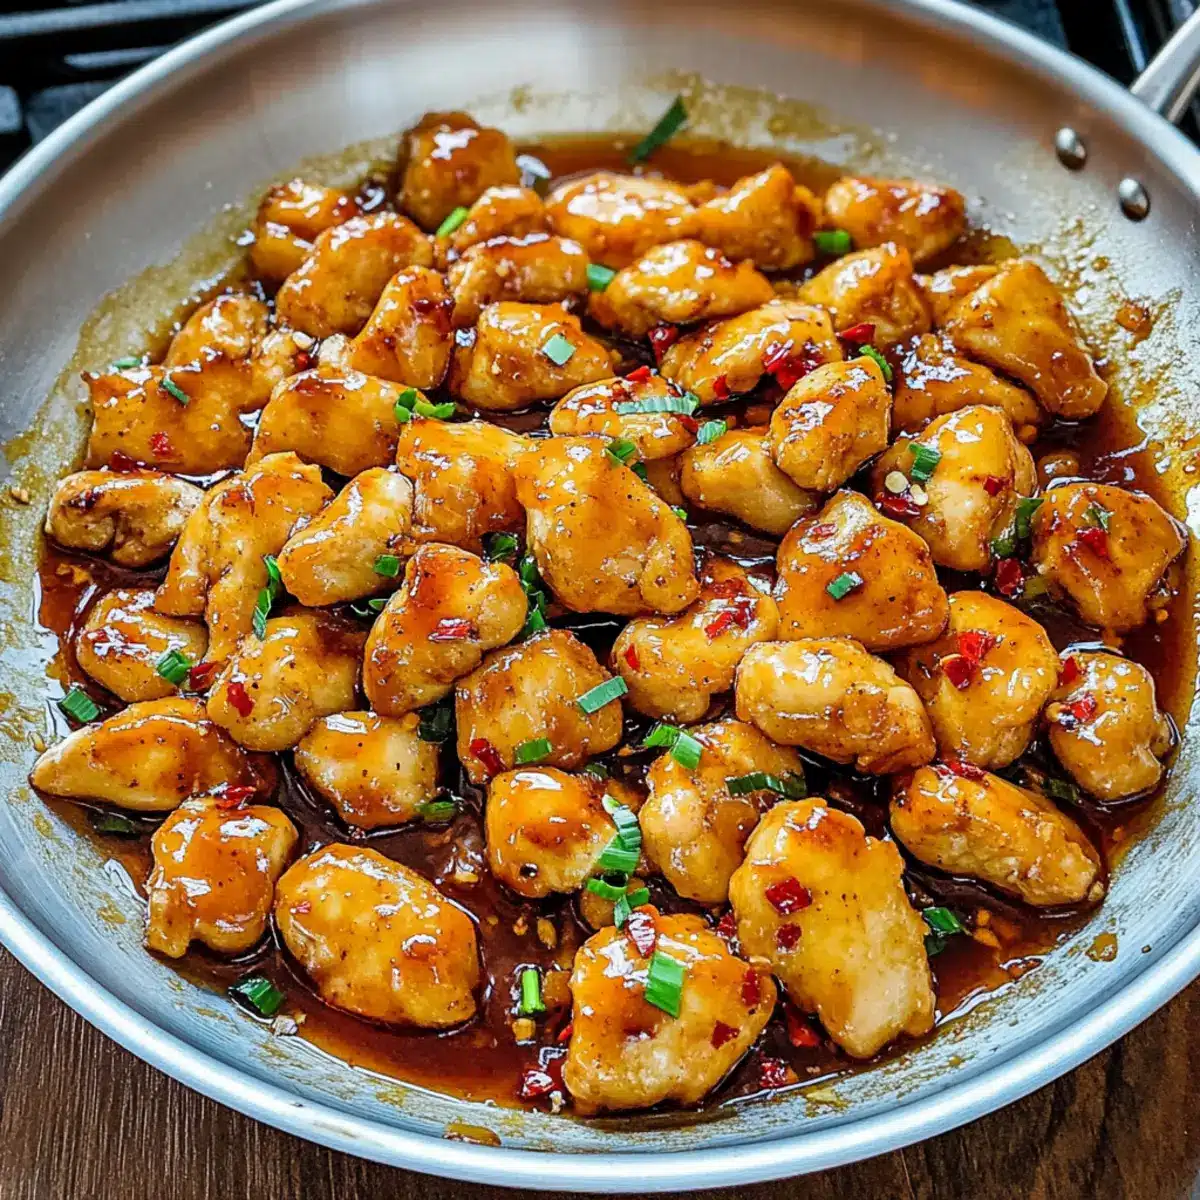
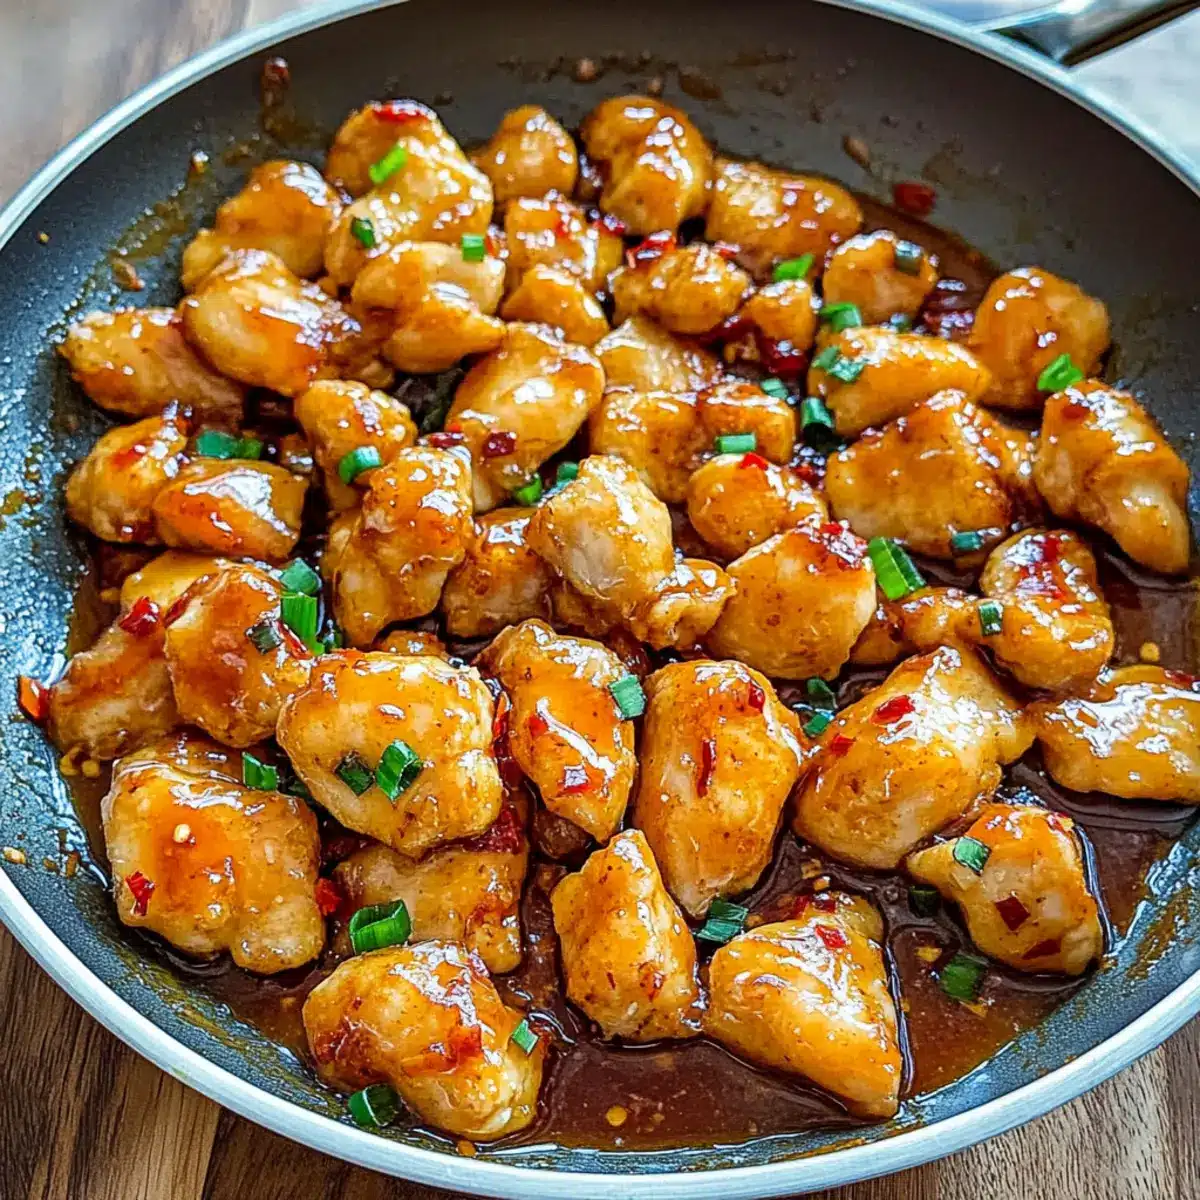
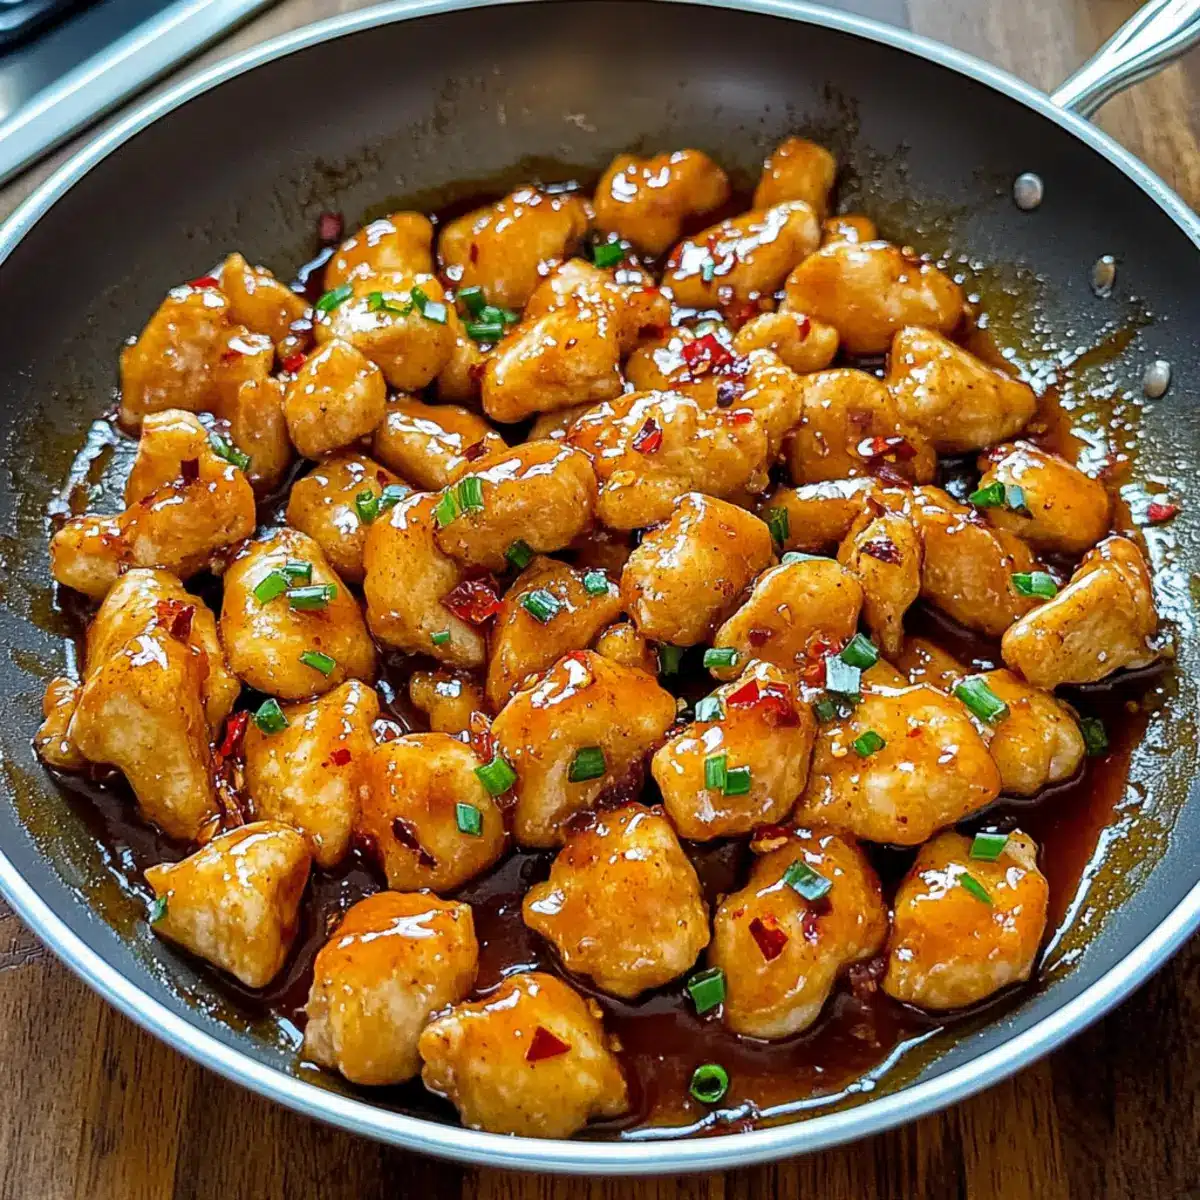
Serve your Honey Garlic Chicken warm over a bed of steamed rice or cauliflower rice, garnishing it with thinly sliced green onions for a pop of color and freshness. The glossy, sticky sauce combined with the crispy chicken will surely make it a family favorite.
Make Ahead Options
These Honey Garlic Chicken bites are a fantastic meal prep solution for busy weeknights! You can marinate the chicken in the sauce up to 24 hours in advance, enhancing the flavors while allowing the chicken to stay juicy. While you prepare your sauce (honey, garlic, etc.), store it separately in the fridge in an airtight container for up to 3 days to maintain its fresh taste. When you’re ready to cook, simply heat your oil, fry the chicken as per the original recipe, pour the sauce over, and enjoy that irresistible flavor just as delicious as when freshly made. By prepping ahead, you save significant cooking time without compromising quality!
Honey Garlic Chicken Variations
Get ready to unleash your creativity in the kitchen with these delightful twists!
-
Shrimp Swap: Use shrimp instead of chicken for a seafood twist, cooking until pink and opaque.
-
Beefy Boost: Swap chicken for thinly sliced beef—flank steak works beautifully—cooking it to your liking for a savory change.
-
Tofu Delight: For a vegetarian option, replace chicken with firm tofu, frying it until golden and crispy for that satisfying crunch.
-
Vegetable Medley: Add snap peas or bell peppers in the last minute of cooking; this incorporates vibrant veggies for extra color and nutrition.
-
Cauliflower Rice: Serve the dish over cauliflower rice instead of traditional rice for a low-carb alternative that’s just as delicious.
-
Fruity Fusion: Incorporate diced pineapple into the sauce for a sweet tropical twist that beautifully complements the honey!
-
Extra Spice: If you’re feeling bold, add extra red pepper flakes or a splash of chili sauce to the sauce for an added zing.
-
Nutty Garnish: Top your dish with toasted sesame seeds to enhance the flavor and add a pleasant crunch to each bite.
With these variations, you can easily enjoy a new and exciting take on your favorite Chicken Enchiladas Cozy, or even recreate a classic dish like Soy Chicken Garlic to keep your meals fresh and enticing!
What to Serve with Honey Garlic Chicken
Warm, inviting aromas fill your kitchen, enticing everyone to the dinner table for a delightful meal experience.
-
Steamed Jasmine Rice: The delicate fragrance and fluffy texture of jasmine rice absorb the sweet sauce beautifully, making each bite a comforting experience.
-
Garlic Broccoli: Crisp-tender broccoli tossed in garlic complements the honey garlic chicken’s sweetness while adding a vibrant color and healthful crunch.
-
Cauliflower Rice: For a low-carb option, serve this dish over cauliflower rice, allowing the flavors to shine while keeping it light and nutritious.
-
Chinese Cabbage Salad: A refreshing salad with crunchy cabbage, carrots, and sesame dressing adds a delightful, crisp contrast and balances the meal’s richness.
-
Miso Soup: A warm bowl of miso soup brings a comforting umami flavor, enhancing the overall dining experience and connecting it to its Asian roots.
-
Chilled Sake: A smooth, chilled sake accentuates the meal’s delicate flavors, while its subtle sweetness echoes the honey in the dish, creating a harmonious pairing.
-
Honeydew Melon Slices: Fresh honeydew melon slices served as a dessert offer a refreshing finish with a natural sweetness that echoes the dish’s flavors.
Explore these pairings to create a memorable feast that delights your family and friends, turning an ordinary dinner into a heartwarming gathering!
How to Store and Freeze Honey Garlic Chicken
Fridge: Store leftovers in an airtight container in the refrigerator for up to 3 days. Reheat gently on the stovetop to maintain that delightful crispiness.
Freezer: If you want to freeze Honey Garlic Chicken, allow it to cool completely, then place it in a freezer-safe container. It can be frozen for up to 3 months.
Reheating: For the best results, reheat in a skillet over medium heat, stirring occasionally. If needed, add a splash of water to prevent drying out and help revive the sauce.
Meal Prep: This dish is perfect for meal prep—just portion it out into containers after cooking for quick, delicious lunches or dinners throughout the week!
Expert Tips for Honey Garlic Chicken
-
Crispy Coating: Ensure the chicken is thoroughly coated with egg and cornstarch. This is crucial for achieving that delightful crunch.
-
Oil Temperature: Always heat the oil until it’s shimmering but not smoking. This helps the chicken cook quickly and evenly without becoming greasy.
-
Avoid Overcrowding: Cook the chicken in batches if necessary. Overcrowding the pan can lead to steamed chicken instead of crispy results.
-
Adjust Thickness: If you prefer a thicker sauce, whisk in a little extra cornstarch mixed with water just before adding it to the chicken.
-
Flavor Boost: For a deeper flavor profile, you can add a splash of sesame oil or a dash of chili sauce to the honey garlic mixture. This elevates your Honey Garlic Chicken to new heights!
-
Vegetable Addition: Consider adding some snap peas, bell peppers, or broccoli in the last few moments of cooking to incorporate freshness and color.
Honey Garlic Chicken Recipe FAQs
How do I choose the right chicken for this recipe?
Absolutely! For the best results, use boneless, skinless chicken breasts or thighs. These cuts cook quickly and remain tender. Look for pieces that are plump and pink without any dark spots or signs of freezer burn.
How should I store leftover Honey Garlic Chicken?
Very simple! Store your leftovers in an airtight container in the refrigerator for up to 3 days. Make sure to let it cool completely before sealing it up. For reheating, a quick warm-up on the stovetop helps to maintain that coveted crispy texture.
Can I freeze Honey Garlic Chicken?
Yes, you can! Allow the chicken to cool completely, then place it in a freezer-safe container. Be sure to label it with the date so you can keep track. It can be frozen for up to 3 months. When you’re ready to enjoy, thaw overnight in the fridge, and reheat gently on the stovetop.
What if my sauce is too thin or too thick?
No worries! If your sauce is too thin, mix a teaspoon of cornstarch with a little water to create a slurry and stir it into the sauce while simmering; it should thicken up nicely. If it’s too thick, just add a splash of chicken broth or water, stirring until you reach your desired consistency.
Are there any dietary considerations I should keep in mind?
Absolutely! This Honey Garlic Chicken can easily be made gluten-free by using tamari in place of regular soy sauce. If you’re cooking for someone with allergies, always double-check the ingredients of your chicken broth and sauces to ensure they’re safe.
Can I add vegetables to the dish?
Very much so! I often recommend incorporating fresh veggies like snap peas, bell peppers, or broccoli for added nutrition and color. Just toss them in during the last few minutes of cooking so they retain their crunch and vibrant flavor!
Quick and Crispy Honey Garlic Chicken That You'll Love
Ingredients
Equipment
Method
- Start by coating your chicken breasts or thighs in a bowl with a lightly beaten egg, ensuring each piece is well-covered. Then, sprinkle cornstarch generously over the chicken pieces, using your hands to coat them evenly.
- In a large skillet, heat about two tablespoons of peanut or vegetable oil over medium-high heat. Once the oil is hot enough, carefully place the coated chicken pieces in the skillet.
- Fry the chicken for about 4-5 minutes on each side, until golden brown and crispy. Use tongs to flip the chicken gently.
- While the chicken is cooking, combine honey, minced garlic, chicken broth, rice wine vinegar, soy sauce, and red pepper flakes in a separate bowl. Stir until well mixed.
- Once the chicken is cooked, pour the sauce mixture over it in the skillet and let it simmer for 1-2 minutes to thicken slightly.
- Add a tablespoon of butter to the skillet and stir gently until it melts and blends into the sauce.
- Serve your Honey Garlic Chicken warm over a bed of steamed rice or cauliflower rice, garnished with thinly sliced green onions.
Leave a Reply