
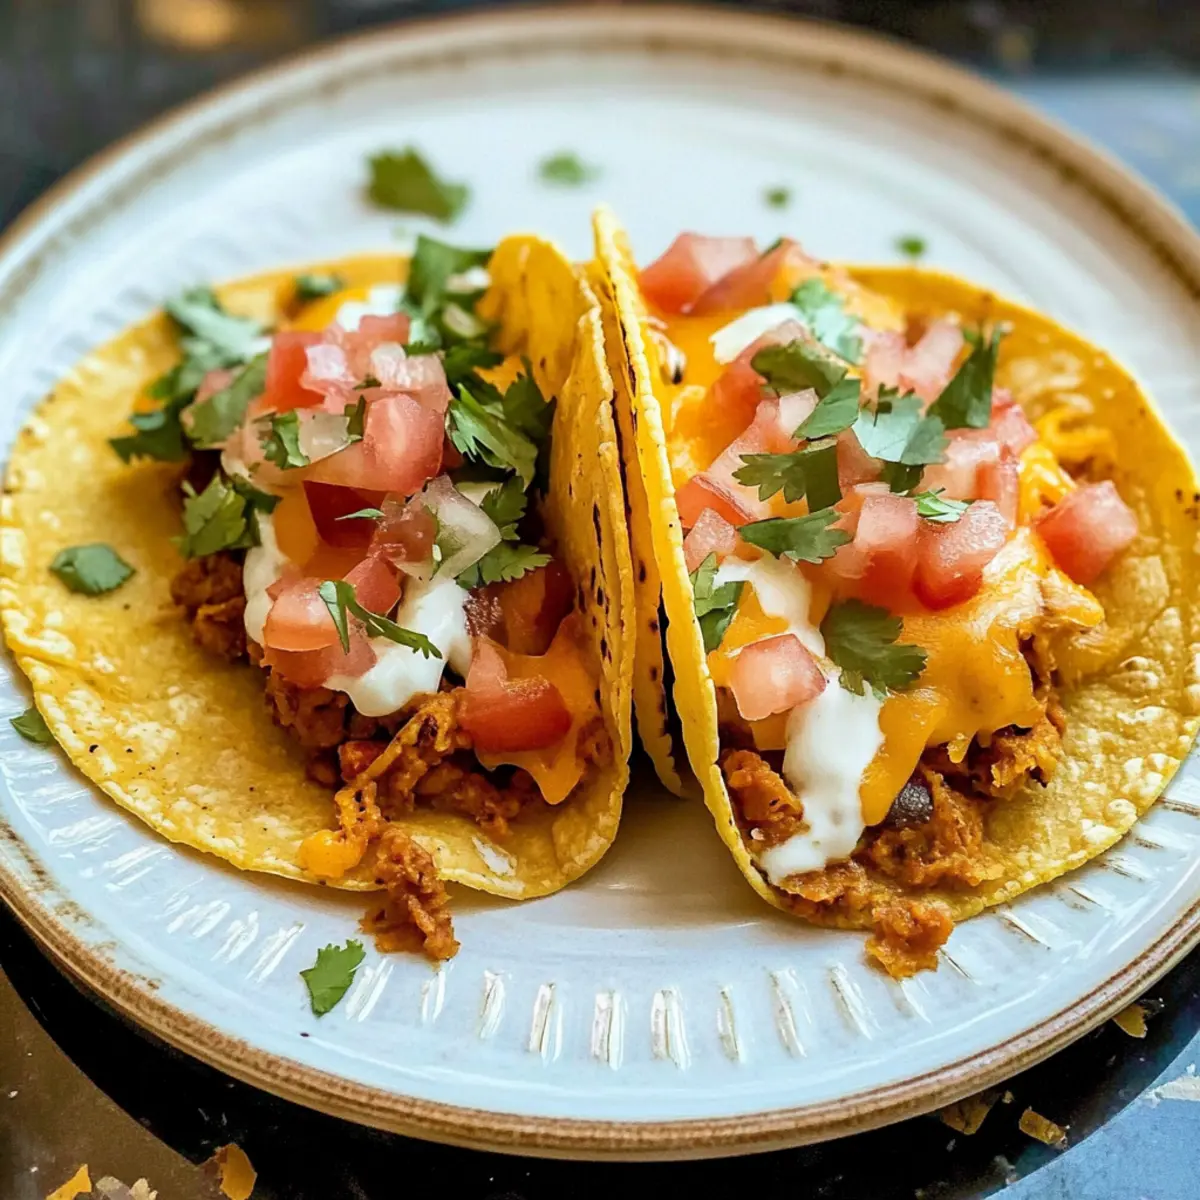
Have you ever found yourself craving something quick yet utterly satisfying? Enter the Crispy Bean and Cheese Smashed Tacos! These little delights are not just a meal; they’re a celebration of textures and flavors, featuring melty cheddar cheese paired perfectly with creamy refried beans. Whether you’re racing against the clock on a busy weeknight or hosting a casual gathering, this vegetarian recipe is a breeze to whip up and full of gratifying crunch. Plus, they can be customized with your favorite toppings, making them a true crowd-pleaser! Ready to dive into this easy and delicious taco experience? Let’s get cooking!
Why Will You Love These Tacos?
Quick Preparation: The simplicity of this recipe means you can have a delicious meal on the table in no time. Perfect for busy evenings!
Endless Customization: Tailor your tacos with toppings like fresh salsa or avocado from an easy make-ahead option like Guacamole.
Flavorful Layers: Enjoy a delightful contrast of crispy cheese and creamy beans that brings intense satisfaction in every bite!
Vegetarian Delight: Packed with protein, these tacos are a nourishing and delicious option for meat-free nights!
Crowd-Pleasing: Impress friends and family with this easy recipe—perfect for game nights or Taco Tuesdays!
Dive into these tasty Bean and Cheese Smashed Tacos and experience why they are such a beloved dish!
Bean and Cheese Smashed Taco Ingredients
• Get ready to make these delightful tacos!
For the Tacos
- Cheddar cheese – provides a rich, gooey texture; opt for Monterey Jack for a great substitute.
- Refried beans – offers creaminess and protein; canned beans are convenient, but homemade is fresher.
- Jalapeño (optional) – adds a spicy kick; skip for milder tacos or use bell peppers for sweetness.
- Flour tortillas – holds the taco together; corn tortillas work well for a gluten-free option.
- Cooking spray – prevents sticking on the griddle; a light brush of oil can also do the job.
For the Toppings
- Tomatoes – lend a juicy freshness; consider using cherry tomatoes for a burst of flavor.
- Cilantro – adds vibrant color and a burst of freshness; can be omitted for those who dislike its flavor.
- Onion – provides crunch and a mild bite; ensure to finely chop for even distribution.
- Lettuce – brings crispness to the tacos; shredded lettuce adds a nice texture contrast.
- Hot Sauce – gives an extra kick; use your favorite brand or homemade for a personal touch.
Get ready to enjoy these scrumptious Bean and Cheese Smashed Tacos!
Step‑by‑Step Instructions for Bean and Cheese Smashed Tacos
Step 1: Preheat the Skillet
Begin by preheating a nonstick skillet or griddle over medium-low heat for about 5 minutes. Lightly spray the surface with cooking spray to prevent sticking. The skillet should be warm to the touch before adding any ingredients, creating the perfect environment for crisping the cheese.
Step 2: Melt the Cheese
Place about 1/2 cup of grated cheddar cheese per taco in a thin circular layer directly onto the griddle. If you like a spicy kick, add sliced jalapeños on top of the cheese. Cook until the cheese is bubbling and the edges start turning golden brown, which should take about 2-3 minutes.
Step 3: Prepare the Tortillas
While the cheese is melting, spread approximately 1/4 cup of refried beans evenly onto each tortilla. Make sure the beans cover the entire surface for a creamy filling. This step is key for achieving the delicious texture in your Bean and Cheese Smashed Tacos, so spread generously and evenly.
Step 4: Combine Tortilla and Cheese
Carefully place the tortilla, bean side down, onto the melted cheese on the griddle. Gently press down on the tortilla to ensure it sticks to the cheese. This will help create a beautiful bond between the crispy cheese and creamy beans, giving you that satisfying crunch when you take a bite.
Step 5: Cook for Crispiness
Allow the taco to cook for an additional 2-3 minutes. You’re looking for the cheese to continue to crisp up and become golden. This will ensure each bite of your Bean and Cheese Smashed Tacos is filled with delightful crunchiness that contrasts the creamy beans.
Step 6: Flip the Taco
Using a spatula, carefully lift and flip the taco over, cooking for another 2 minutes. This will give the other side a chance to crisp up as well. Keep an eye on it to ensure it reaches that perfect, golden-brown color—this is where the magic happens!
Step 7: Serve Immediately
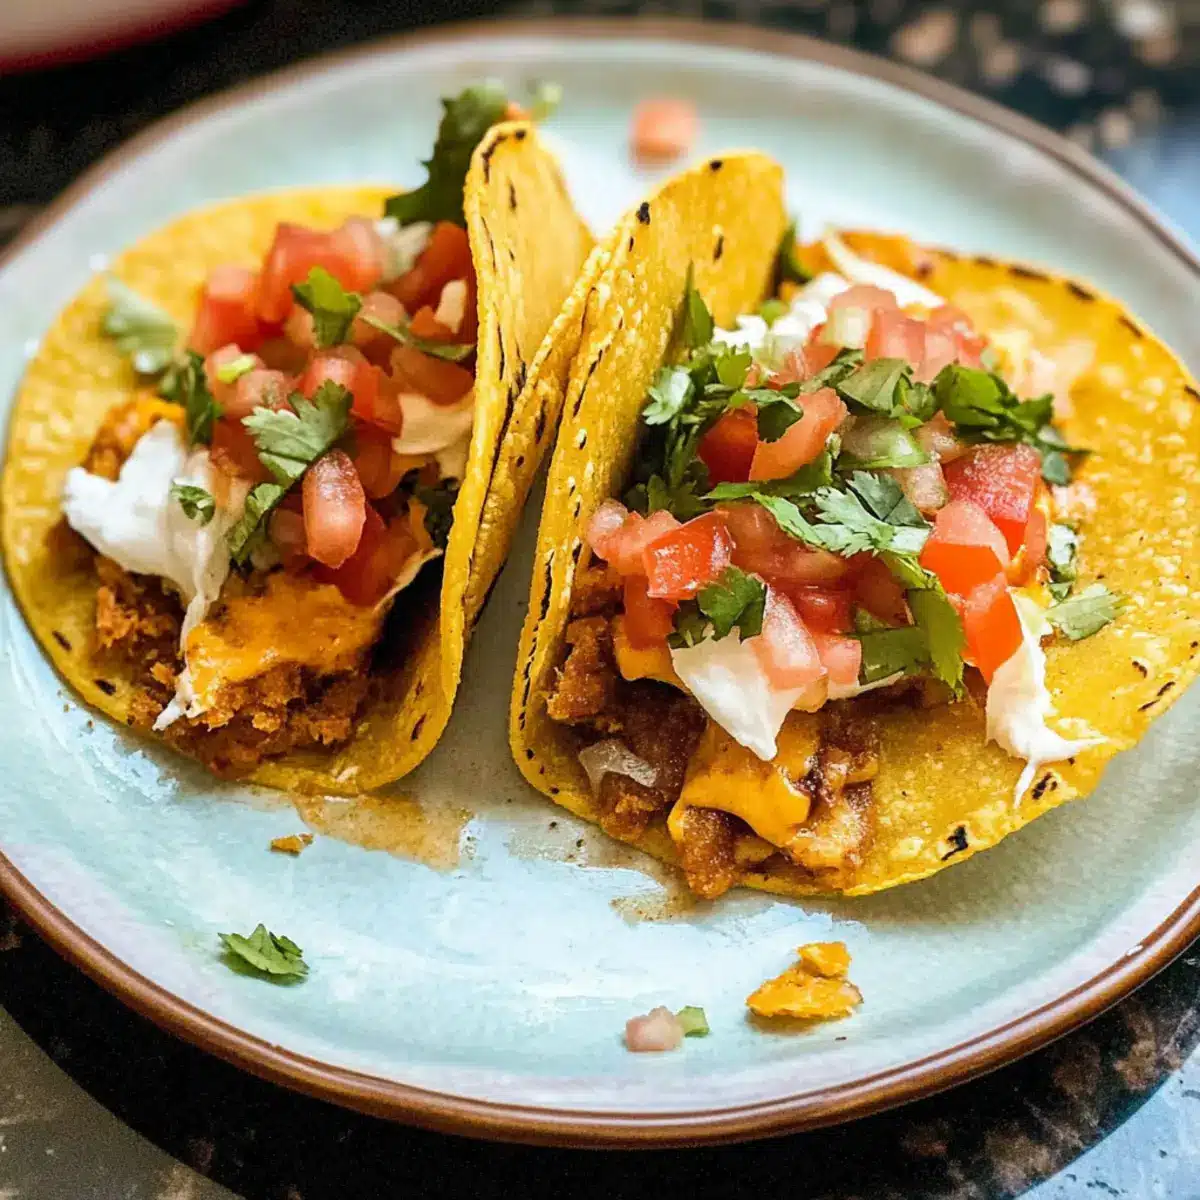
Once both sides are crispy and golden brown, remove the taco from the skillet. Place it on a serving plate and add your favorite toppings like fresh tomatoes, lettuce, and hot sauce. These Bean and Cheese Smashed Tacos are best enjoyed immediately to maintain their delicious crunch!
How to Store and Freeze Bean and Cheese Smashed Tacos
Fridge: Store leftover tacos in an airtight container for up to 3 days. To maintain the best texture, wrap each taco in foil or parchment paper before placing them in the container.
Freezer: For longer storage, freeze individual tacos wrapped in plastic wrap and a layer of aluminum foil for up to 2 months. This helps preserve their flavor and prevents freezer burn.
Reheating: Thaw frozen tacos in the fridge overnight. Reheat in a skillet over medium heat for about 3-4 minutes per side, or until heated through and crispy again.
Make-Ahead: Prepare refried beans and cheese separately in advance and store them in the fridge, so you can whip up fresh Bean and Cheese Smashed Tacos anytime!
What to Serve with Crispy Bean and Cheese Smashed Tacos
There’s no better way to elevate your meal than with delightful sides that complement the wonderful crunch of these tacos.
-
Guacamole: Creamy and rich, this avocado dip adds a smooth contrast to your crunchy tacos. Serve it with tortilla chips for an extra treat!
-
Pico de Gallo: A fresh and zesty salsa that brightens the dish, balancing the richness of the cheese with refreshing tomatoes and lime.
-
Spanish Rice: Fluffy and seasoned to perfection, this sides brings a satisfying heartiness that rounds out your vegetarian meal beautifully.
-
Corn on the Cob: Sweet, juicy, and bursting with flavor, grilled corn adds a gorgeous pop of color and a touch of summer to each bite.
-
Crispy Apple Salad: With tasty apple slices, crunchy nuts, and tangy vinaigrette, this salad offers a refreshing contrast to the warmer taco flavors.
-
Chilled Horchata: Sweetened rice milk with hints of cinnamon, this delicious drink pairs perfectly with the spicy beans, providing a cooling effect.
Enjoy these delicious pairings to complete your meal and make your Bean and Cheese Smashed Tacos an unforgettable dining experience!
Bean and Cheese Smashed Tacos Variations
Feel free to experiment and make these tacos your own, adding flavors that tempt your taste buds!
-
Veggie Boost: Add grilled veggies such as bell peppers or zucchini for more flavor and nutrition. The added color and crunch elevate your taco experience!
-
Cheese Blend: Swap out cheddar for a mix of pepper jack and mozzarella for a spicier and creamier texture. This variation takes your flavors to the next level!
-
Black Bean Option: Use black beans instead of refried beans for a different flavor profile. This will introduce a new depth that your palate will love.
-
Crunchy Toppings: Sprinkle on some crushed tortilla chips for an extra layer of crunch. This fun twist enhances the texture and adds a delightful surprise in every bite!
-
Herb Infusion: Mix in fresh herbs like cilantro or parsley with your toppings for a burst of freshness. This will not only brighten the taste but elevate the visual appeal as well.
-
Heat Level: Adjust the level of spice using different peppers; try chipotle for a smoky flavor or even add some hot sauce directly into the beans for a punch.
-
Sweet & Spicy: Add a slice of grilled pineapple or mango to your tacos for a sweet contrast to the savory beans and cheese. It’s a flavor adventure worth trying!
These variations will help you customize your bean and cheese smashed tacos for every occasion, just like many of the elements in a delightful Pistachio Mushroom Cheesecake. Enjoy the exciting journey of flavors!
Expert Tips for Bean and Cheese Smashed Tacos
- Cheese Control: Avoid stirring the melting cheese excessively; let it bubble undisturbed for optimal crispiness.
- Serve Hot: These tacos are at their best when served immediately; they lose their delightful crispiness over time.
- Batch Cooking: If making more than one, keep the tacos warm in a 250°F oven to maintain their crunchy texture without overcooking.
- Customizing Spice: Adjust the level of spice by varying the amount of jalapeño; omit altogether for milder flavor or add more for heat!
- Tortilla Choice: Use fresh tortillas for optimal flavor and texture; they enhance the overall experience of your Bean and Cheese Smashed Tacos.
- Watch Cooking Time: Keep an eye on cooking times; too long can lead to burnt cheese while too short may leave it too gooey.
Make Ahead Options
These Bean and Cheese Smashed Tacos are a fantastic choice for meal prep! You can prepare the refried beans up to 3 days in advance and refrigerate them in an airtight container. When ready to enjoy, simply reheat the beans on the stovetop or in the microwave until warm, then follow the original recipe to melt the cheese and assemble the tacos. Additionally, you can pre-chop your toppings like tomatoes and onions and store them in the fridge for easy access when serving. This prep not only saves you time but ensures that your tacos remain just as delicious and satisfying when it’s time to eat!

Bean and Cheese Smashed Tacos Recipe FAQs
What type of beans should I use for my tacos?
You can use canned refried beans for convenience, which are already prepared and save time in the kitchen. However, for a fresher taste, I often recommend making homemade beans by cooking pinto beans with spices. This gives your tacos a richer flavor and a personal touch!
How long can I store leftover tacos in the fridge?
Absolutely! You can keep leftover Bean and Cheese Smashed Tacos in an airtight container for up to 3 days. Just make sure to wrap each taco in foil or parchment paper before placing them in the container to maintain their texture.
Can I freeze the Bean and Cheese Smashed Tacos?
Yes! For longer storage, simply wrap each taco individually in plastic wrap and then in aluminum foil. You can freeze them for up to 2 months. This method helps preserve their flavor and prevents freezer burn. When you’re ready to enjoy, thaw them overnight in the fridge and reheat in a skillet for about 3-4 minutes per side until crispy.
What should I do if my cheese isn’t melting properly?
If you’re having trouble with the cheese not melting or crisping, check the heat on your skillet—it should be medium-low. If the heat is too high, the cheese may burn before it melts. Allow the cheese to cook undisturbed for a few minutes until it bubbles and starts turning golden brown. Remember, patience is key for achieving that perfect crispy cheese!
Are these tacos suitable for people with gluten intolerance?
For sure! You can easily make these Bean and Cheese Smashed Tacos gluten-free by swapping the flour tortillas for corn tortillas. Ensure to double-check the packaging to confirm they are certified gluten-free if necessary.
Can I make the tacos in advance?
Certainly! You can prepare the refried beans and shredded cheese ahead of time and store them separately in the fridge. When you’re ready to make your tacos, just reheat the beans and cheese before assembling and cooking for a quick, satisfying meal!

Delicious Bean and Cheese Smashed Tacos for Quick Comfort
Ingredients
Equipment
Method
- Preheat a nonstick skillet or griddle over medium-low heat for about 5 minutes.
- Lightly spray the surface with cooking spray before adding any ingredients.
- Place about 1/2 cup of grated cheddar cheese per taco in a thin circular layer directly onto the griddle.
- If desired, add sliced jalapeños on top of the cheese.
- Cook until the cheese is bubbling and edges start turning golden brown, about 2-3 minutes.
- Spread approximately 1/4 cup of refried beans evenly onto each tortilla.
- Carefully place the tortilla, bean side down, onto the melted cheese on the griddle.
- Gently press down on the tortilla to ensure it sticks to the cheese.
- Cook for an additional 2-3 minutes until cheese crispness is achieved.
- Using a spatula, carefully flip the taco over, cooking for another 2 minutes.
- Remove the taco from the skillet and place on a serving plate.
- Add your favorite toppings and serve immediately.
Leave a Reply