
As I sifted through vibrant sprinkles and melted candy, the aroma of cheerful springtime enveloped me. Crafting these cute Marshmallow Chicks is not just a fun activity; it’s an opportunity to create lasting memories with loved ones. Perfect for Easter festivities, these delightful treats are easy to whip up, making them ideal for kids to join in the fun of decorating. With their fluffy texture and eye-catching yellow coating, they’re not only a stunning addition to any dessert table but also a crowd-pleaser that can easily become a family favorite. Whether you’re looking to top off a batch of cupcakes or simply enjoy them as a treat on their own, these adorable treats offer both joy and simplicity. Curious about how to bring these sweet little chicks to life? Let’s dive into the recipe!
Why Are These Marshmallow Chicks Special?
Easy to Make: With just a few simple ingredients, these Marshmallow Chicks come together quickly, making them perfect for a fun family activity.
Kid-Friendly Fun: Involve the little ones! They’ll love drizzling sprinkles and dipping marshmallows while creating memories that last a lifetime.
Versatile Treats: Top off your favorite cupcakes or serve as standalone pops; these chicks are perfect for any occasion!
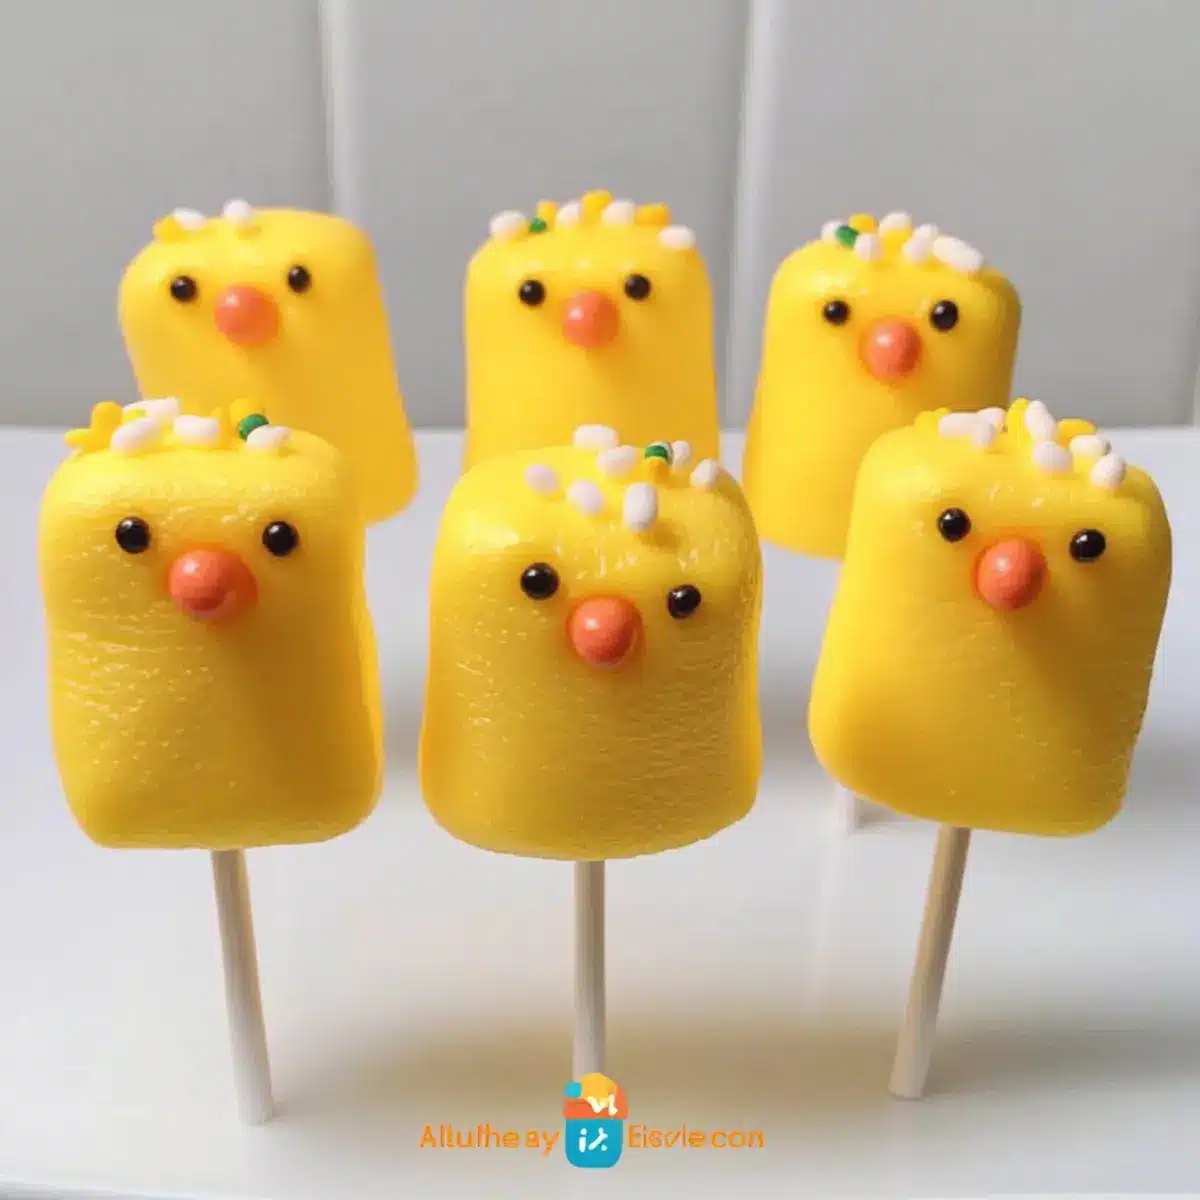
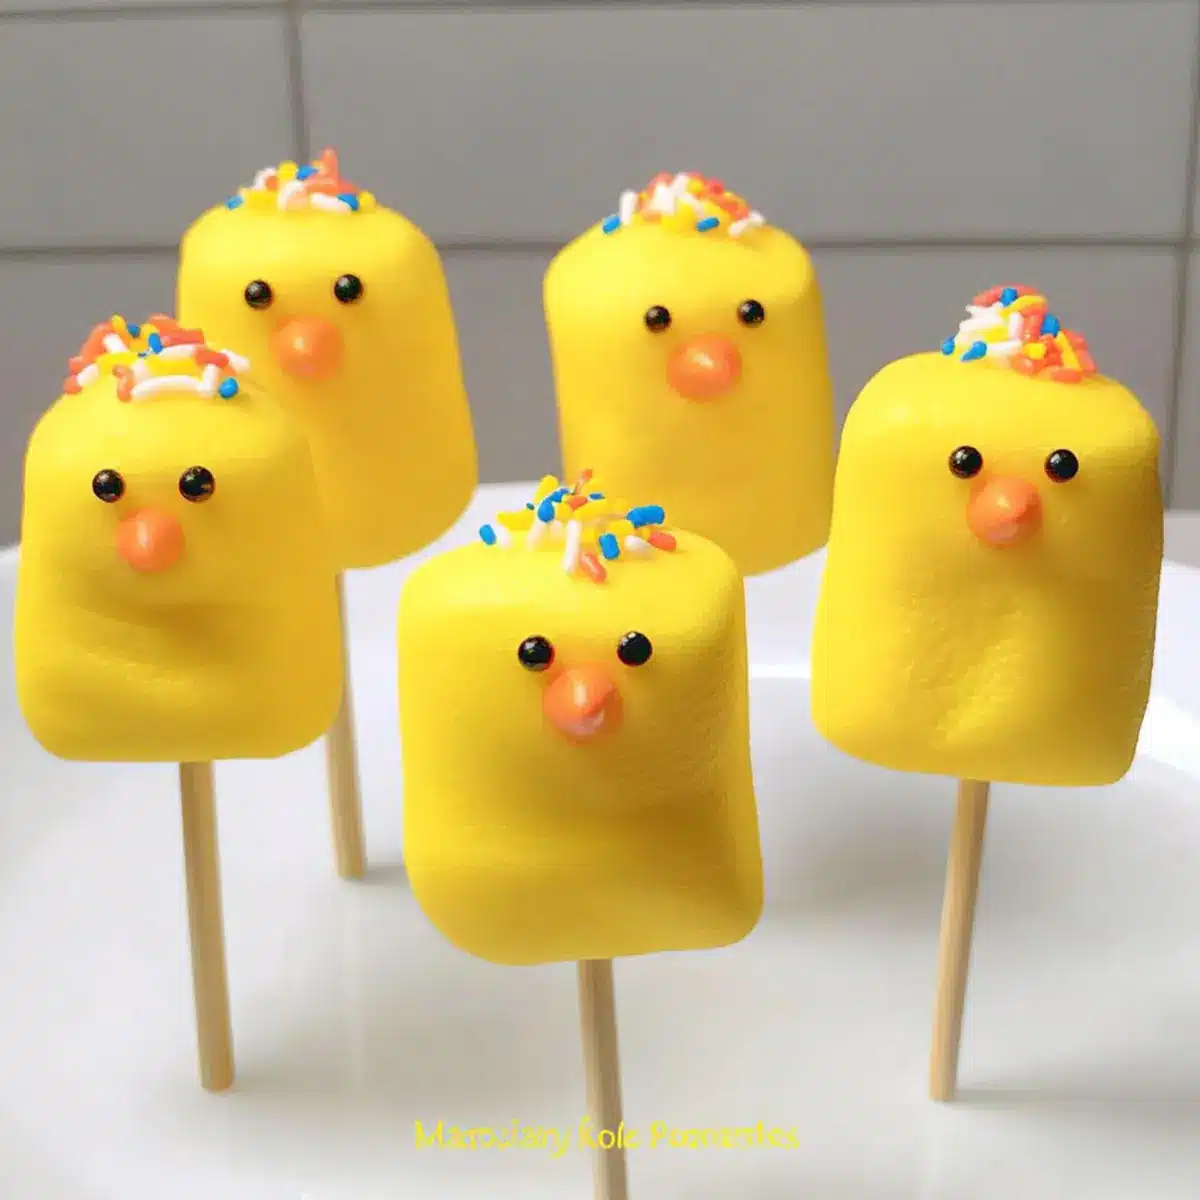
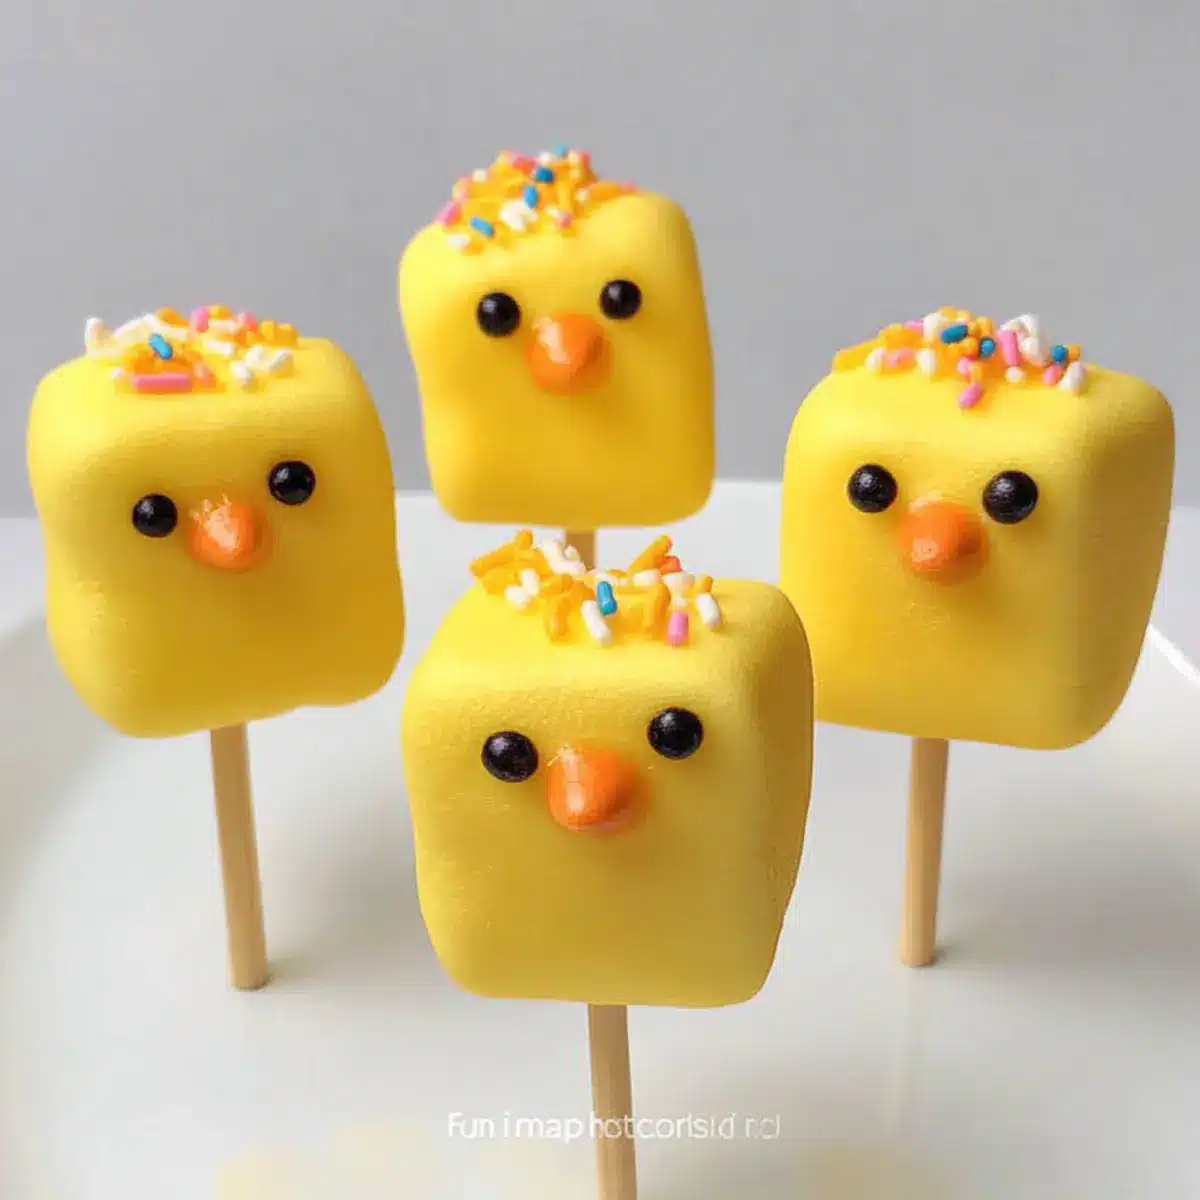
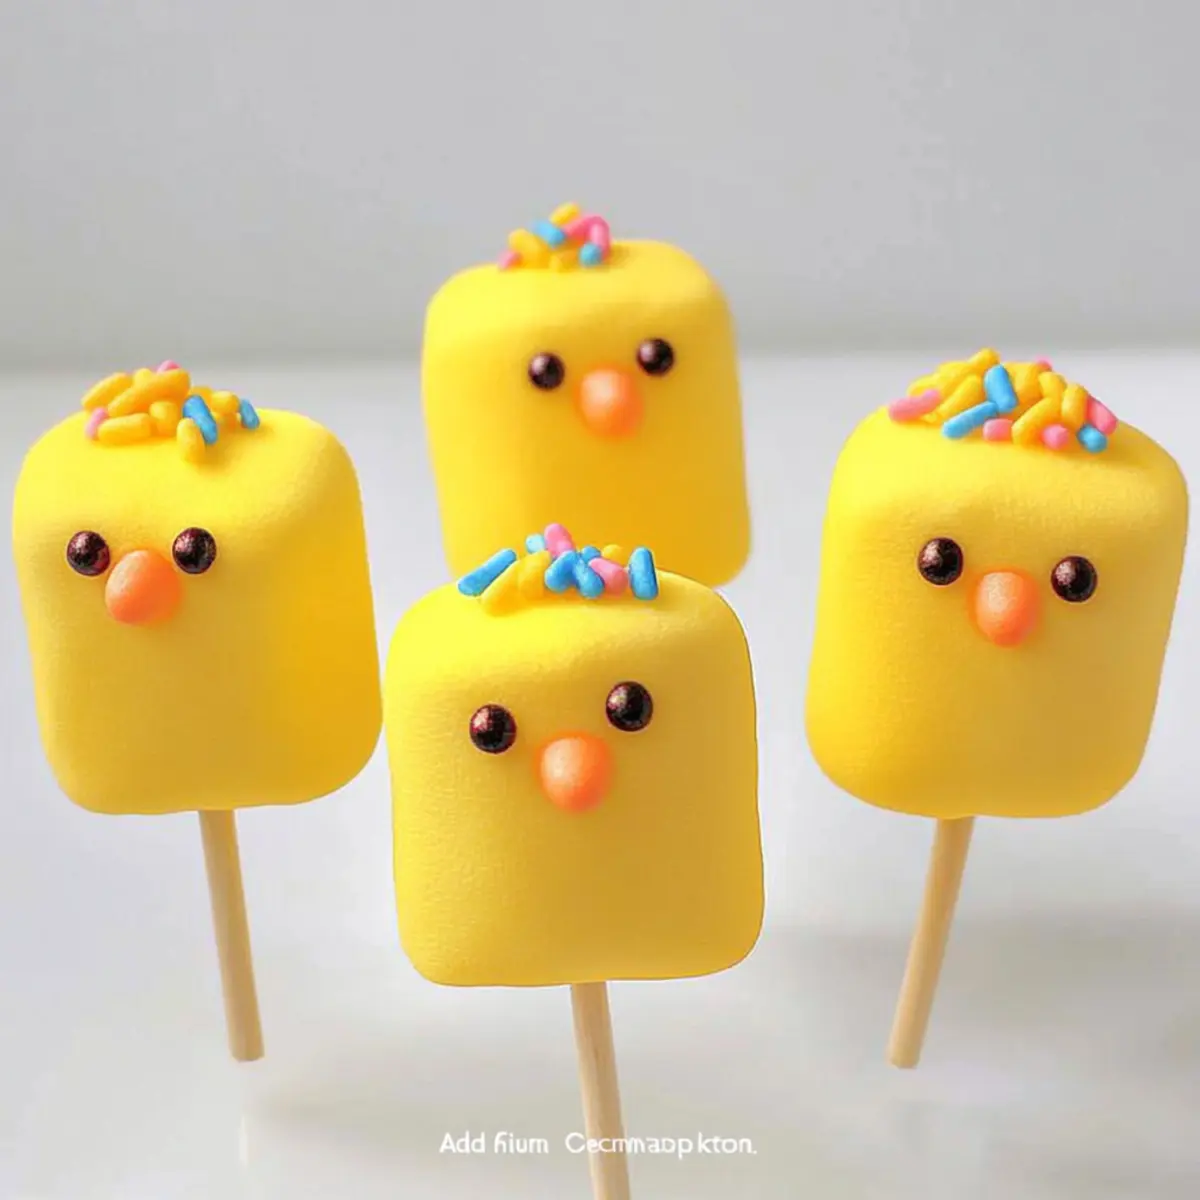
Appealing Presentation: Their vibrant yellow coating and playful design make them an eye-catching centerpiece for your Easter dessert table.
Delightfully Tasty: The chewy marshmallow center paired with the sweet candy coating offers a simply irresistible treat that everyone will enjoy!
If you’re interested in experimenting more, check out our variation ideas for even more delightful creations!
Cute Marshmallow Chicks Ingredients
For the Chicks
• Marshmallows – The base of the dessert, adding that delightful sweetness and chewy texture.
• Yellow Candy Melts – Creates a vibrant coating; you can substitute with white chocolate melts colored with food dye for a fun twist.
For Decoration
• Sprinkles – These colorful toppings enhance the visual appeal and add a fun crunch; feel free to use any color or shape that fits your theme!
• Lollipop Sticks – Optional for creating cute pops; use sturdy sticks or swap with short pretzel rods for an exciting variation.
Get ready to create these adorable Cute Marshmallow Chicks that are bound to bring smiles to the table and delight everyone!
Step‑by‑Step Instructions for Cute Marshmallow Chicks
Step 1: Melt Candy Coating
Begin by melting the yellow candy melts in a microwave-safe bowl. Heat them in 30-second increments, stirring in between, until completely smooth and glossy—this usually takes about 1 to 2 minutes. Keep an eye on the melts to prevent scorching, as they should have a smooth texture without any lumps.
Step 2: Prepare Marshmallows
If you’re making pops, gently insert a lollipop stick into the base of each marshmallow, pushing it about halfway in. If desired, let the marshmallows rest for 5 minutes at room temperature to cool slightly; this helps the coating to adhere better. Arrange them on a clean work surface for easy dipping.
Step 3: Dip in Coating
Carefully dip each marshmallow into the melted yellow candy, ensuring they are completely coated. Use a swirling motion to help lift them out, allowing the excess candy to drip back into the bowl for a smooth finish. Ensure the coating is even, as this will contribute to the adorable appearance of your Cute Marshmallow Chicks.
Step 4: Add Sprinkles
While the candy coating is still wet, immediately sprinkle colorful sprinkles over each marshmallow for decoration. This step is crucial as it allows the sprinkles to stick; feel free to be creative with different colors and shapes, enhancing the festive look of your marshmallow chicks.
Step 5: Set
Carefully place the decorated marshmallow chicks on a parchment-lined tray to set. Allow them to sit at room temperature for about 10–15 minutes until the coating hardens and becomes glossy. Once cooled, gently move them to an airtight container for storage or display, creating a delightful treat for your Easter celebration.
Cute Marshmallow Chicks: Variations & Substitutions
Explore the delightful world of marshmallow chicks by customizing them to suit your taste and style!
- Dairy-Free: Use dairy-free candy melts to create a version that everyone can enjoy. Just check the packaging to confirm!
- Chick on a Stick: Make it even more fun by using colorful paper straws instead of lollipop sticks. They add a whimsical touch!
- Flavor Boost: Infuse the marshmallows with a dash of vanilla extract for an extra layer of flavor. You’ll love the added depth!
- Mini Pops: Swap regular marshmallows for mini ones to create bite-sized treats perfect for little hands. These are super adorable and kid-friendly!
- Festive Colors: Try using pastel-colored candy melts—think light pink, blue, and green for a vibrant seasonal display perfect for Spring festivities.
- Chocolate Coating: For a rich twist, substitute yellow candy melts with milk or dark chocolate. This adds a delightful contrast to the sweetness of the marshmallows.
- Nutty Add-Ins: Roll the finished marshmallow chicks in crushed nuts or shredded coconut for a tasty texture and extra visual appeal. Who can resist that crunch?
- Spicy Chick Variation: If you’re feeling adventurous, sprinkle some cayenne pepper on a few to add an unexpected spicy kick. It’s sure to be a conversation starter!
These variations not only personalize your marshmallow chicks but also create lovely opportunities to bond with family and friends. For more delightful twists and creative ideas, check out our tasty storage tips and explore how to serve these treats with flair. Enjoy your creative journey in the kitchen!
What to Serve with Cute Marshmallow Chicks?
These charming treats are perfect for brightening up any festive gathering, making them ideal for an inviting dessert spread.
-
Spring Fruit Salad: A colorful mix of strawberries, blueberries, and kiwis brings a refreshing, juicy contrast to the sweetness of the marshmallow chicks.
-
Chocolate Cupcakes: Rich, moist chocolate cupcakes create a delightful balance with the fluffy, sugary taste of your marshmallow treats, making for a perfect pairing.
-
Creamy Vanilla Ice Cream: The cold, smooth ice cream complements the chewy texture of the marshmallow, offering a delightful mix of temperatures and flavors.
-
Lemonade or Iced Tea: A refreshing drink—like tangy lemonade or sweet iced tea—pairs beautifully, cleansing the palate between bites of delicious marshmallow chicks.
-
Cheesecake Bites: Mini cheesecake bites add a rich touch of creaminess that contrasts well with the light, airy marshmallow; they make a winning combination on any table.
-
Easter-themed Cookies: Fun, decorated cookies echo the festive spirit and create a playful dessert platter that invites smiles and excitement.
These pairings not only enhance the overall dessert experience but also create a vibrant, joyous atmosphere that celebrates the spirit of Easter!
Make Ahead Options
These adorable Cute Marshmallow Chicks are perfect for meal prep, allowing you to enjoy hassle-free Easter celebrations! You can prepare the marshmallow pops up to 24 hours in advance by completing steps 1-4—melt the candy, insert sticks, dip the marshmallows, and add sprinkles. To maintain their delightful quality, store the untreated marshmallows in an airtight container at room temperature until you’re ready to dip. When it’s time to serve, simply complete step 5 and let them set for 10-15 minutes to achieve that glossy finish. This make-ahead approach saves you precious time on busy days while ensuring these treats are just as delicious and charming as ever!
How to Store and Freeze Cute Marshmallow Chicks
- Room Temperature: Store your Cute Marshmallow Chicks in an airtight container at room temperature for up to one week. This keeps them fresh while maintaining that delightful texture.
- Fridge: If you live in a warm climate, consider refrigerating them. Ensure they are in a sealed container to prevent moisture and odor absorption, and consume within 5 days.
- Freezer: For longer storage, freeze the marshmallow chicks in a single layer inside a freezer bag or airtight container. They can last up to 2 months, but be sure to allow them to thaw at room temperature before enjoying.
- Reheating: These treats can be served cold or at room temperature. Avoid reheating in the microwave, as they may lose their shape and texture.
Expert Tips for Cute Marshmallow Chicks
-
Mind the Heat: Always melt candy melts in short intervals to prevent scorching. Scorched candy can ruin your cute marshmallow chicks!
-
Stick It Right: Ensure the lollipop sticks are inserted firmly but not too deep, avoiding breakage of the marshmallows during dipping.
-
Sprinkle While Wet: Add sprinkles immediately after dipping, as this allows them to adhere properly to the wet candy coating.
-
Keep It Warm: Maintain the melted candy at a warm temperature while working, which helps achieve a smooth, delicious coating on your marshmallow chicks.
-
Cool Before Plating: Allow the marshmallow chicks to fully cool at room temperature before transferring them to maintain their adorable shape and prevent sticking.
Cute Marshmallow Chicks Recipe FAQs
How do I choose ripe marshmallows?
Absolutely! When picking marshmallows, look for ones that are soft and fluffy, free from any hard spots or dark spots all over. Fresh marshmallows should feel slightly sticky to the touch and have a slight bounce; this indicates they are perfect for making your Cute Marshmallow Chicks!
What is the best way to store these marshmallow chicks?
You can store your Cute Marshmallow Chicks in an airtight container at room temperature for up to one week. This method will keep them fresh and maintain that delightful texture. If you’re in a warmer climate, refrigerate them, making sure they are sealed tightly to avoid moisture and absorbing odors.
Can I freeze Cute Marshmallow Chicks?
Yes, indeed! For longer storage, you can freeze your marshmallow chicks. Place them in a single layer inside a freezer bag or an airtight container, and they can last up to 2 months. When you’re ready to enjoy them, simply thaw at room temperature—keep them covered to maintain their soft texture.
What should I do if the candy coating is too thick?
If the candy coating is too thick, don’t worry! You can add a teaspoon of coconut oil or vegetable shortening to the melted candy melts to thin it out, allowing for a smoother dip. Make sure to mix thoroughly to incorporate the oil fully. Always melt the candy in small increments, and feel free to reheat gently to maintain a nice viscosity.
Are there any allergy considerations for these treats?
Very! If you’re making Cute Marshmallow Chicks for guests with dietary restrictions, check the labels of your ingredients carefully. Some candy melts may contain allergens like gluten, nuts, or dairy. For a safer alternative, look for vegan marshmallows and allergy-friendly sprinkles to ensure everyone can enjoy these delightful treats!
Cute Marshmallow Chicks: Delightful Easter Treats to Make Together
Ingredients
Equipment
Method
- Melt the yellow candy melts in a microwave-safe bowl in 30-second increments until smooth.
- If making pops, gently insert a lollipop stick into each marshmallow and let rest for 5 minutes.
- Dip each marshmallow into the melted candy coating and allow excess to drip back for a smooth finish.
- Immediately sprinkle colorful sprinkles over the wet candy coating on each marshmallow.
- Place decorated marshmallow chicks on a parchment-lined tray and let them set for 10-15 minutes.
Leave a Reply