
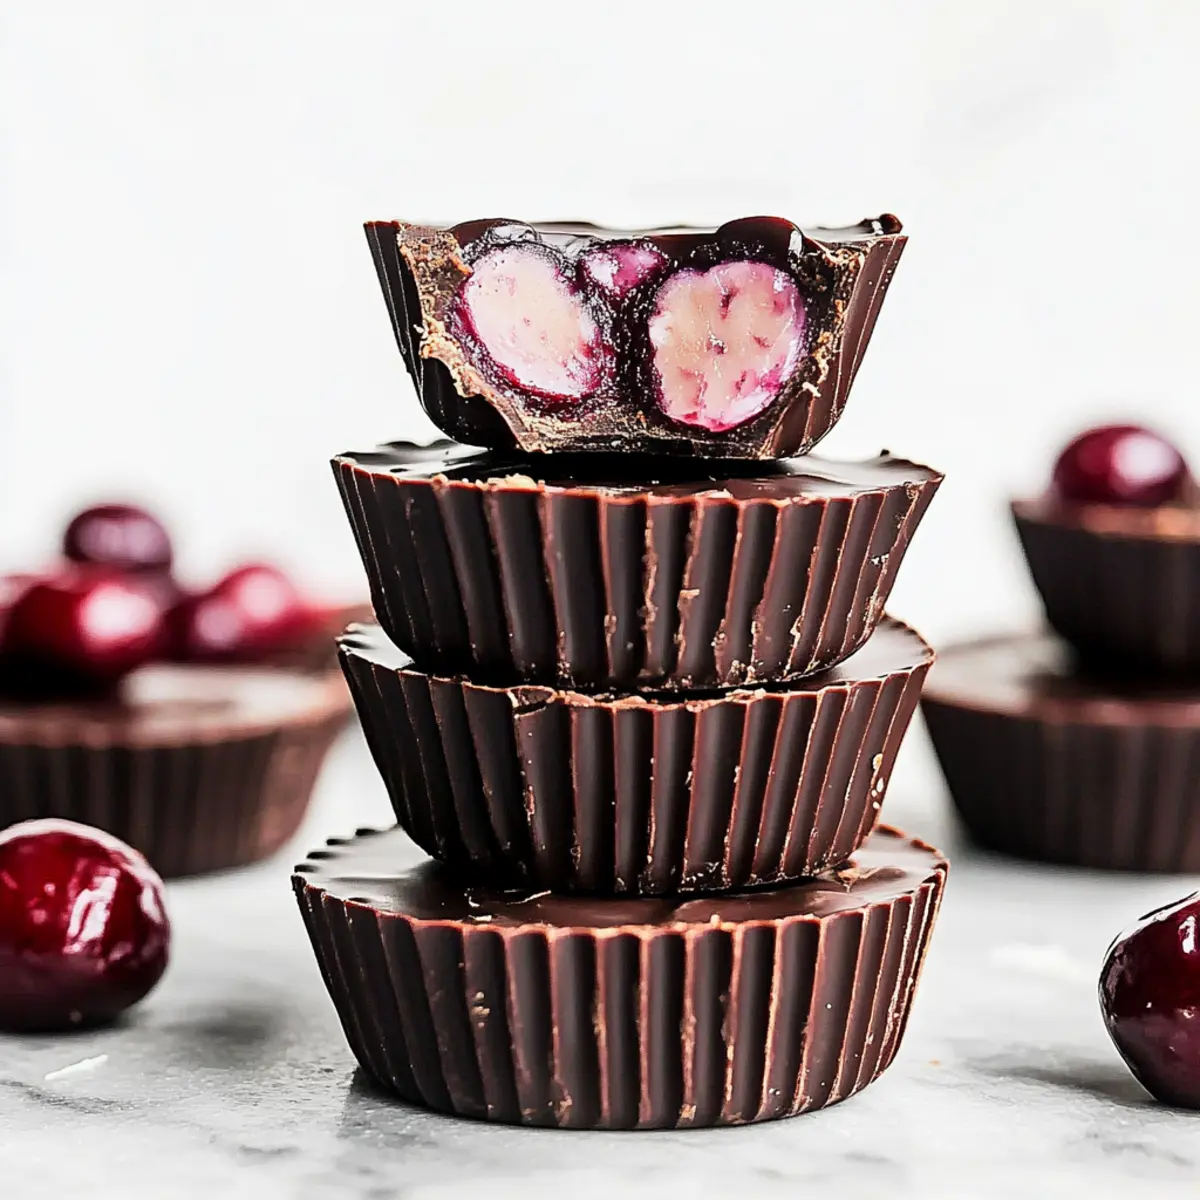
The scent of melting dark chocolate wafts through my kitchen, reminding me that some of the best moments are born from simple ingredients and a splash of love. Today, I’m thrilled to share my recipe for Cherry Filled Chocolate Coconut Butter Cups—an easy, vegan treat that you can whip up with just five ingredients. These delightful cups are not only nut-free but also perfect for Valentine’s Day, making them a thoughtful gift for someone special. Imagine indulging in the creamy coconut butter filling paired with the tartness of cherries, all enveloped in a rich chocolate shell. It’s a sweet treat that satisfies your cravings while offering a healthier alternative to typical sugary snacks. Are you ready to impress your loved ones with these delicious bites? Let’s get started!
Why are these cups a must-try?
Simplicity at Its Finest: With just five easy ingredients, making these Cherry Filled Chocolate Coconut Butter Cups is a breeze, even for novice bakers.
Irresistible Flavor Combination: The tangy cherries perfectly complement the rich dark chocolate, creating a harmonious taste that will impress your friends and family.
Vegan Delights: These cups are 100% vegan and nut-free, making them a fantastic option for those with dietary restrictions.
Quick Treat: From start to finish, you’ll have these mouthwatering treats ready in no time, making them perfect for spontaneous cravings or last-minute gifts.
Impressive Presentation: They look as good as they taste! Serve them alongside a warm cup of dairy-free hot chocolate or with other vegan treats for a stunning dessert platter.
Ready to whip these up? You might also love these delightful additions to your dessert table: Dark Chocolate Peppermint and White Chocolate Orange. Enjoy!
Cherry Filled Chocolate Coconut Ingredients
• Dive into this easy Cherry Filled Chocolate Coconut recipe with just 5 components!
For the Cups
- Coconut Butter – Provides a creamy texture and rich flavor. Substitution: Use homemade coconut butter if store-bought is unavailable.
- Dark Chocolate – Acts as the outer coating, giving a satisfying crunch and rich chocolate flavor. Note: Vegan chocolate is recommended to keep the recipe plant-based.
For the Filling
- Cherries – Serve as the flavor foundation; either fresh or frozen can be used. Prep Note: If using frozen, thaw and drain excess water to maintain filling consistency.
- Non-dairy Milk (e.g., almond or oat milk) – Adds creaminess and helps blend the ingredients. Substitution: Any unsweetened non-dairy milk works well.
- Vanilla Extract – Enhances the overall flavor profile; adds warmth and depth. Note: Ensure it’s pure vanilla extract for best results.
Step‑by‑Step Instructions for Cherry Filled Chocolate Coconut
Step 1: Prepare the Cherries
Start by prepping your cherries; if using fresh, pit them and chop into fine pieces. For frozen cherries, simply thaw and drain excess water to prevent a watery filling. You want the cherries finely diced to ensure each bite of your Cherry Filled Chocolate Coconut Butter Cups is bursting with flavor.
Step 2: Make the Coconut Filling
In a food processor, combine half of the chopped cherries with coconut butter, a splash of non-dairy milk, and a teaspoon of vanilla extract. Blend this mixture until it reaches a smooth and creamy consistency, about 30 seconds. The mixture shouldn’t be too runny, as it will form the luscious filling for your cups.
Step 3: Incorporate Remaining Cherries
Once your coconut mixture is smooth, add the remaining chopped cherries and pulse gently just to mix. You want to keep some texture and bits of cherry visible for added flavor and contrast. This will create a delightful cherry coconut filling for your Cherry Filled Chocolate Coconut Butter Cups.
Step 4: Prepare the Muffin Tin
Line a standard muffin tin with paper liners to make it easy to remove the cups after they set. This step ensures that you’ll have perfectly shaped cups without any mess. It’s a crucial part of the process, so don’t skip it if you want a clean presentation!
Step 5: Melt the Dark Chocolate
In a microwave-safe bowl or using a double boiler, melt the dark chocolate with gentle heat. Stir the chocolate every 15 seconds in the microwave until it is fully melted and smooth, about 1 to 1.5 minutes. Be cautious not to overheat it, which can cause it to seize.
Step 6: Assemble the Chocolate Cups
Pour about half of the melted dark chocolate into each muffin liner, ensuring the bottom of the cup is completely covered. Use a spoon to help spread the chocolate evenly along the sides. Then, place the muffin tin in the freezer for about 5 minutes, or until the chocolate is firm to the touch.
Step 7: Add the Coconut Filling
Once the chocolate has set, take the muffin tin out of the freezer and spoon about 1/2 tablespoon of the cherry coconut filling into each cup. Gently press down to compact the filling. This layer of creamy goodness is the heart of your Cherry Filled Chocolate Coconut Butter Cups.
Step 8: Top with More Chocolate
Drizzle the remaining melted dark chocolate over each filled cup, covering the coconut filling completely. Use a spatula or the back of a spoon to smooth out the chocolate layer. Return the muffin tin to the freezer for an additional 10 minutes, allowing the tops to harden fully.
Step 9: Final Touch and Serve
After the chocolate has set completely, carefully peel away the paper liners from the cups. Your Cherry Filled Chocolate Coconut Butter Cups are now ready to impress! Place them on a platter and share this delightful treat with loved ones for a special occasion or a sweet everyday indulgence.
Expert Tips for Cherry Filled Chocolate Coconut
-
Melt Smartly: When melting chocolate, do it slowly over low heat to prevent it from seizing. Stir consistently for smooth results.
-
Chilling Time Matters: After assembling, chill the cups adequately to ensure they set properly. This prevents a messy filling when served.
-
Liner Love: Always use muffin liners to make removal easy. A clean presentation enhances the indulgent experience of your Cherry Filled Chocolate Coconut cups.
-
Adjust Sweetness: Taste your filling before assembling. You can add a bit of maple syrup or agave if you prefer a sweeter treat.
-
Creative Variations: Don’t hesitate to swap cherries for raspberries or strawberries. Each fruit will give a unique flavor twist to your cups!
Cherry Filled Chocolate Coconut Variations
Feel free to get creative and make these delightful cups your own with these inspiring twists!
-
Berry Bliss: Substitute the cherries with strawberries or raspberries for a fruity explosion. Each variety brings its own burst of flavor that’s just as delightful!
-
Salted Chocolate: Add a pinch of sea salt on top before the chocolate sets for a sophisticated salty-sweet blend that will tantalize your taste buds.
-
Crunchy Delight: Mix in some crushed graham crackers or your favorite seeds into the coconut filling for a textural twist that elevates every bite. The added crunch makes these cups even more indulgent!
-
Minty Fresh: Incorporate a few drops of peppermint extract into the chocolate for a refreshing mint-chocolate combination. It’s a lovely way to celebrate the flavors of the season!
-
Coconut Joy: Boost the coconut flavor by adding unsweetened shredded coconut into the filling. It enhances that tropical vibe and gives every cup a delightful chew.
-
Spicy Kick: For a little heat, sprinkle in some cayenne pepper or chili powder in the chocolate. This unexpected kick will leave your guests pleasantly surprised!
-
Fruit Fusion: Why stop at one kind of berry? Create a mixed berry filling using blueberries alongside cherries for a colorful and flavorful experience!
-
Chocolate Variants: Try a different type of chocolate! Use white chocolate instead of dark for a sweeter, creamier twist on this classic treat. You could even drizzle some over the top for an elegant finish!
These variations not only keep things exciting but also cater to different tastes and dietary preferences. Explore these ideas and find your winning combination! While you’re at it, why not pair these cups with some White Chocolate Peppermint treats for a festive touch?
Make Ahead Options
These Cherry Filled Chocolate Coconut Butter Cups are perfect for meal prep enthusiasts! You can prepare the coconut filling up to 3 days in advance; simply store it in an airtight container in the refrigerator to maintain its creamy texture. The chocolate cups can also be fully assembled and frozen for up to 3 weeks—just ensure they are wrapped tightly to prevent freezer burn. When you’re ready to enjoy, remove them from the freezer and let them sit at room temperature for about 10-15 minutes before serving. This way, they will be just as delicious, and you’ll save precious time on busy weeknights or special occasions. Enjoy the convenience without sacrificing flavor!
Storage Tips for Cherry Filled Chocolate Coconut
Fridge: Store leftover cups in an airtight container for up to 3 days for best freshness. If the filling shows signs of moisture, consider transferring to the freezer.
Freezer: Keep these Cherry Filled Chocolate Coconut Butter Cups in the freezer for up to 2 months. Make sure they are wrapped individually or in a sealed container to maintain their flavor and texture.
Reheating: For a softer texture, let the cups sit at room temperature for about 10-15 minutes before enjoying them. Avoid using the microwave, as it could melt the chocolate coating.
Making Ahead: These treats can be prepped in advance, making them perfect for last-minute gifting or sharing at events. Simply pull them from the freezer when needed!
What to Serve with Cherry Filled Chocolate Coconut Butter Cups?
These delightful treats are perfect for creating a memorable meal or celebration that will enchant your taste buds.
-
Dairy-Free Hot Chocolate: The warmth of hot chocolate is a cozy pairing, enhancing the chocolate experience and comforting your soul.
-
Fresh Fruit Platter: A beautifully arranged platter of seasonal fruits like strawberries and oranges brings a vibrant contrast, refreshing your palate.
-
Chocolate-Covered Strawberries: For a double-choco experience, serve these alongside the cups. The juicy berries complement the rich chocolate flavors perfectly.
-
Vegan Ice Cream: A scoop of smooth, dairy-free ice cream adds an indulgent touch, perfect for late-night cravings or special occasions.
-
Nutty Granola: For a simple, crunchy side, try a nut-free granola. Its texture and flavors will elevate your dessert experience without overwhelming it.
-
Herbal Tea: A calming cup of mint or chamomile tea can balance the sweetness of the cups, creating a light, refreshing finish to your meal.
Serve your Cherry Filled Chocolate Coconut Butter Cups with these suggestions to create a memorable and delicious dessert experience!
Cherry Filled Chocolate Coconut Recipe FAQs
What kind of cherries should I use?
You can use either fresh or frozen cherries for this recipe. If you’re using fresh cherries, make sure to pit and chop them finely. If you choose frozen cherries, thaw them completely and drain any excess water to prevent a watery filling.
How should I store the Cherry Filled Chocolate Coconut Butter Cups?
For optimal freshness, store your cups in an airtight container in the refrigerator for up to 3 days. If you want them to last longer, keep them in the freezer for up to 2 months. Just wrap each cup individually or store them in a sealed container to preserve their flavor and texture.
Can I freeze these chocolate cups?
Absolutely! To freeze, simply place the Cherry Filled Chocolate Coconut Butter Cups in the freezer for up to 2 months. For best results, ensure they are well-wrapped or stored in an airtight container. When you’re ready to enjoy them, let them sit at room temperature for about 10-15 minutes for a perfectly soft texture.
What if my filling is too runny?
If your cherry coconut filling seems too runny, don’t worry! Simply place it in the refrigerator for about 15-20 minutes to firm it up before assembling the cups. This will help create a creamy filling that holds its shape perfectly without a messy presentation.
Are these cups safe for nut allergies?
Yes, these Cherry Filled Chocolate Coconut Butter Cups are nut-free, making them a wonderful choice for those with nut allergies. Just be sure to use ingredients that are labeled as nut-free, particularly the non-dairy milk, to ensure they meet dietary needs.
How can I make these cups even more delicious?
For a delightful twist on the flavor, you can substitute cherries with strawberries or raspberries. If you want to add an extra crunch, try mixing in some crushed graham crackers or seeds into the coconut filling, keeping in mind any allergies your guests may have. Enjoy experimenting with different flavors!
Irresistible Cherry Filled Chocolate Coconut Cups You’ll Love
Ingredients
Equipment
Method
- Prepare the cherries by pitting and chopping fresh cherries or thawing and draining frozen ones.
- Make the coconut filling by blending half of the chopped cherries with coconut butter, non-dairy milk, and vanilla extract until smooth.
- Incorporate remaining cherries into the coconut mixture to add texture.
- Prepare a muffin tin by lining it with paper liners.
- Melt dark chocolate in a microwave-safe bowl, stirring every 15 seconds until smooth.
- Pour half of the melted chocolate into each muffin liner, spreading it evenly.
- Add 1/2 tablespoon of the cherry coconut filling into each chocolate cup.
- Top with remaining melted chocolate, ensuring the filling is covered.
- Chill in the freezer for about 10 minutes to set.
- Remove the paper liners and serve your Cherry Filled Chocolate Coconut Cups.
Leave a Reply