
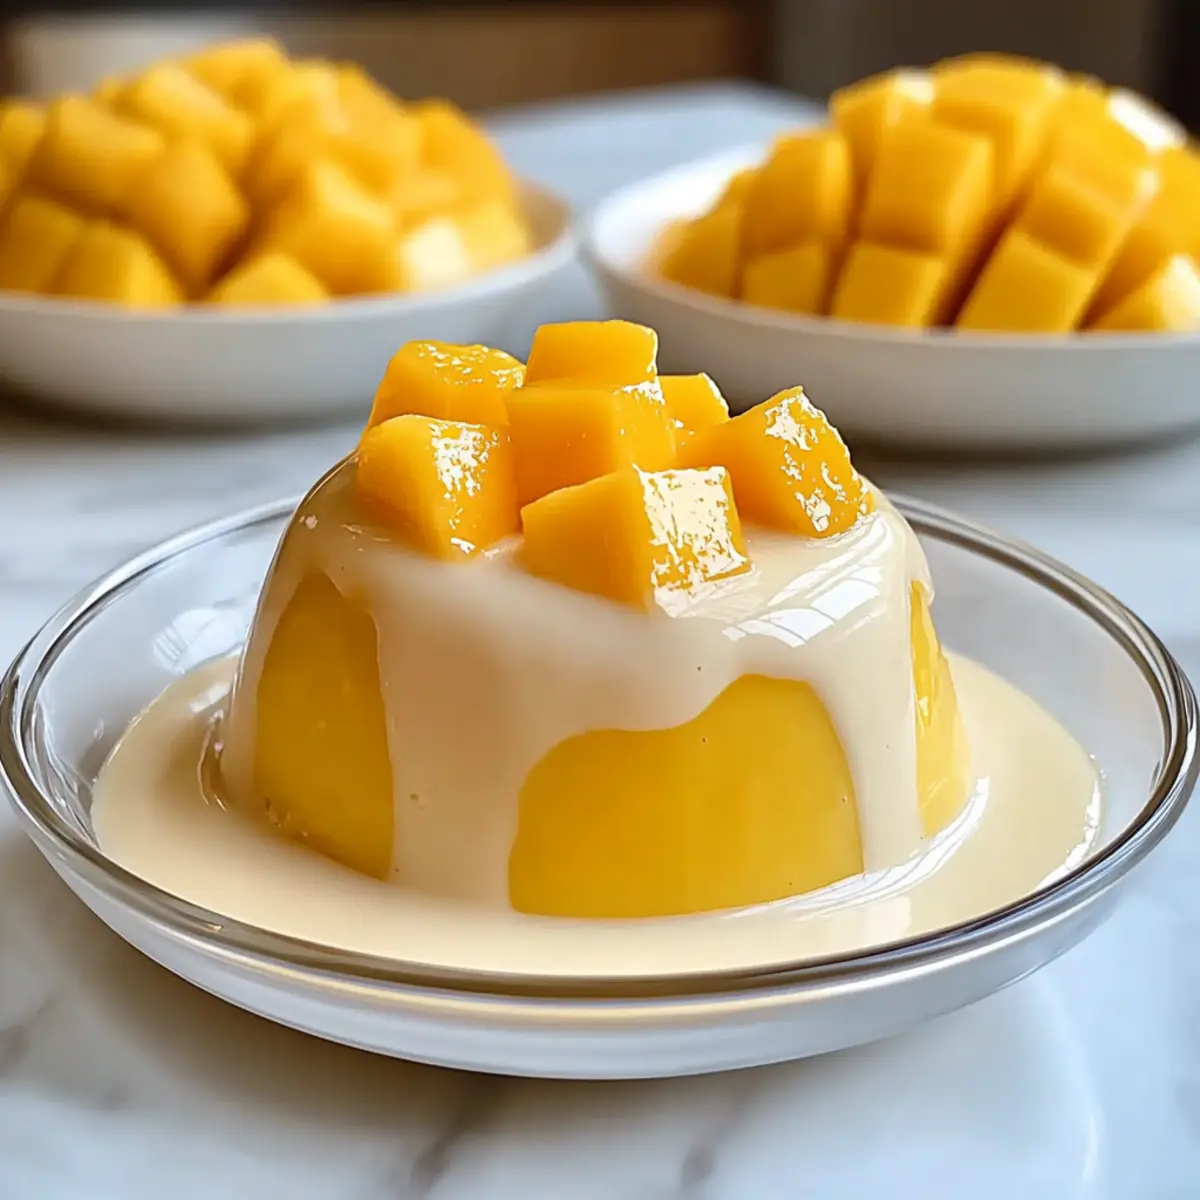
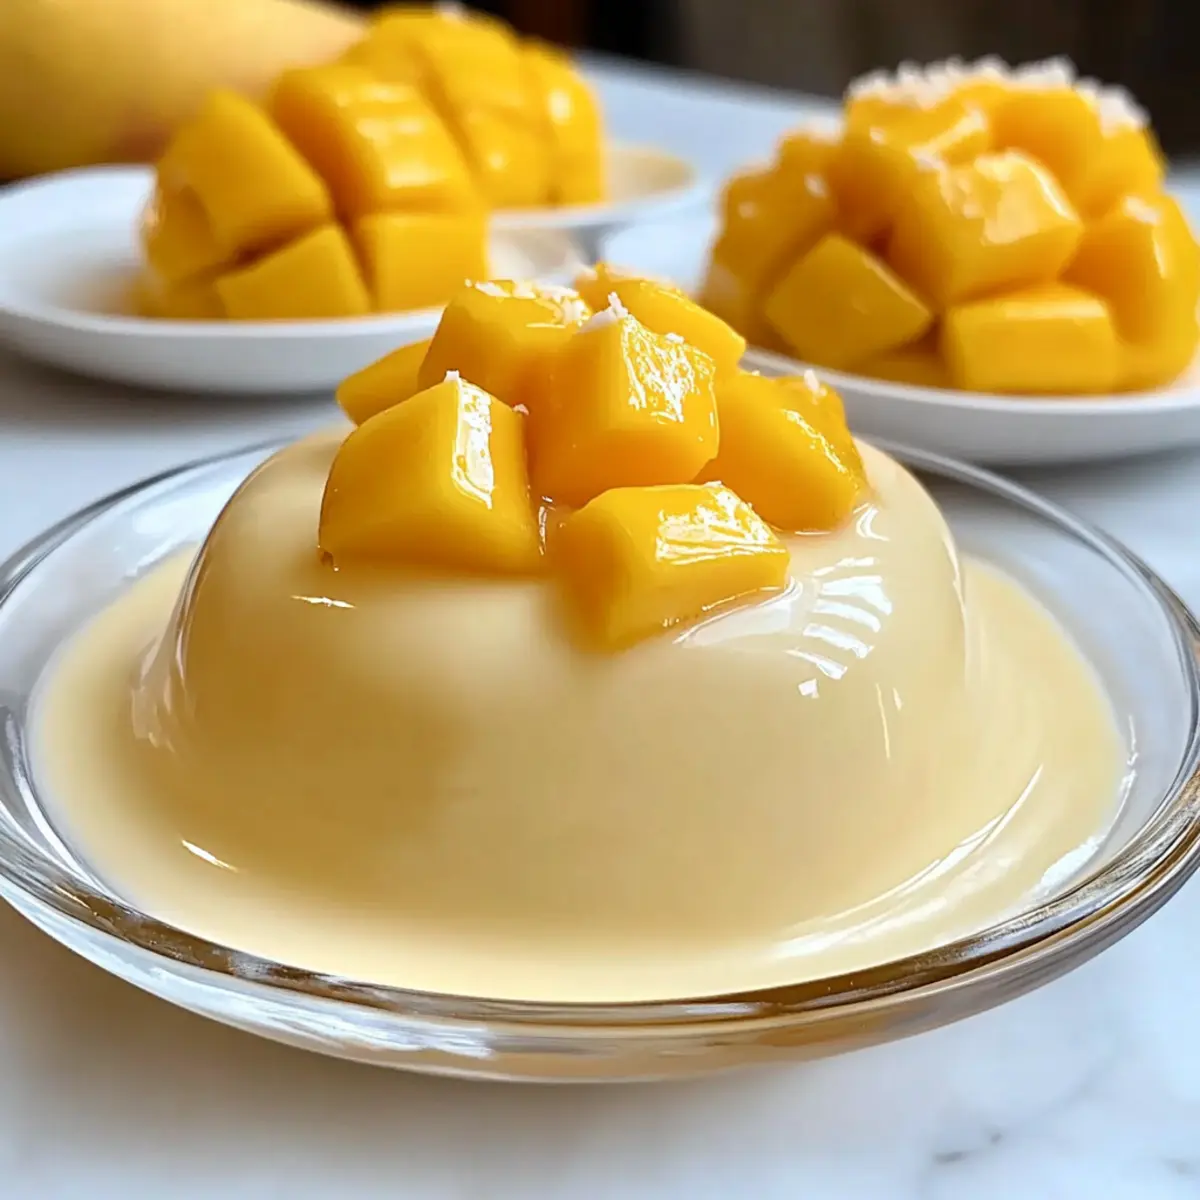
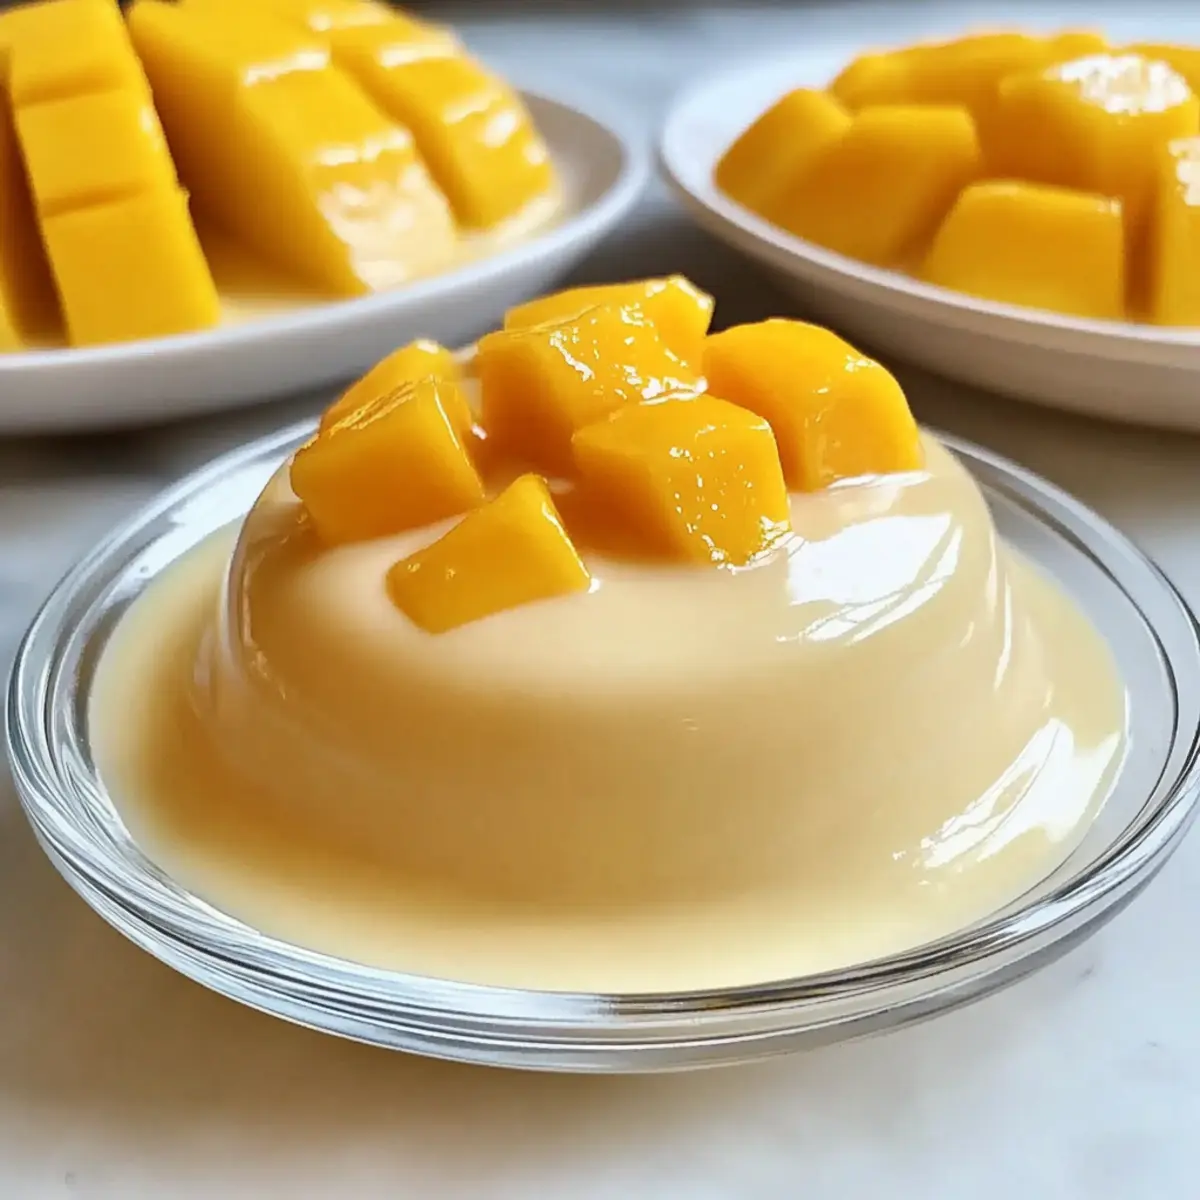
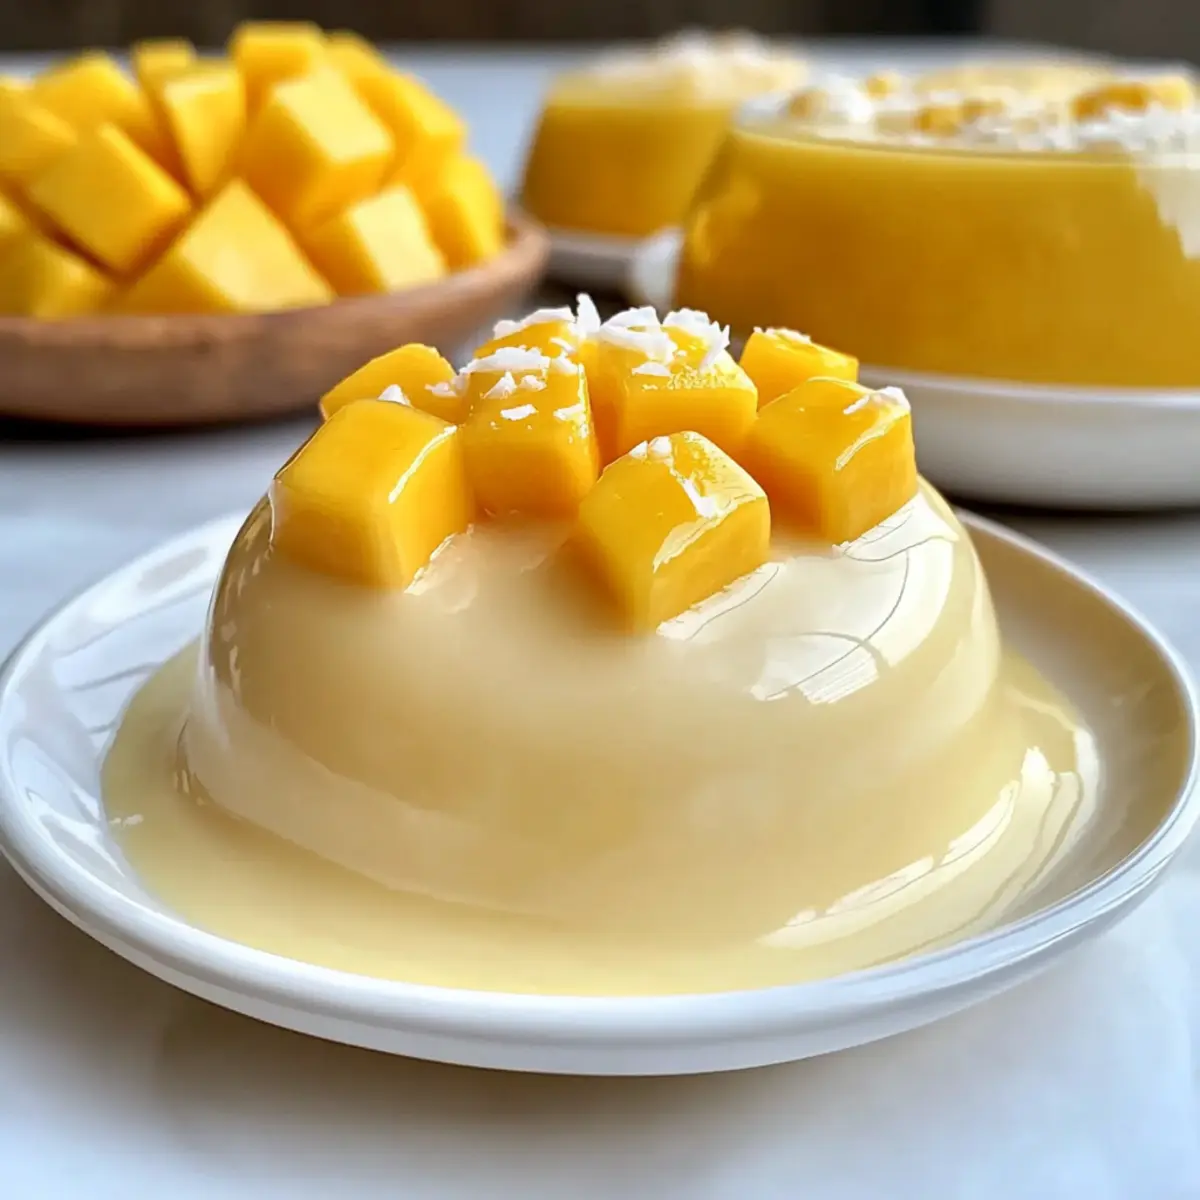
As I stood in my kitchen, the sweet aroma of ripe mango filled the air, transporting me straight to a sun-drenched tropical paradise. That’s when I knew it was the perfect day to whip up my Easy Simple Mango Pudding Recipe, a no-bake delight that promises to be both refreshing and luxurious. This dessert not only requires minimal ingredients and effort, making it a quick win for any home chef, but also offers a fantastic vegan variation for those seeking plant-based options. The silky texture and vibrant mango flavor will have everyone asking for seconds! Curious about how to create this creamy masterpiece in just a few simple steps? Let’s dive into the details!
Why is Mango Pudding a Must-Try?
Ultimate Refreshment: This Easy Simple Mango Pudding is a lightweight dessert that’s perfect for hot summer days, making it a fantastic addition to any gathering or family dinner.
Vegan-Friendly Option: With the ability to substitute gelatin for vegan-friendly agar agar, everyone can enjoy this mouthwatering treat regardless of dietary preferences.
Quick & Simple: Minimal prep time means you can whip this up effortlessly, saving you from the hassle of complicated dessert recipes. Just blend, mix, and chill!
Deliciously Versatile: Feel free to play with flavors by incorporating other fruits like passion fruit or pineapple, or even layer in some tropical jelly cubes for added texture.
Eye-Catching Presentation: Top with toasted coconut or slivers of fresh mango for a stunning finishing touch. This pudding will not only taste great—it will also look impressive on any table!
Don’t forget to check out my Coconut Oatmeal Cookie recipe for another easy treat that’s bound to become a favorite!
Easy Simple Mango Pudding Ingredients
For the Pudding
• Mango – The primary flavor; opt for the ripest varieties like Kent, Ataulfo, or Alphonso for the best taste.
• Gelatin (or Agar Agar) – A gelling agent; agar agar is perfect for a vegan option, ensuring everyone can enjoy this Easy Simple Mango Pudding.
• Coconut Milk – This adds richness; full-fat coconut milk enhances the creamy texture.
• Granulated Sugar – Sweetens up the dessert; feel free to adjust based on the sweetness of your mangoes.
• Cold Water – Essential for blooming the gelatin/agar agar, allowing for easy dissolution.
For Garnish
• Toasted Coconut – Adds crunch and flavor; sprinkle it on top for an extra tropical twist.
• Diced Mango – Fresh fruit on top enhances taste and presentation; it brings freshness to each bite.
• Mint Leaves – A pop of color and freshness; this adds a lovely aromatic finish to your dish.
• Slivered Pistachios – These add a nutty crunch and beautiful color contrast to the creamy pudding.
With these ingredients on hand, you’re just a few steps away from creating a beautiful Easy Simple Mango Pudding that’s sure to impress!
Step‑by‑Step Instructions for Easy Simple Mango Pudding Recipe
Step 1: Prepare the Mango
Begin by peeling, pitting, and dicing the ripe mangoes, ensuring you choose the sweetest varieties for optimal flavor. Next, place the diced mango into a blender and blend until it turns into a smooth puree, which should take around 60 seconds. For an ultra-smooth texture, consider sieving the puree to remove any fibrous pieces.
Step 2: Bloom the Gelatin or Agar Agar
In a small bowl, sprinkle the gelatin or agar agar over a specified amount of cold water. Stir this mixture gently for about 30-45 seconds, until it begins to look gel-like and thoroughly combined. This blooming process is crucial for achieving that desired silky consistency in your Easy Simple Mango Pudding.
Step 3: Combine the Ingredients
In a mixing bowl, combine the bloomed gelatin or agar with the sugar, coconut milk, and the fresh mango puree you prepared earlier. Whisk the mixture diligently until it is smooth and uniform in texture, ensuring all ingredients are well incorporated. This step is vital as it brings together the fruity and creamy elements essential for your pudding.
Step 4: Heat the Mixture
Transfer the combined mixture to a pot and place it over medium-low heat. Gently warm while whisking continuously for about 4-5 minutes, or until the gelatin or agar has fully dissolved. Take care not to let it boil, especially if using gelatin, as this can affect the texture of your Easy Simple Mango Pudding, keeping it light and creamy.
Step 5: Set the Pudding
Once dissolved, carefully pour the mixture into serving bowls or molds. Smooth the surface with a spatula, making sure there are no bubbles trapped. Place the bowls in the refrigerator and let the pudding set for at least 6 hours or overnight. This chilling time allows the flavors to meld beautifully, resulting in a luxurious pudding everyone will love.
Expert Tips for Easy Simple Mango Pudding
-
Choose Ripe Mangoes: The ripest mangoes guarantee the best flavor for your Easy Simple Mango Pudding. Look for soft, aromatic fruit to maximize sweetness.
-
Gentle Heating: Be careful not to boil the mixture when heating; this can affect the texture of the pudding. Keep it gently warmed instead.
-
Dissolve Completely: Make sure your gelatin or agar agar is fully dissolved before cooling. Undissolved bits can lead to lumps in your pudding.
-
Testing Consistency: If your pudding doesn’t set, reheat gently and add a little more gelatin. This step can save your dessert from being too runny.
-
Presentation Matters: For an inviting look, consider garnishing your pudding with toasted coconut or fresh mango. It enhances both flavor and appeal!
Easy Simple Mango Pudding Variations
Feel free to get creative and make this Easy Simple Mango Pudding your own with these delightful variations!
-
Vegan Twist: Replace gelatin with agar agar to create a completely plant-based version without sacrificing taste or texture. This way, everyone can indulge in a creamy treat!
-
Tropical Fruit Medley: Swap out mango for other tropical fruits like passion fruit or pineapple. Each fruit brings its unique flavor, turning your pudding into an exciting surprise.
-
Natural Sweeteners: Use maple syrup or honey in place of granulated sugar for a more natural sweetness. These alternatives add a unique flavor while keeping things deliciously sweet.
-
Texture Layers: Consider layering the pudding with tropical jelly cubes or diced fresh fruit for a beautiful presentation and an enjoyable texture contrast. It makes each spoonful a delightful experience.
-
Spicy Kick: Add a hint of chili powder to the mixture for those who love a spicy twist infusing a tantalizing warmth to your dessert. This unexpected element can be a conversation starter at gatherings.
-
Coconut Cream Topping: Instead of garnishing with regular whipped cream, opt for whipped coconut cream to keep the coconut theme intact. It not only complements the pudding but also keeps it dairy-free.
-
Nutty Flavor Boost: Toss in a handful of toasted coconut or almond slices into the pudding for some extra crunch. These ingredients add a wonderful layer of flavor and texture that’s sure to please.
-
Mint Infusion: Add fresh mint leaves into the mango puree for a refreshing twist. This small addition enhances the tropical flavor while adding a refreshing taste to your dessert.
For more inspirations, why not dive into my Butter Chicken Pasta or experiment with my sweet and tangy Cranberry Orange Cookies? Enjoy your culinary adventure!
Storage Tips for Easy Simple Mango Pudding
Fridge: Store the Easy Simple Mango Pudding in an airtight container for up to 3 days. This allows you to enjoy it fresh and flavorful whenever you like.
Make-Ahead: You can prepare the pudding a day in advance. Just ensure it’s completely cooled before refrigerating to maintain the best texture.
Do Not Freeze: Avoid freezing your pudding as it can alter the creamy texture, making it grainy once thawed. Stick to chilling for the best results.
Reheating Not Required: Enjoy the pudding chilled straight from the fridge! If you wish to warm any leftovers, do so gently in a bowl over hot water, not directly on heat.
Make Ahead Options
These Easy Simple Mango Pudding recipes are perfect for busy weeknights or last-minute gatherings! You can prepare the mango puree and bloom the gelatin (or agar agar) up to 24 hours in advance. Simply blend the mango and, once smooth, refrigerate it separately from the bloomed gelatin mixture. When you’re ready to finish the pudding, combine them with the coconut milk and sugar, and gently heat as instructed until everything is well blended. Then pour it into your serving bowls and refrigerate it for a minimum of 6 hours or overnight. This process ensures you have a delightful dessert ready with minimal effort, maintaining the pudding’s silky texture and fresh flavor just as delicious as when first made!
What to Serve with Easy Simple Mango Pudding
Elevate your tropical dessert experience by pairing it with complementary dishes that tantalize the taste buds.
-
Coconut Rice: Creamy and slightly sweet, coconut rice enhances the pudding’s tropical vibe, making every bite a delightful experience.
-
Grilled Pineapple: The caramelized sugars from grilled pineapple add a smoky sweetness that perfectly balances the pudding’s creaminess, creating a wonderfully layered flavor profile.
-
Fresh Fruit Salad: A refreshing medley of seasonal fruits brightens the palate and provides a vibrant contrast to the rich mango pudding.
-
Mint Iced Tea: Serve a chilled glass of mint iced tea to refresh and cleanse the palate between the sweet bites of pudding.
-
Dark Chocolate Sauce: Drizzling a rich dark chocolate sauce adds depth and a touch of indulgence, making it a luxurious dessert combo.
-
Toasted Coconut Flakes: Sprinkling toasted coconut flakes on top enriches the texture while echoing the coconut milk in the pudding.
-
Vanilla Sorbet: A scoop of vanilla sorbet offers a light and cooling touch, perfectly contrasting the silky mango delight.
-
Chia Seed Pudding: Layering chia seed pudding can add an interesting texture and an additional nutritional boost, making it a fun and healthful pairing.
Consider these options to create an unforgettable dessert spread, ensuring your Easy Simple Mango Pudding shines even brighter!
Easy Simple Mango Pudding Recipe FAQs
How do I choose the right mangoes for this pudding?
Absolutely! When selecting mangoes, look for those that are slightly soft to the touch and have a sweet fragrance. The Kent, Ataulfo, or Alphonso varieties are ideal for the best flavor. Avoid mangoes with dark spots or blemishes, as these may indicate overripeness.
How should I store the Easy Simple Mango Pudding?
You can store the Easy Simple Mango Pudding in an airtight container in the fridge for up to 3 days. Just make sure it has completely cooled before sealing to maintain its delightful texture and flavor.
Can I freeze the mango pudding for later use?
No, it’s best to avoid freezing your Easy Simple Mango Pudding. Freezing can change its creamy texture, making it grainy and less enjoyable. Stick to chilling in the fridge after preparing for the best results!
What should I do if my pudding doesn’t set properly?
If your pudding doesn’t set, don’t fret! You can gently reheat the mixture on low heat and add a bit more bloomed gelatin or agar agar. Stir continuously until it’s fully dissolved, then pour it back into your serving bowls and refrigerate again. This will help it achieve that lovely, silky consistency.
Is this pudding suitable for those with dietary restrictions?
Very much so! This Easy Simple Mango Pudding can be made vegan by substituting gelatin with agar agar. Additionally, it’s vegetarian-friendly and can be adjusted to accommodate various dietary preferences, ensuring that everyone can indulge in this delicious dessert.
Easy Simple Mango Pudding Recipe That Will Wow Your Taste Buds
Ingredients
Equipment
Method
- Prepare the mango by peeling, pitting, and dicing the ripe mangoes. Blend the diced mango into a smooth puree.
- Bloom the gelatin or agar agar in a bowl with cold water and stir until gel-like.
- Combine bloomed gelatin/agar with sugar, coconut milk, and mango puree, and whisk until smooth.
- Heat the mixture over medium-low heat, whisking for 4-5 minutes until dissolved.
- Pour into serving bowls or molds and refrigerate for at least 6 hours to set.
Leave a Reply