
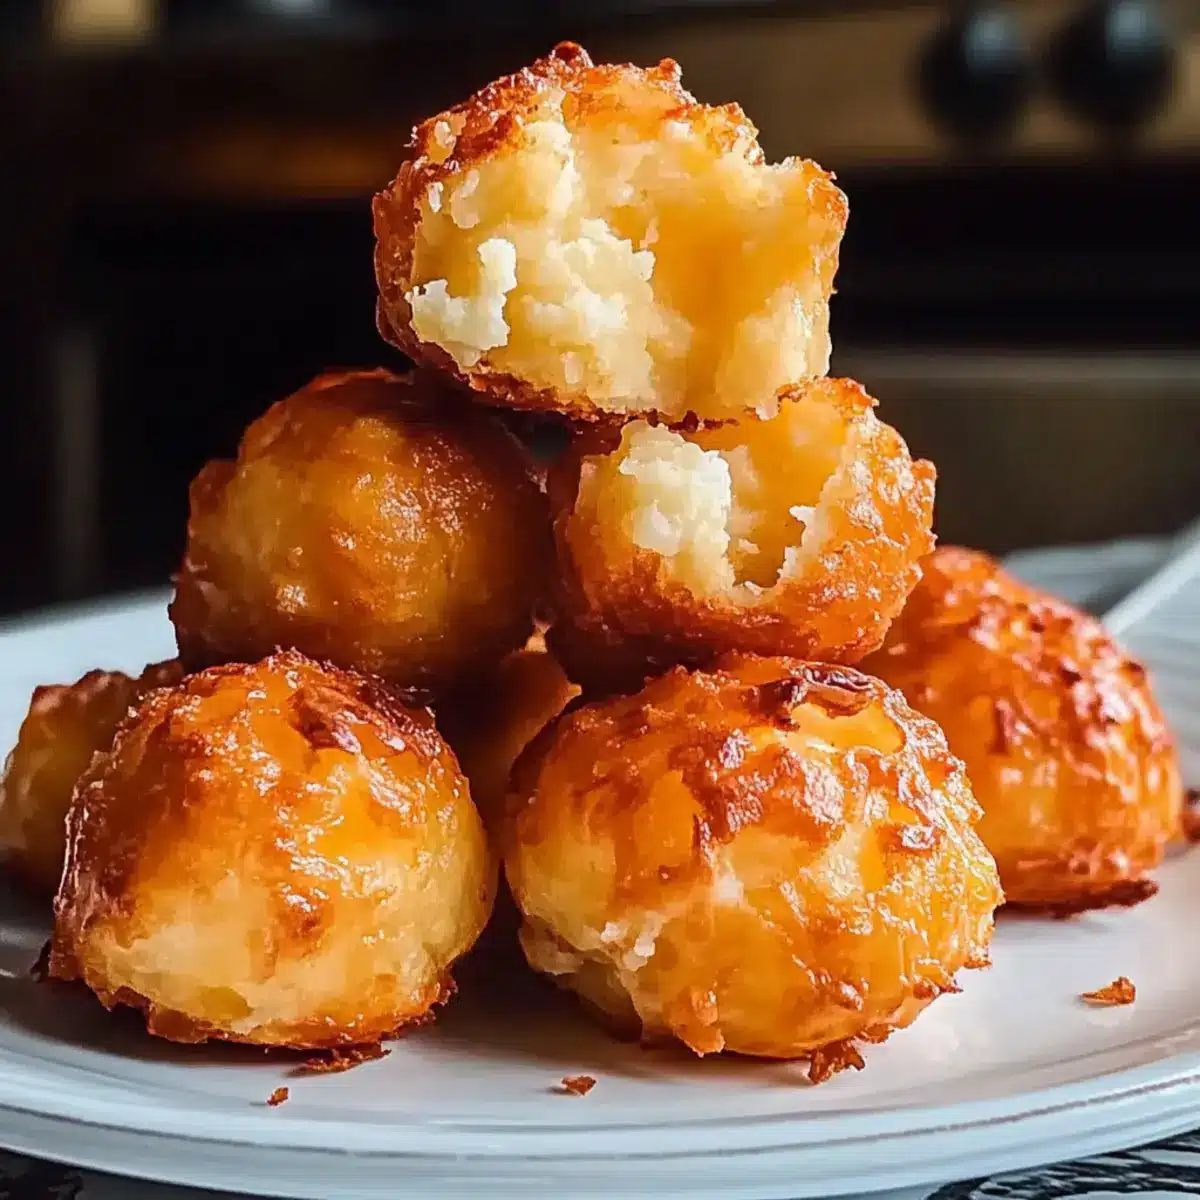
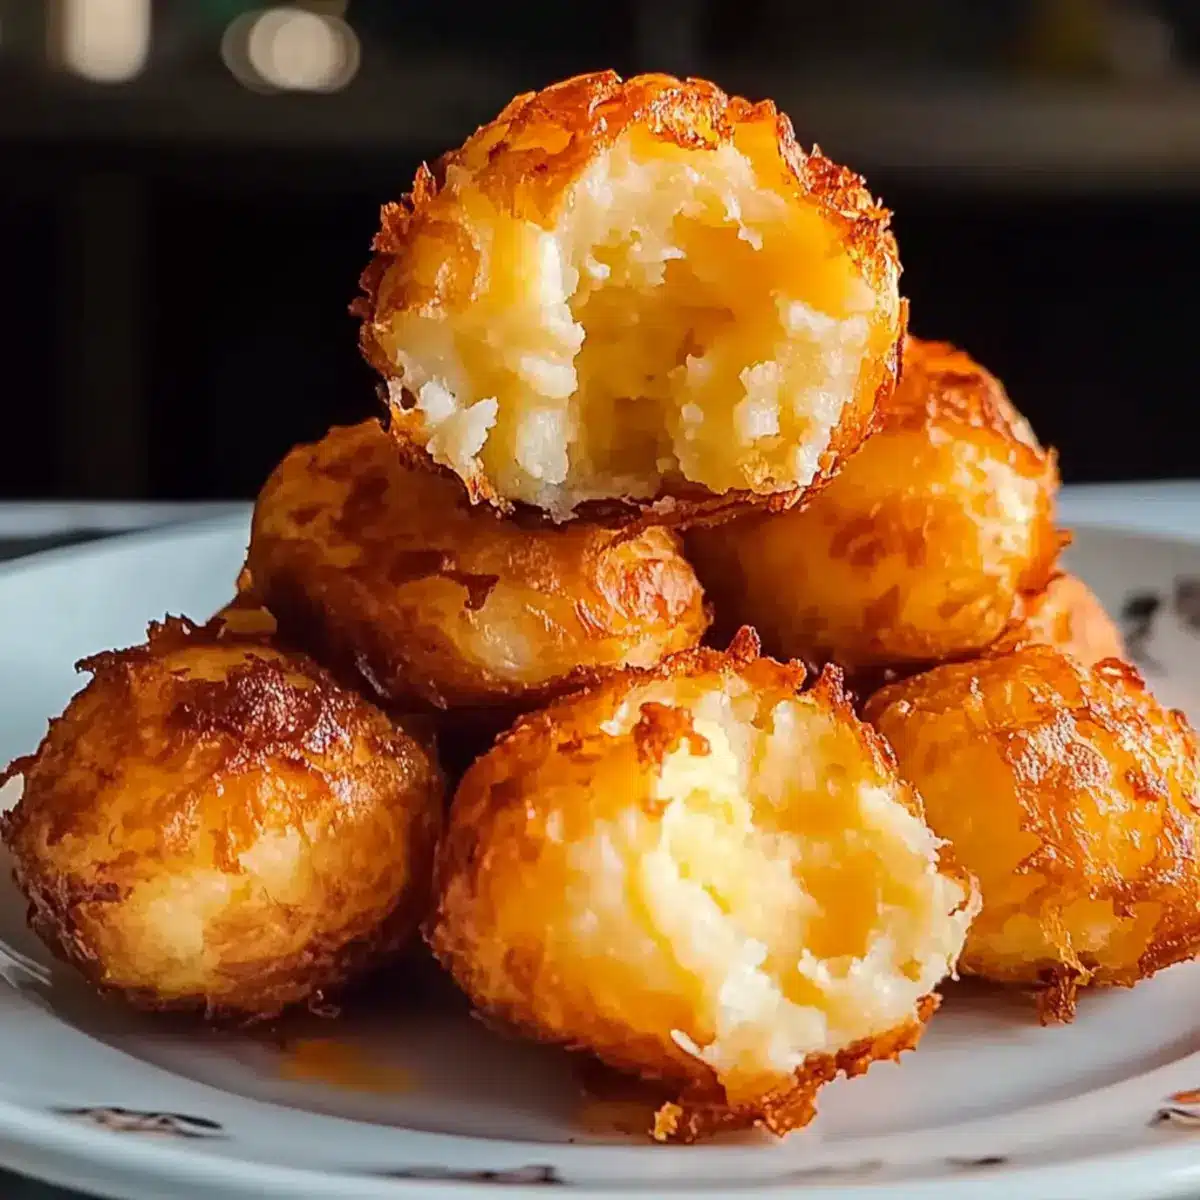
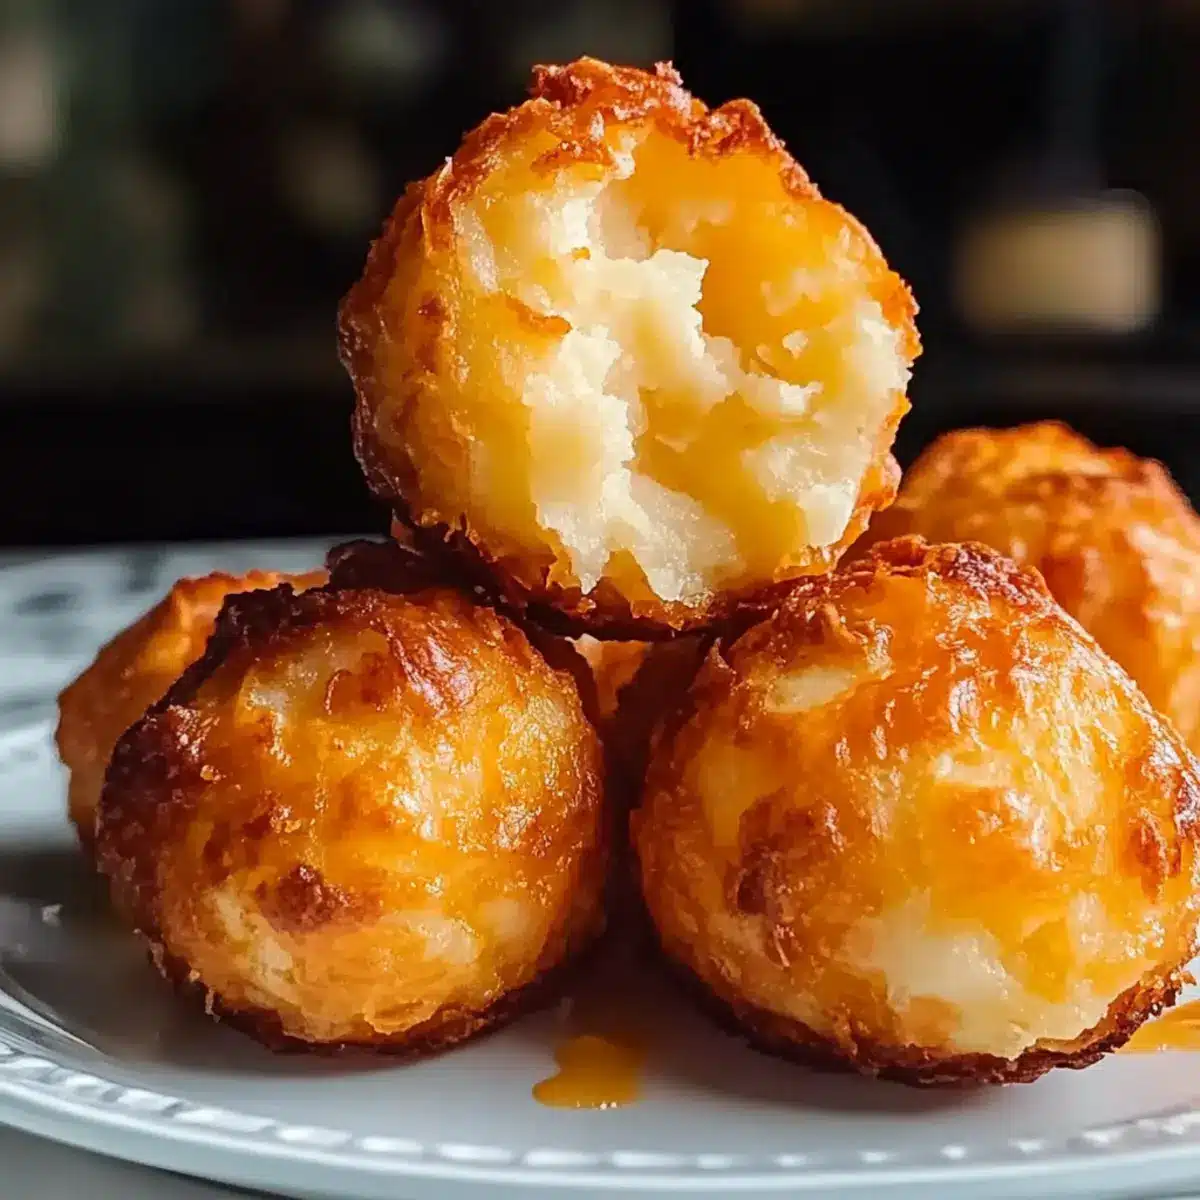
As I rummaged through my fridge, I stumbled upon a container of leftover mashed potatoes that begged for a delicious reinvention. Enter the Mashed Potato Cheese Puffs, a quick and simple way to elevate those humble spuds into a crispy, cheesy delight! These mouthwatering bites are not only perfect for repurposing leftovers but also offer a convenient snack option that’s sure to impress at your next gathering. With the ability to customize them for gluten-free or lactose-free diets, they’re an inclusive treat that everyone can enjoy. Whether you serve them warm as a savory snack or alongside soups and salads, these golden treasures will leave your taste buds dancing. Curious about how to transform your leftover mash into something extraordinary? Let’s dive into this delightful recipe!
Why Are Mashed Potato Cheese Puffs Incredible?
Deliciously Versatile: These cheese puffs are a fantastic way to repurpose leftover mashed potatoes, making them a zero-waste snack option.
Crisp Exterior, Creamy Inside: Enjoy the delightful contrast of a golden-brown crust with a soft, cheesy interior that melts in your mouth.
Customizable to Your Taste: Feel free to experiment by swapping in different cheeses like gouda or adding spices for an extra kick.
Diet-Friendly Options: With simple substitutions like gluten-free flour or lactose-free sour cream, everyone can indulge in this tasty treat.
Quick & Easy Prep: In just a few steps, you can whip up these puffs, which make for a perfect dish for unexpected guests or casual get-togethers.
Crowd-Pleasing Appeal: Whether you serve them as a snack, appetizer, or alongside a hearty soup, these puffs are sure to win over any crowd! Don’t forget to try them with a side of Honey Cream Cheese dip for an extra layer of flavor.
Mashed Potato Cheese Puffs Ingredients
• Perfect for your next snack!
For the Puffs
• Mashed Potatoes – Use chilled, well-seasoned mash for the best texture.
• Shredded Cheese – Cheddar or mozzarella works great; pick your favorite melting cheese for varied flavors.
• All-Purpose Flour – This binds the mixture; swap for gluten-free flour if needed.
• Parmesan Cheese (optional) – Adds a salty, nutty flavor; omit if you prefer a simpler recipe.
• Fresh Chives – Provides freshness; feel free to substitute with green onions if you like.
• Sour Cream – Contributes creaminess; lactose-free sour cream can be used for lactose intolerance.
• Salt – Enhances flavor; adjust to your taste.
• Eggs – Binds everything together; for a vegan option, consider using flax eggs.
With these ingredients, you’re on your way to making scrumptious Mashed Potato Cheese Puffs that everyone will love!
Step‑by‑Step Instructions for Mashed Potato Cheese Puffs
Step 1: Preheat the Oven
Begin by preheating your oven to 400°F (200°C) to ensure it’s ready for baking. While the oven heats up, prepare a greased muffin tin by generously coating the cups with cooking spray or butter to prevent sticking. This step is crucial for achieving that perfect golden-brown crust on your Mashed Potato Cheese Puffs.
Step 2: Mix Wet Ingredients
In a mixing bowl, whisk together the eggs and sour cream until the mixture is smooth and creamy, creating a rich base for your cheese puffs. This should take about 2 minutes of vigorous whisking. The smooth texture will help bind the ingredients together, resulting in fluffy Mashed Potato Cheese Puffs that everyone will enjoy.
Step 3: Incorporate Cheeses
Add your shredded cheese and optional Parmesan to the egg mixture, stirring gently to combine. Make sure all the cheese is evenly mixed in; this will enhance the flavor and texture of the puffs. The mixture may start to look cheesy and inviting, perfect for the next step in creating your delicious snacks.
Step 4: Combine Potatoes
Delicately fold in the chilled, well-seasoned mashed potatoes to the cheese mixture, being careful not to overmix. The goal is to keep the mixture light and fluffy, which will lead to airy Mashed Potato Cheese Puffs. Mix until just combined, and you’ll see the beautiful layers of cheese and potato coming together.
Step 5: Fill Muffin Tin
Using a spoon, carefully scoop the potato mixture into each muffin cup, filling them about three-quarters full. This ensures they have room to puff up while baking and achieve that irresistible golden-brown appearance. Consider using a small cookie scoop for even portions that bake uniformly.
Step 6: Bake
Place the muffin tin in your preheated oven and bake the Mashed Potato Cheese Puffs for 20–25 minutes. Keep an eye on them as they bake; look for a golden color and a puffed-up appearance, indicating they are done. The aroma of melting cheese will fill your kitchen, tempting everyone around!
Step 7: Cool and Serve
Once baking is complete, remove the muffin tin from the oven and let it cool slightly for about 5 minutes. This resting time allows the puffs to set and makes them easier to remove. Gently lift out the puffs with a fork or knife, and serve them warm to enjoy their flavorful, cheesy goodness.
Storage Tips for Mashed Potato Cheese Puffs
Fridge: Store leftover Mashed Potato Cheese Puffs in an airtight container for up to 3 days to maintain their deliciousness.
Freezer: For longer storage, freeze puffs in a single layer on a baking sheet. Once solid, transfer to a freezer bag for up to 2 months.
Reheating: For best results, reheat in the oven at 350°F (175°C) for about 10–15 minutes until warmed through and crispy again. Avoid microwaving, as it may make them soggy.
What to Serve with Mashed Potato Cheese Puffs
Looking to create a feast that makes your taste buds sing? Pair these delightful bites with the perfect accompaniments!
- Fresh Green Salad: Crunchy greens with a tangy vinaigrette contrast beautifully with the rich cheese puffs, adding freshness to your meal.
- Creamy Tomato Soup: This classic pairing offers comforting warmth, and the velvety texture complements the cheesy, fluffy puffs perfectly.
- Garlic Bread: The garlicky aroma envelops the senses and brings a satisfying crunch, serving as a delightful counterpoint to the soft cheese puffs.
- Roasted Veggies: Seasoned, caramelized vegetables add a savory touch and vibrant colors, elevating the meal’s overall appeal and nutrients.
- Sour Cream Dip: Making a zesty dip to accompany the puffs will enhance their flavor, creating an exciting bite with every dunk! Celebrate your inner chef by whipping up this quick dip using sour cream and fresh herbs.
- Sparkling Apple Cider: A refreshing, bubbly beverage complements the richness of the cheese puffs, providing a delightful balance with each sip.
Make Ahead Options
These Mashed Potato Cheese Puffs are a fantastic meal prep solution for busy weeknights! You can prepare the mixture up to 24 hours in advance by combining all the ingredients (mashed potatoes, cheeses, and seasonings) and storing it in an airtight container in the refrigerator. To maintain their delightful texture, ensure that the mashed potatoes are well-chilled and not overmixed before filling the muffin tin. When you’re ready to serve, simply scoop the mixture into greased muffin cups and bake them fresh for 20-25 minutes. This way, you’ll have freshly baked, cheesy snacks with minimal effort, saving you precious time while still delivering delicious results!
Expert Tips for Mashed Potato Cheese Puffs
Chill Your Potatoes: Ensure your mashed potatoes are chilled before mixing. This prevents a dense texture and helps keep the puffs light and airy.
Gentle Mixing: When combining ingredients, fold gently. Overmixing can cause the puffs to become heavy instead of fluffy and tender.
Grease Well: Use a non-stick muffin tin or grease it thoroughly to avoid any sticking. This will allow for easy removal and a beautiful presentation.
Check for Doneness: Keep an eye on the baking time; every oven is different. Look for a golden-brown color and a puffed-up appearance to indicate they’re ready.
Serve Warm: Enjoy these Mashed Potato Cheese Puffs fresh out of the oven for the best flavor and texture. They’re a delightful treat at any gathering!
Mashed Potato Cheese Puffs Variations
Feel free to adjust these Mashed Potato Cheese Puffs to suit your tastes or dietary needs—get creative!
- Gluten-Free: Use gluten-free all-purpose flour in place of regular flour for a safe option. This means everyone can enjoy a crispy puff without worry.
- Lactose-Free: Substitute regular sour cream with lactose-free sour cream to enjoy the same creamy texture without the discomfort. It’s an easy swap that keeps your puffs indulgent!
- Cheese Variations: Swap out cheddar for gouda or pepper jack for a delightful twist. Try adding a sprinkle of smoked cheese for an irresistible smoky flavor!
- Meaty Goodness: Add cooked bacon or diced ham for a heartier snack that’s loaded with flavor. Just mix in your meat of choice for a savory treat!
- Herb-Infused: Experiment with fresh herbs like rosemary or thyme instead of chives for a fragrant twist. This can elevate the puffs with earthy notes that enhance every bite!
- Spicy Kick: For heat lovers, mix in some diced jalapeños or a pinch of red pepper flakes. These fiery additions will light your taste buds on fire in the best way!
- Veggie Boost: Incorporate finely chopped spinach or cooked broccoli for added nutrients and flavor. This not only makes the puffs heartier but also adds a vibrant green hue!
- Indulgent Toppings: After baking, drizzle with melted garlic butter or serve with your favorite dipping sauce, like the delicious Honey Cream Cheese dip. It adds an extra layer of flavor that will leave everyone reaching for more!

Mashed Potato Cheese Puffs Recipe FAQs
How do I select the best mashed potatoes for this recipe?
Absolutely! The best mashed potatoes for Mashed Potato Cheese Puffs are those that are chilled and well-seasoned. If you’re using leftovers, make sure they are free of dark spots or any off flavors. The seasoning is crucial, so taste-test them before mixing.
What are the best storage methods for leftover cheese puffs?
Very simple! Store any leftover Mashed Potato Cheese Puffs in an airtight container in the fridge for up to 3 days. This ensures they stay fresh and ready for snacking. Just reheat them in the oven for a few minutes to reclaim their crispiness!
Can I freeze the cheese puffs for later?
Absolutely! To freeze your Mashed Potato Cheese Puffs, first, arrange them in a single layer on a baking sheet and freeze until solid, about 1-2 hours. Then, transfer the puffs to a freezer bag, making sure to remove as much air as possible. They can be stored in the freezer for up to 2 months. When ready to enjoy, you can bake them straight from frozen at 350°F (175°C) for about 20-25 minutes.
What should I do if my cheese puffs turn out dense?
If you find your Mashed Potato Cheese Puffs are dense, it could be due to overmixing the ingredients or using warm mashed potatoes. To keep them light and fluffy, mix gently and ensure your mashed potatoes are chilled before incorporating them into the mixture. If they’re too dense, fold in an extra egg to add more air.
Are there any dietary considerations I should keep in mind?
For sure! If you’re catering to special diets, you can easily modify this recipe. Use gluten-free flour to make it gluten-free and opt for lactose-free sour cream and cheese to accommodate lactose intolerance. Additionally, consider using flax eggs instead of standard eggs for a vegan version—just mix 1 tablespoon of ground flaxseed with 3 tablespoons of water per egg and let it sit for a few minutes until thickened!
Cheesy Mashed Potato Puffs That Will Elevate Your Snacking!
Ingredients
Equipment
Method
- Preheat the oven to 400°F (200°C) and prepare a greased muffin tin.
- In a mixing bowl, whisk together the eggs and sour cream until smooth.
- Add the shredded cheese and optional Parmesan to the egg mixture, stirring to combine.
- Gently fold in the chilled mashed potatoes until just combined.
- Carefully scoop the mixture into the muffin tin, filling each cup three-quarters full.
- Bake for 20–25 minutes until golden brown and puffed up.
- Let cool for 5 minutes before removing and serve warm.
Leave a Reply