
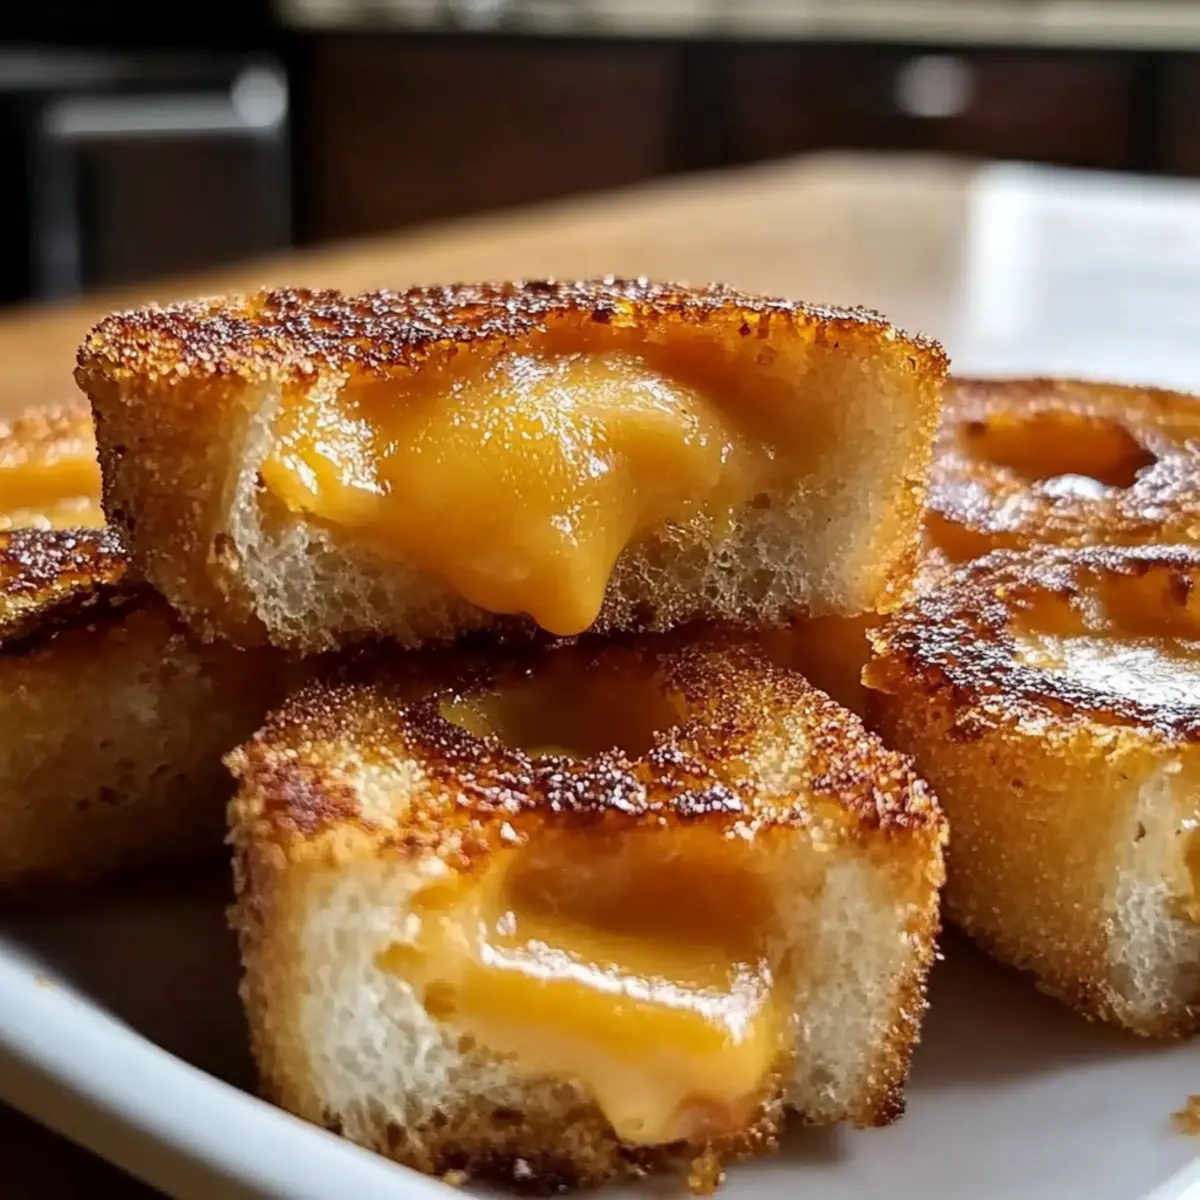
The kitchen was filled with the mouthwatering aroma of melting cheese when I stumbled upon a delightful idea: Mini Grilled Cheese Dippers. These charming bites blend nostalgia and creativity, transforming the classic grilled cheese sandwich into a fun snack perfect for gatherings or cozy nights in. Not only are they incredibly easy to prepare, but their bite-sized nature encourages playfulness—perfect for sharing with friends or enjoying solo. Plus, you can easily adapt these little treats to fit various dietary needs, including a gluten-free option! So, whether you’re dipping them into creamy tomato soup or enjoying them straight from the skillet, prepare to be captivated by the warm, cheesy goodness. Are you ready to dive into the world of Mini Grilled Cheese Dippers?
Why Will You Adore These Dippers?
Unmatched Simplicity: You don’t need to be a culinary expert to whip these up—just a few simple steps turn basic ingredients into a delightful snack.
Perfect for Sharing: Whether it’s a party or movie night, these bite-sized dippers make sharing (and enjoying) easy and fun!
Decadent Flavor: The blend of sharp cheddar and provolone offers an irresistible, gooey richness that elevates the classic grilled cheese experience.
Gluten-Free Friendly: Have dietary restrictions? No problem! Just swap in gluten-free bread and enjoy the same great taste.
Versatile Pairing: Pair them with creamy tomato soup or a variety of dips for a fun twist; they’re just as tasty on their own!
Prepare to impress your family and friends with these scrumptious little morsels that remind us all of simpler, happier times.
Mini Grilled Cheese Dipper Ingredients
Get ready to make some deliciousness!
For the Bread
- Sturdy Sandwich Bread – The foundation for your dippers; gluten-free options work well if they’re durable enough.
For the Cheese
- Sharp Cheddar – Brings a bold, delicious flavor that everyone loves.
- Provolone – A melting marvel that ensures gooey goodness with every bite.
For the Fat
- Unsalted Butter – Opt for this creamy option to achieve that perfect golden crust.
- Mayonnaise – A light spread adds a delightful richness and helps achieve crispiness while grilling.
Step‑by‑Step Instructions for Mini Grilled Cheese Dippers
Step 1: Prepare the Bread
Start by selecting your favorite sturdy sandwich bread. Cut the bread into small squares, about 2 inches by 2 inches, creating a base for your Mini Grilled Cheese Dippers. Lay them out on a clean cutting board, ensuring ample space to assemble your tasty dippers later.
Step 2: Assemble the Sandwiches
Take two squares of bread and let your creativity flow by layering a slice of sharp cheddar and provolone cheese in between them. Gently press the top square down on the cheese to hold it in place. Don’t be afraid to get generous with the cheese; the gooey melt is what makes these dippers irresistible!
Step 3: Top the Sandwiches
Spread a thin layer of unsalted butter or mayonnaise on the outer sides of each assembled sandwich. This step is crucial as it ensures a crisp, golden crust when grilling. Make sure to cover all edges, as the fat will help your Mini Grilled Cheese Dippers achieve that perfect texture.
Step 4: Grill the Sandwiches
Heat a non-stick skillet over medium-low heat. Once the skillet is hot, carefully place your prepared sandwiches in the pan. Grill for approximately 3-4 minutes, or until the bottom side is golden brown and crispy. The enticing aroma of melting cheese will fill the air, promising delicious dippers ahead!
Step 5: Cook to Golden Perfection
Keep a close eye on your dippers as they grill, flipping them once for even cooking. After 3-4 minutes on the first side, use a spatula to gently flip the sandwiches over. Aim for a lovely golden color on both sides, ensuring the cheese melts beautifully inside.
Step 6: Flip and Finish
Once the second side is golden, give your Mini Grilled Cheese Dippers one last minute on the skillet. This final touch will ensure any remaining spots get crispy and that the cheese is perfectly gooey. The excitement builds as you see the bread reaching that ideal golden-hued crispiness.
Step 7: Rest and Slice
Remove the grilled sandwiches from the skillet and let them rest for a minute on a cutting board. This helps the cheese set slightly, making it easier to slice. Carefully cut each sandwich into smaller strips, readying them for dipping.
Step 8: Create the Dippers
Serve your Mini Grilled Cheese Dippers immediately while still warm and bubbly. They are perfect for dipping into creamy tomato soup or your favorite sauces. The combination of warmth and cheese pulls everyone in, making them a delightful treat for both gatherings and quiet evenings at home.
What to Serve with Mini Grilled Cheese Dippers
Pair your Mini Grilled Cheese Dippers with delightful accompaniments that elevate your snacking experience to new heights!
- Creamy Tomato Soup: This classic pairing enhances the meltiness of cheese while adding a cozy, flavorful contrast. Dip and savor the warmth!
- Garlic Herb Butter: A fragrant dip that adds rich, buttery flavor; simply melt and mix fresh herbs for an aromatic touch.
- Avocado Salsa: The creamy texture and zing of fresh avocado salsa beautifully balance the crispiness of the dippers. A fresh, vibrant bite!
- Honey Mustard Sauce: Enjoy the delightful sweetness combined with a hint of tang, providing a playful twist on your cheese dippers.
- Balsamic Glaze: Drizzle this on the dippers for a sweet and tangy flavor profile that brings sophistication to your snack.
- Pickles and Olives: The briny crunch of pickles or olives adds a zesty contrast, making every bite exciting and dynamic!
- Fruit Chutney: Fruity flavors like apricot or mango offer a sweet and savory contrast that elevates the entire grazing experience.
- Sparkling Lemonade: A refreshing drink to cleanse your palate, its bright citrus notes complement the rich cheese perfectly.
- Chocolate Fondue: For a whimsical dessert, dip your leftovers into warm chocolate for an unexpected and delightful sweet treat!
Expert Tips for Mini Grilled Cheese Dippers
-
Use Good Bread: Opt for durable sandwich bread to prevent sogginess. Gluten-free bread should also offer a solid structure for the perfect Mini Grilled Cheese Dippers.
-
Heat Control: Keep the skillet at medium-low heat. Too high a temperature can burn the bread before the cheese melts properly.
-
Even Cooking: Work in batches to avoid overcrowding the skillet, ensuring each dipper gets even crispiness without steaming.
-
Creative Add-ins: Feel free to experiment with thin slices of veggies or meats; however, keep them minimal to maintain structure and avoid sogginess.
-
Serve Fresh: For the best experience, serve your dippers immediately after grilling while they’re still warm and gooey, ideal for dipping!
-
Storage Tips: If you have any leftovers, store them in an airtight container for up to two days, and reheat in a skillet to regain crispiness.
Mini Grilled Cheese Dippers Variations
Feel free to get creative with these delightful Mini Grilled Cheese Dippers and make them your own!
- Gluten-Free: Use gluten-free bread for a delicious, diet-friendly option without sacrificing taste.
- Vegetable Delight: Add thin slices of tomatoes or fresh spinach inside for a nutritious twist that adds freshness.
- Cheese Medley: Experiment with cheeses like Gruyère or Mozzarella for diverse flavors; each will elevate their gooey texture!
- Spicy Kick: Incorporate jalapeño slices or a dash of hot sauce to bring a fun level of heat to your dipper.
- Herb Infusion: Mix fresh herbs like basil or chives into the cheese for an aromatic, flavorful surprise in every bite.
- Toasty Variations: Brush the sandwich outside with garlic butter for an extra savory punch; it’ll tantalize your taste buds!
- Sweet Surprise: Swap out the savory for sweet! Use cream cheese with a hint of garlic or even a dollop of pumpkin puree.
- Saucy Pairing: Serve alongside unique dips such as a honey sriracha sauce or a creamy ranch for even more flavor adventures.
For a balanced bite, consider serving your Mini Grilled Cheese Dippers with a warm bowl of creamy tomato soup, just like at your favorite diner! If you’re eager for more cheesy treats, you might also enjoy these Mini Grilled Cheese or a delightful Pumpkin Cheese Ball. The possibilities are endless when it comes to customizing these charming bites!
Make Ahead Options
These Mini Grilled Cheese Dippers are ideal for busy home cooks looking to save time during their week! You can assemble the sandwiches up to 24 hours in advance; simply layer the cheese between the bread squares, then place them in an airtight container in the refrigerator. To maintain that crispy texture, avoid buttering the outer sides until you’re ready to grill. When it’s time to serve, spread the butter or mayonnaise, heat your skillet, and grill as directed until golden brown and gooey. This way, you can enjoy warm, delicious dippers with minimal effort on your hectic days!
Storage Tips for Mini Grilled Cheese Dippers
Room Temperature: Enjoy these dippers fresh out of the skillet for the best taste; however, if left out, consume within 2 hours.
Fridge: Store leftovers in an airtight container in the fridge for up to 2 days. Make sure to cool them down before sealing to prevent moisture buildup.
Freezer: If you want to save some for later, wrap individual dippers tightly in plastic wrap and place them in a freezer-safe bag for up to 1 month.
Reheating: To reheat, use a skillet over medium-low heat. This will help restore their crispy exterior while ensuring the cheese is gooey once again.
Mini Grilled Cheese Dippers Recipe FAQs
What type of bread works best for Mini Grilled Cheese Dippers?
Absolutely! For Mini Grilled Cheese Dippers, you’ll want a sturdy sandwich bread that can hold up to grilling without becoming soggy. I often recommend whole grain or sourdough for a fantastic flavor and texture. If you need a gluten-free option, be sure to select a durable gluten-free bread that is designed for toasting.
How should I store leftover Mini Grilled Cheese Dippers?
Very simple! To store your leftover dippers, place them in an airtight container and keep them in the fridge for up to 2 days. Make sure they cool completely before sealing to avoid moisture build-up that could make them soggy. I love reheating them in a skillet to restore that perfect crispiness!
Can I freeze Mini Grilled Cheese Dippers?
Certainly! To freeze, wrap individual dippers tightly in plastic wrap and then place them into a freezer-safe bag or container. They can be stored for up to 3 months. When you’re ready to enjoy them, thaw in the fridge overnight, then reheat slowly in a skillet to achieve that crispy texture again.
What should I do if my dippers are soggy?
If you’re finding your Mini Grilled Cheese Dippers are soggy, check that you’re using a high-butterfat bread and avoid overcrowding the skillet while grilling. It also helps to grill them over medium-low heat; too high of a flame can cause the outsides to brown too quickly without cooking the cheese, leading to that undesirable sogginess inside. If they’ve gotten soggy after cooking, try reheating them in a skillet until they crisp back up.
Are Mini Grilled Cheese Dippers suitable for people with dietary restrictions?
Yes, absolutely! This recipe can easily accommodate various dietary needs. For those avoiding gluten, just replace regular bread with a good quality gluten-free bread. You can also opt for lactose-free cheese if you’re sensitive to dairy. Always double-check ingredient labels to ensure they meet your dietary preferences.
How can I make my Mini Grilled Cheese Dippers even more flavorful?
Ooh, great question! For added flavor, feel free to experiment with different cheese blends, like adding Gruyère, or consider introducing thin slices of veggies like tomatoes or avocados to keep the dippers fresh. Just keep any additional ingredients thin to maintain the structural integrity of each dipper. Enjoy the creative process!

Mini Grilled Cheese Dippers for a Fun and Cheesy Snack
Ingredients
Equipment
Method
- Start by selecting your favorite sturdy sandwich bread. Cut the bread into small squares, about 2 inches by 2 inches.
- Take two squares of bread and layer a slice of sharp cheddar and provolone cheese in between them.
- Spread a thin layer of unsalted butter or mayonnaise on the outer sides of each assembled sandwich.
- Heat a non-stick skillet over medium-low heat and place your prepared sandwiches in the pan.
- Grill for approximately 3-4 minutes, flipping once for even cooking.
- Once the second side is golden, let the dippers rest for a minute on a cutting board.
- Carefully cut each sandwich into smaller strips, readying them for dipping.
- Serve your Mini Grilled Cheese Dippers immediately while still warm and bubbly.
Leave a Reply